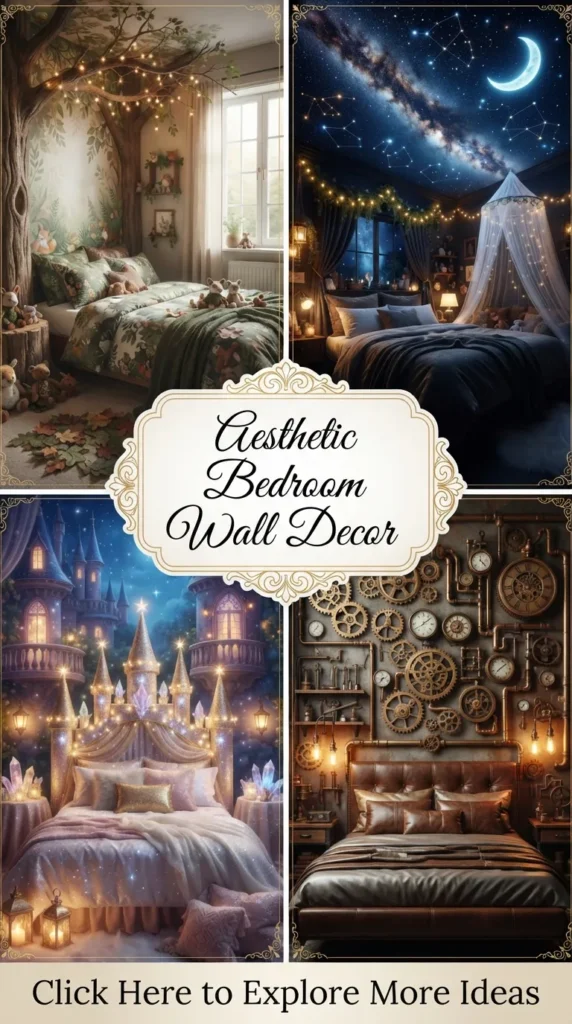
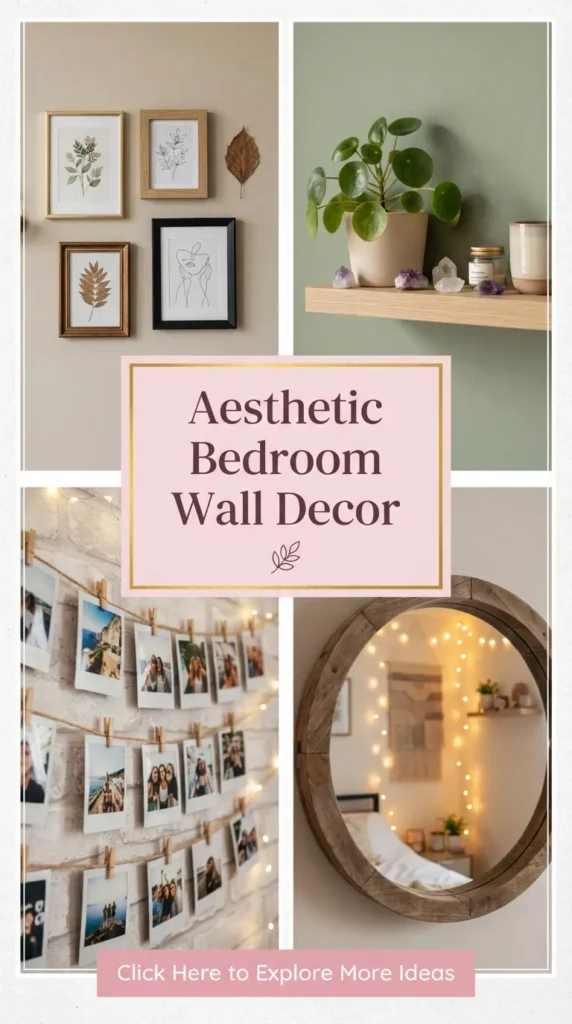
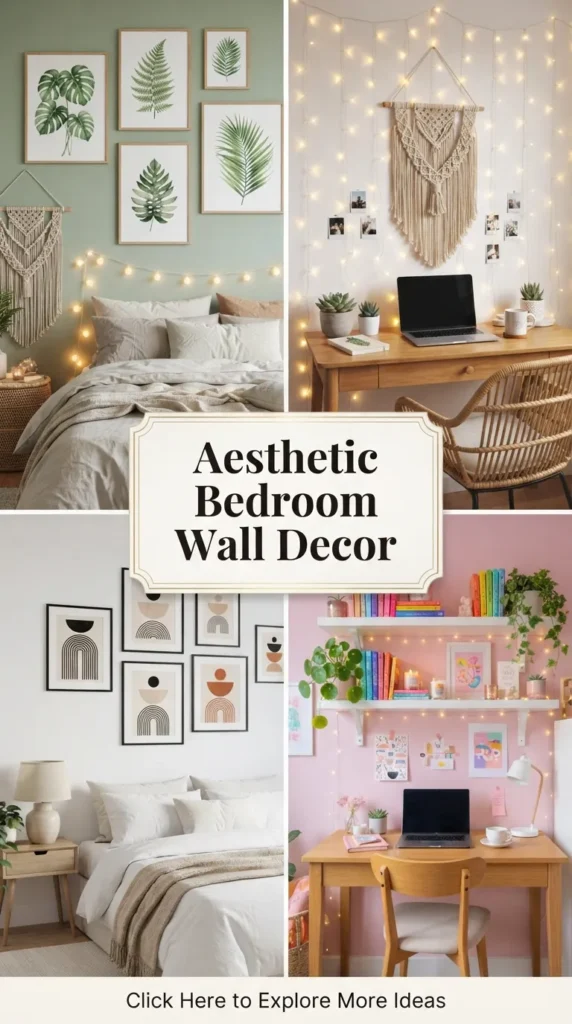
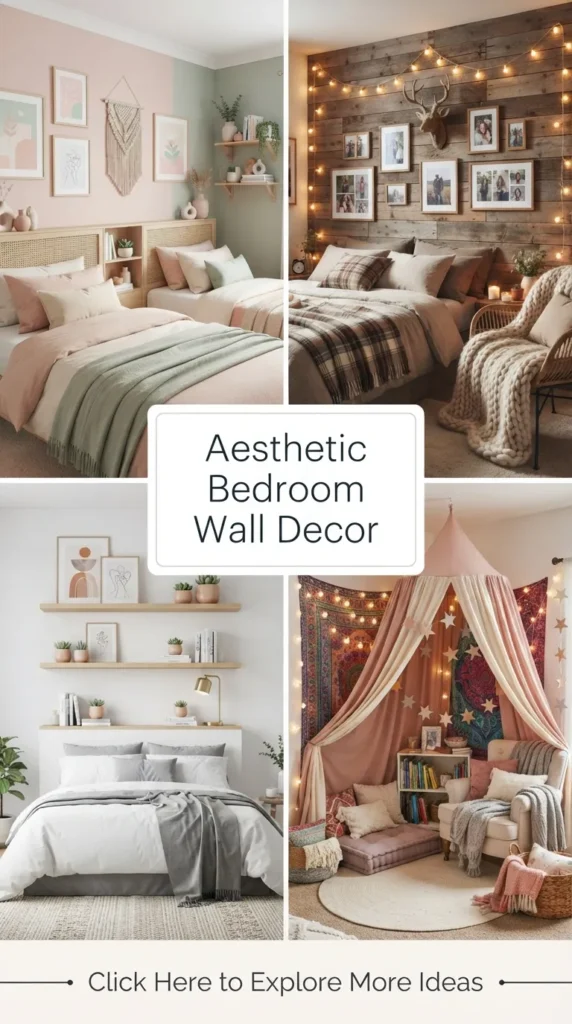
Transforming your bedroom into a tranquil, celestial sanctuary is one of the most rewarding interior design journeys you can undertake. The galaxy aesthetic has evolved far beyond basic glow-in-the-dark ceiling stickers; today’s cosmic decor blends sophisticated color palettes, luxury textures, dynamic lighting, and artistic craftsmanship. Whether you prefer rich indigo hues, subtle gold-leaf constellations, or breathtaking fiber-optic starfields, bringing the cosmos onto your walls creates a serene, dreamy atmosphere perfect for rest and contemplation.
Below is an extensive, step-by-step guide to 20 Elegant & Inspiring Galaxy Aesthetic Bedroom Wall Decor Ideas, complete with detailed tutorials, expert tips, and material lists to help you curate your own starry sanctuary.
1. Hand-Painted Celestial Constellation Mural
What This Idea Means
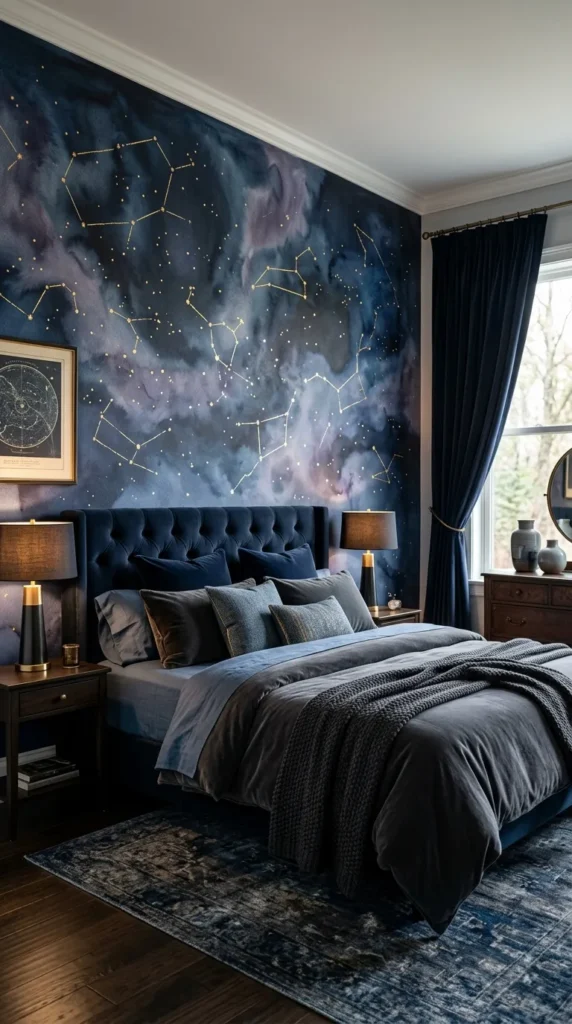
A hand-painted celestial mural serves as a captivating focal point behind your bed or along a primary accent wall. Rather than a chaotic splatter of stars, an elegant galaxy mural balances deep indigo, rich violet, and soft charcoal tones with delicate, hand-drawn gold or white constellation lines. It adds bespoke artistic flair while maintaining a mature, refined atmosphere.
How to Make It
- Prepare the Wall: Clean the surface and apply a matte deep-navy or dark midnight-blue base coat. Let it dry completely for 24 hours.
- Layer the Nebula Effect: Using a natural sea sponge, lightly dab shades of deep purple, dusty violet, turquoise, and black paint across select sections of the wall to create organic, swirling nebulae. Blur the edges with a dry blending brush.
- Flick the Starfield: Dilute white acrylic paint slightly with water. Dip an toothbrush or stiff brush into the paint, point it at the wall, and pull back on the bristles to flick tiny white pinpricks of light across the nebula clouds.
- Draw Constellations: Trace real constellation maps (like Orion, Ursa Major, or Cassiopeia) using a thin chalk pencil. Once aligned, paint over the chalk lines using liquid gold leaf or a metallic paint marker, adding slightly larger gold dots for the major stars.
Tips & Variations
- Tip: Keep the brightest star clusters clustered around corners or diagonal angles to give the room natural motion.
- Variation: If painting directly on the wall isn’t ideal for your living situation, paint a large stretched canvas (4×6 feet) using the same technique and hang it securely above your headboard.
What You Need
- Base wall paint (Matte Midnight Blue or Navy)
- Acrylic paints (Violet, Magenta, Turquoise, Soft White)
- Natural sea sponge & soft blending brushes
- Liquid gold leaf or gold paint markers
- Painter’s tape, chalk pencil, and dropping cloths
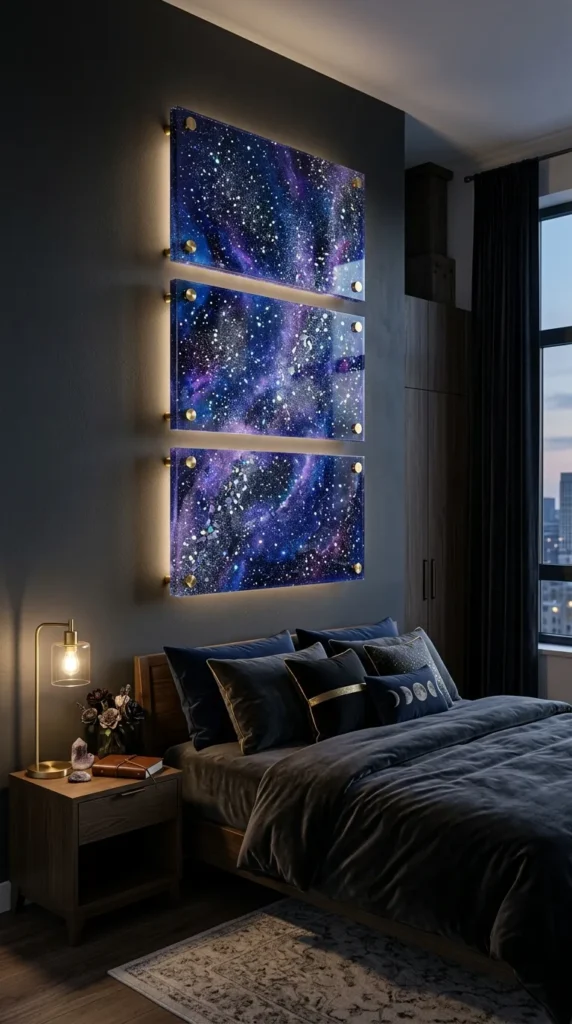
2. Floating Starlight Resin Wall Panels
What This Idea Means
Resin wall art captures depth like no other medium. Floating starlight resin panels consist of cured epoxy resin layered over dark wood panels, infused with ultra-fine glitter, metallic mica powder, and embedded crystal dust. Mounted slightly away from the wall with spacer hardware, they float effortlessly, catching sunlight by day and ambient room light by night.
How to Make It
- Prep the Base: Take a smooth wood panel sanding block, seal it with a black primer, and frame the edges with silicone dams.
- Mix and Pigment Resin: Mix a two-part epoxy resin according to instructions. Divide into smaller cups, mixing deep indigo dye into one, dark violet into another, and iridescent white micro-glitter into a third.
- Pour the Cosmic Drift: Pour the dark resin across the board, manipulating it with a heat gun to push hues into dynamic cosmic waves. Pour tiny streams of white/glitter resin across the dark background to mimic star trails.
- Embed Crystals & Cure: Gently scatter tiny crushed clear quartz chips along the central resin drift. Allow the resin to cure fully in a dust-free environment for 48 hours.
- Mounting: Attach french cleats or stand-off mounting hardware to the back of the panel to hang it 1 inch off the wall.
Tips & Variations
- Tip: Lightly pass a blowtorch over the wet resin to pop micro-bubbles and achieve a glass-like finish.
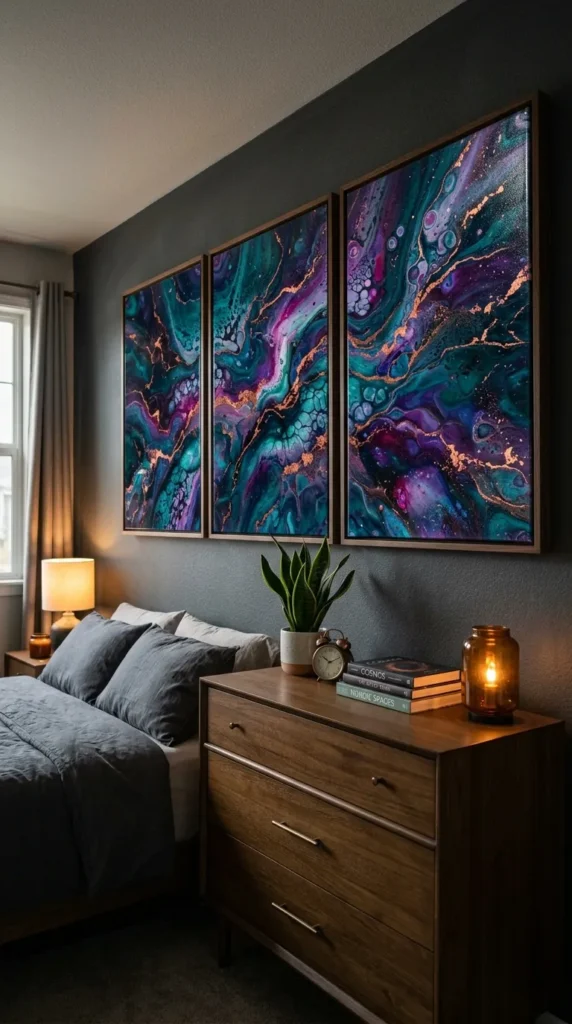
- Variation: Combine three vertical panels to create a continuous, dramatic triptych across your main bedroom wall.
What You Need
- Wood art boards (24×36 inches or similar)
- Two-part clear epoxy resin
- Alcohol inks & mica powders (Navy, Purple, White)
- Crushed quartz chips & fine iridescent glitter
- Heat gun & standoff mounting hardware
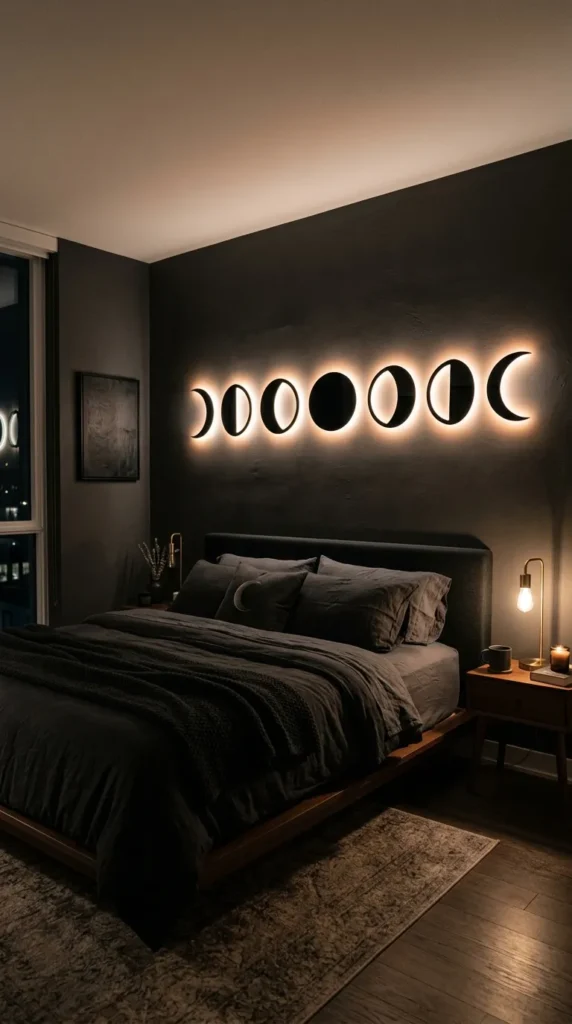
3. LED Backlit Acrylic Moon Phase Cutouts
What This Idea Means
Moon phase wall art is a classic staple of galaxy decor. This sophisticated variation utilizes laser-cut acrylic discs representing the stages of the lunar cycle (waxing, full, waning) fitted with hidden warm-white LED backlighting. The backlighting creates a soft, halo-like glow around each phase, casting ambient lighting across your bedroom walls.
How to Make It
- Craft or Source Moon Discs: Cut black or frosted slate-grey acrylic sheets into five or seven circular and crescent shapes representing the lunar cycle.
- Apply Lunar Textures: Use gray textured spray paint or alcohol ink stippling on the surface of each moon piece to recreate craters and lunar maria.
- Install LED Strips: Affix flexible warm white LED strip lighting around the rear perimeter of each cutout, facing toward the wall.
- Mounting: Mount each cutout sequentially using 1.5-inch wall spacers, running wires discreetly behind a decorative cable channel or behind drywall.
Tips & Variations
- Tip: Choose smart LEDs that allow you to adjust the brightness and color temperature (2700K warm gold for cozy evenings, 4000K daylight for crisp contrast).
- Variation: Arrange the moon phases vertically beside a floor lamp or horizontally across the width of your headboard.
What You Need
- Acrylic circular blanks / cutouts (Moon phases)
- Textured spray paint (Charcoal, Stone gray, Pearl white)
- Warm white flexible LED strips & power supply
- Wall standoff spacers (1 to 2 inches depth)
- Cable concealment kit
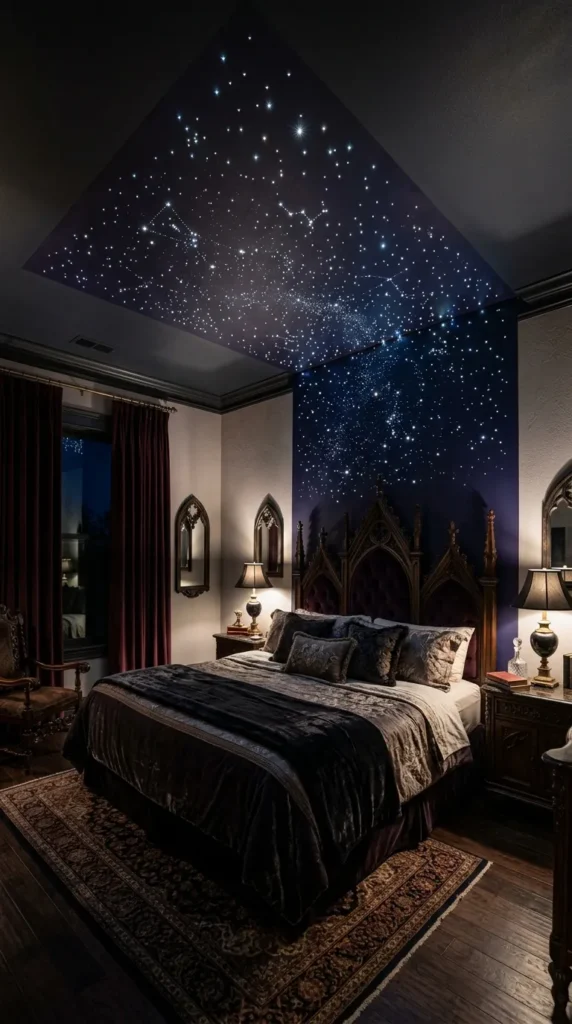
4. Fiber Optic Starfield Ceiling-to-Wall Canopy
What This Idea Means
For the ultimate immersive experience, a fiber-optic starfield extends seamlessly from the top edge of your wall onto your ceiling. Tiny fiber-optic strands shine point-source light through drywall or lightweight acoustic fabric panels, creating a realistic twinkling constellation map that looks like a high-end planetarium.
How to Make It
- Prepare Wall/Ceiling Panels: Build or purchase lightweight canvas or acoustic foam wall panels painted in deep matte black or dark indigo.
- Drill Micro-Holes: Map out actual constellation patterns on the back of the panels, then drill micro-holes (0.75mm to 1.5mm) using a tiny hand drill bit.
- Thread Fiber Optics: Thread individual fiber optic cables from a light engine through each drilled hole, securing them at the back with hot glue.
- Trim & Mount: Trim the front fibers so they sit flush or just slightly proud (1mm) of the panel face. Mount the panels securely onto the wall/ceiling using studs and frame clips. Plugin the illuminator engine.
Tips & Variations
- Tip: Select a fiber optic light engine equipped with a “twinkle wheel” feature to make stars gently flicker independently.
- Variation: Focus the fiber optics solely on a large wall tapestry or framed box frame for a contained, low-budget alternative.
What You Need
- Fiber optic light engine (with RF remote/twinkle effect)
- Fiber optic cable bundle (0.75mm – 1.5mm thickness mix)
- Lightweight paneling or stretched canvas
- Micro hand drill (pin vise) & hot glue gun
- Wall mounting brackets
5. Deep Nebula Fluid Art Canvas Triptych
What This Idea Means
Fluid acrylic art creates organic, unpredictable patterns that naturally resemble interstellar gas clouds and vibrant deep-space nebulae. Splitting a single large fluid painting across three oversized canvases (a triptych) elevates the visual impact, creating an elegant gallery aesthetic suitable for a main bedroom wall.
How to Make It
- Prepare Canvases: Line three equal-sized gallery-wrapped canvases side by side on a flat drop-cloth-covered table.
- Prepare Pouring Paints: Mix acrylic paints in shades of deep teal, violet, magenta, midnight blue, and titanium white with a pouring medium and a few drops of silicone oil (to create “cells”).
- Perform the Pour: Execute a “dirty pour” technique across all three canvases continuously, ensuring the color patterns flow seamlessly from panel 1 to panel 2 and panel 3.
- Tilt and Flare: Tilt the canvases together to stretch the paint into flowing galactic arms. Use a artist torch briefly over the paint to reveal micro-cellular galaxy patterns.
- Dry and Varnish: Allow 72 hours to dry completely, then coat with high-gloss varnish for brilliant depth.
Tips & Variations
- Tip: Keep the edges of the canvases painted solid black so the artwork pops against light-colored bedroom walls.
- Variation: Add real metallic leafing (silver or rose gold) to the fluid lines after drying for an added touch of luxury.
What You Need
- 3 large stretched gallery canvases (e.g., 24×48 inches each)
- Pouring medium & silicone cell oil
- Acrylic paints (Midnight blue, Cyan, Magenta, White)
- Handheld propane/butane torch
- High-gloss clear topcoat spray or liquid varnish
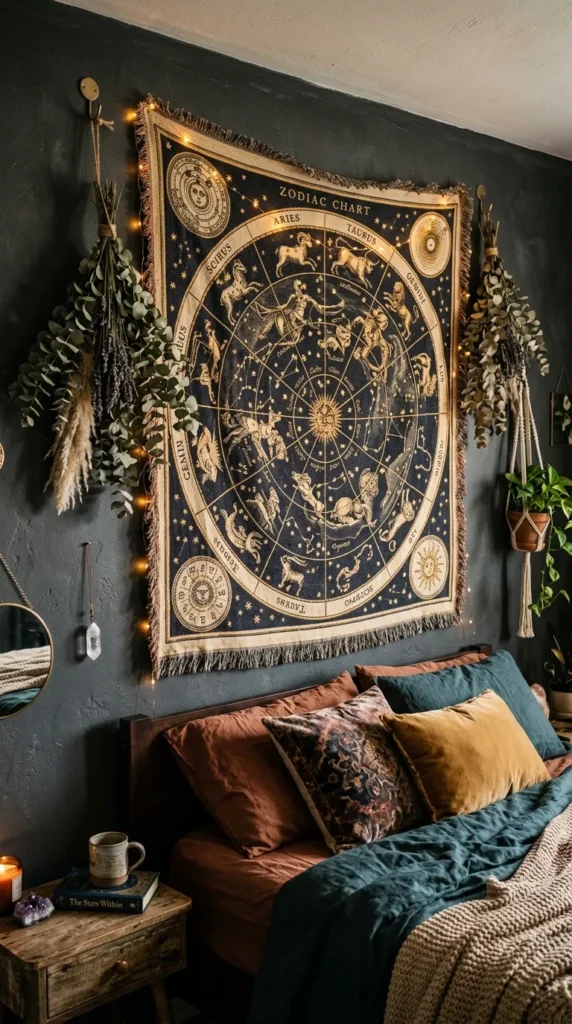
6. Vintage Celestial Zodiac Tapestry with Fairy Lights
What This Idea Means
Blending vintage aesthetic charts with galaxy decor creates a bohemian-chic ambiance. This design combines a detailed, antique-style astrological chart printed on soft woven cotton or velvet, illuminated from behind by warm micro fairy lights to create a subtle glow through the fabric.
How to Make It
- Prepare Wall Base: Hang a crisscross grid of warm copper-wire fairy lights flat against your chosen wall section using clear adhesive clips.
- Select & Mount Tapestry: Choose a high-quality tapestry featuring vintage celestial cartography or constellation charts. Attach top loops or clips to a wooden drapery rod.
- Drape and Secure: Hang the drapery rod over the fairy lights, letting the lightweight fabric fall softly over the bulbs.
- Frame the Setup: Add hanging greenery, such as dried eucalyptus or dark faux vines, along the wooden rod to ground the cosmic theme with natural elements.
Tips & Variations
- Tip: Choose fabric tapestries with dark background hues (deep charcoal, gold-accented navy) so the fairy lights act as stars glowing through celestial dust.
- Variation: Use curtain rod ring clips to easily slide the tapestry aside or change out hanging artwork with the seasons.
What You Need
- High-definition woven or velvet celestial tapestry
- Copper wire LED string fairy lights (warm white)
- Clear wall adhesive clips (Command hooks)
- Wooden curtain rod & brackets
- Faux vines or dried botanical accents (optional)
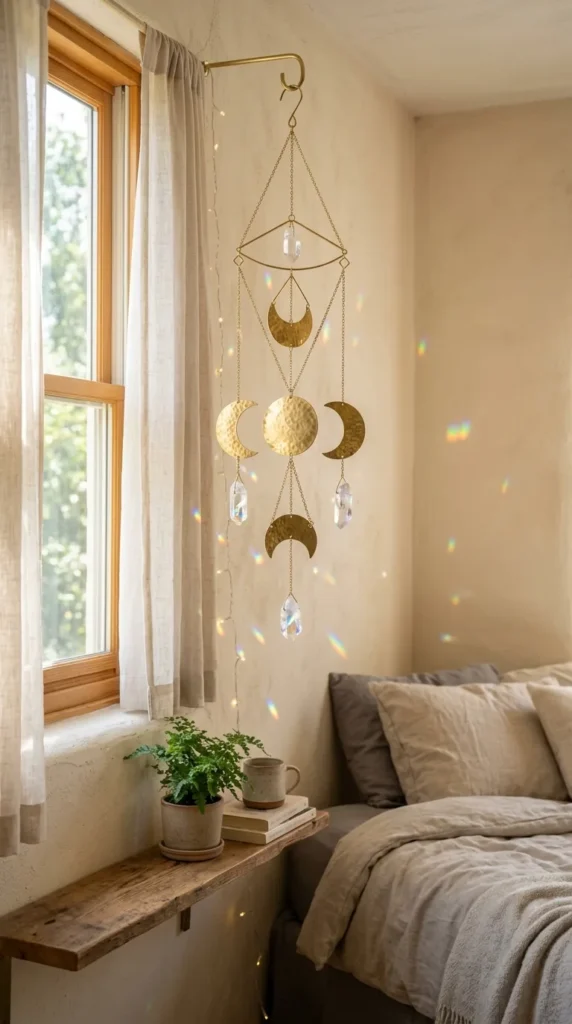
7. Brass & Crystal Geometric Moon Phase Mobile / Wall Hanging
What This Idea Means
If you prefer minimalist decor with metallic highlights, a vertical brass and raw crystal wall hanging delivers quiet elegance. Featuring hammered brass moon discs, delicate chains, and light-refracting crystal prisms, this dynamic wall sculpture refracts natural light into tiny rainbows across your bedroom during the day and reflects cozy lamp glows at night.
How to Make It
- Shape Brass Elements: Cut thin brass sheet metals into moon phases (or buy pre-stamped hammered brass discs).
- Assemble Chains: Connect each brass phase in vertical order using delicate brass jump rings and fine jewelry chain.
- Attach Crystals: Fasten raw quartz points or faceted K9 glass prisms to the bottom end of each hanging strand.
- Anchor to Driftwood/Brass Bar: Attach 3 to 5 vertical strands across a horizontal polished brass rod or dark stained piece of driftwood.
- Wall Mounting: Securely suspend the horizontal bar over a dresser or reading nook using matching brass wall hooks.
Tips & Variations
- Tip: Hang this piece directly opposite a window so sunlight hits the crystal prisms, scattering light around the bedroom.
- Variation: Swap raw quartz for dark amethyst or fluorite crystals to enhance the moody, deep-space color palette.
What You Need
- Hammered brass moon phase blanks
- Brass jewelry chain & jump rings
- Raw quartz points or faceted glass prisms
- Polished brass rod or dark stained driftwood branch
- Brass wall hooks & pliers
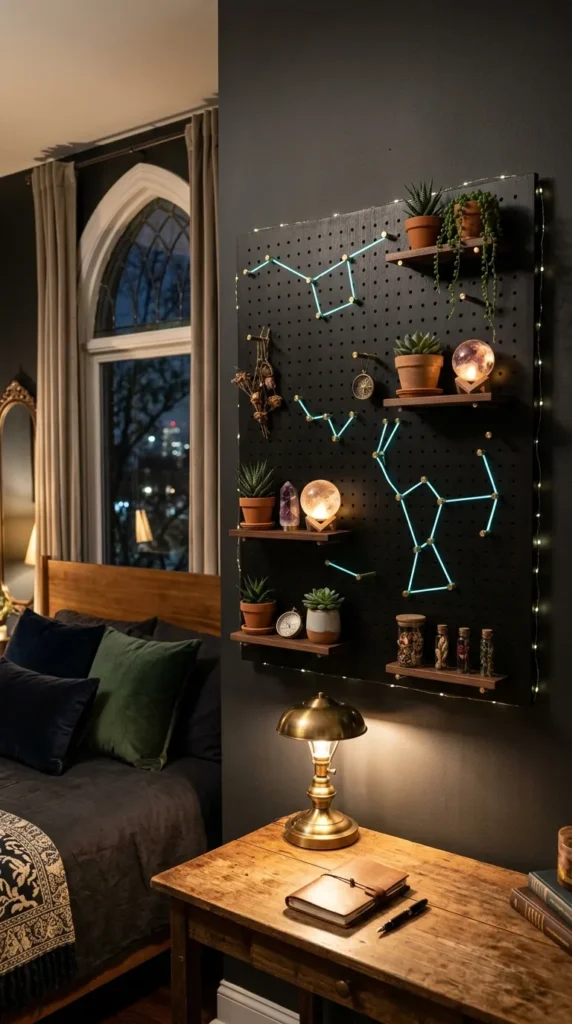
8. Glow-in-the-Dark Constellation Wall Pegboard
What This Idea Means
Combining functional wall storage with galaxy aesthetics, a dark painted wooden pegboard serves as both an organized display and an interactive star map. Painted in matte black, with custom peg arrangements mapped out like real constellations, this setup utilizes phosphorescent paint and brass pegs to organize accessories, artwork, and plants.
How to Make It
- Paint the Pegboard: Coat a large hardwood pegboard with high-durability matte black latex paint.
- Map Constellations: Outline your favorite stars using thin lines of luminescent (glow-in-the-dark) acrylic paint connecting selected peg holes.
- Insert Brass Pegs: Insert polished brass pegs into key star locations along the constellation lines.
- Install Shelving: Slide small dark wood floating shelves onto pairs of brass pegs to hold galaxy-themed decor objects, like glowing globes, small succulents, and star jars.
Tips & Variations
- Tip: Charge the phosphorescent paint using a UV blacklight desk lamp in the evening for an intense, long-lasting nighttime glow.
- Variation: Paint the background with subtle blue watercolor washes instead of solid black to keep the aesthetic soft and ethereal.
What You Need
- Large wooden pegboard
- Matte black paint & foam rollers
- High-grade phosphorescent (glow-in-the-dark) paint
- Polished brass peg hooks
- Mini wooden shelves for pegboards
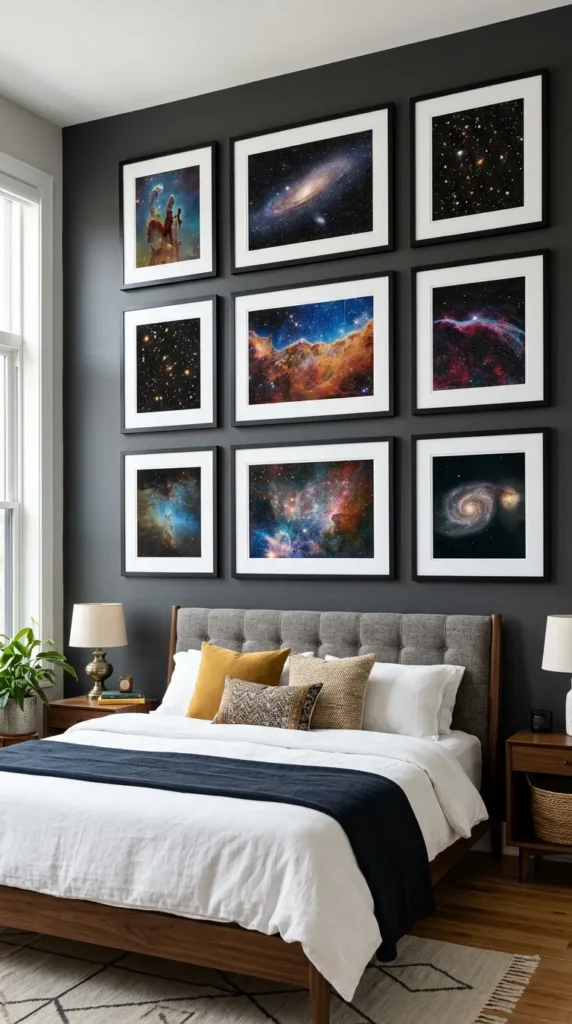
9. Framed High-Definition Deep Space Astrophotography Gallery
What This Idea Means
For an authentic, scientific approach to galaxy aesthetic, nothing beats genuine deep-space imagery captured by modern space telescopes. A gallery wall composed of sleek black frames with wide white matting elevates NASA and Hubble images into high-end fine art pieces.
How to Make It
- Curate High-Res Prints: Source high-resolution public domain astrophotography images (e.g., Carina Nebula, Andromeda Galaxy, Pillars of Creation).
- Print on Premium Stock: Print the images on archival satin or luster photo paper to maximize color richness and deep blacks.
- Frame Elegantly: Mount each print into a minimalist black or brushed aluminum frame featuring wide (2 to 3-inch) white acid-free mats.
- Layout & Mount: Arrange the frames in a clean geometric grid (e.g., 2×3 or 3×3 array) or a asymmetrical gallery layout above a desk or bed.
Tips & Variations
- Tip: Use anti-reflective glare-free glass in your frames to prevent window reflections from obscuring the deep black space backgrounds.
- Variation: Mix astrophotography prints with vintage star maps and typography quotes about the cosmos to add visual diversity.
What You Need
- High-resolution astronomical digital image files
- Fine-art photo printing paper (satin/matte finish)
- Sleek black or metal frames with white mats
- Frame level & picture hanging strips/nails
- Measuring tape for precise grid alignment
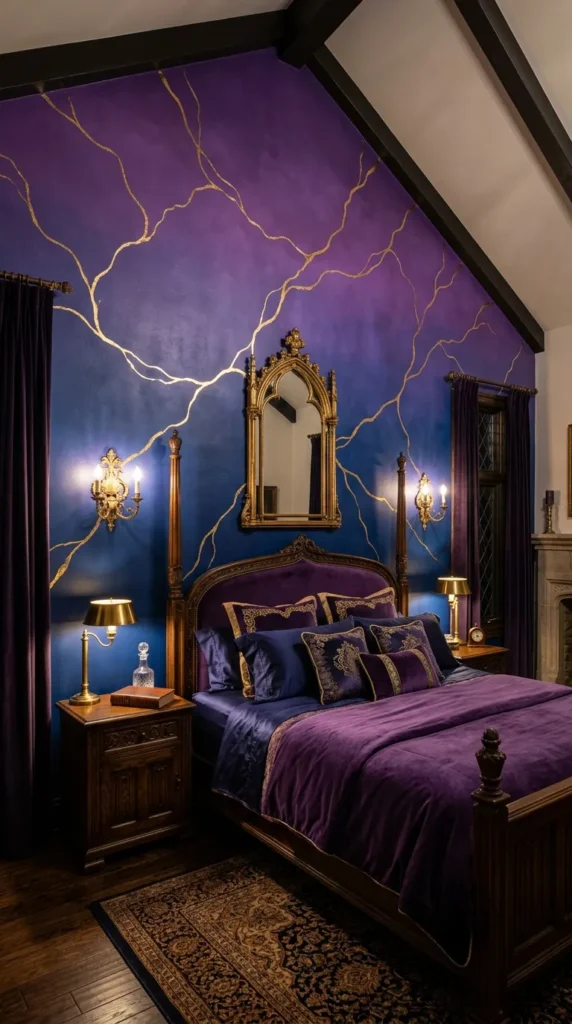
10. Ombré Indigo-to-Violet Galaxy Accent Wall with Gold Leaf
What This Idea Means
An ombré wall transitions seamlessly from dark midnight indigo at the floor to a lighter celestial violet near the ceiling. Interspersed with real hand-applied gold leaf veins, this wall treatment brings a luxurious hotel-suite ambiance into your bedroom while honoring the galaxy theme.
How to Make It
- Paint the Base Ombré: Section the wall into horizontal color zones (Midnight Black -> Deep Indigo -> Royal Violet -> Lavender Mist).
- Blend the Boundaries: While the paint is still wet, use a clean wet blending brush to feather the transitions between colors, creating a smooth sky-like gradient.
- Apply Metal Leafing Adhesive: Paint delicate, lightning-like galaxy dust trails across the gradient using gilding size (gold leaf adhesive).
- Apply Gold Leaf: Once the adhesive becomes tacky, press sheets of 24k gold leaf or imitation brass leaf onto the wall. Gently brush away excess leaf with a soft duster brush.
Tips & Variations
- Tip: Blend in small circular motions at the color boundaries to avoid harsh line steps and mimic interstellar gas clouds.
- Variation: Swap gold leaf for silver leaf if your bedroom accent metallic is nickel or chrome.
What You Need
- Latex wall paint (Black, Dark Indigo, Royal Violet, Soft Lavender)
- Blending sponge & wide dry blending brushes
- Gilding size (metal leaf adhesive)
- Imitation gold or brass leaf sheets
- Soft gilding mop brush
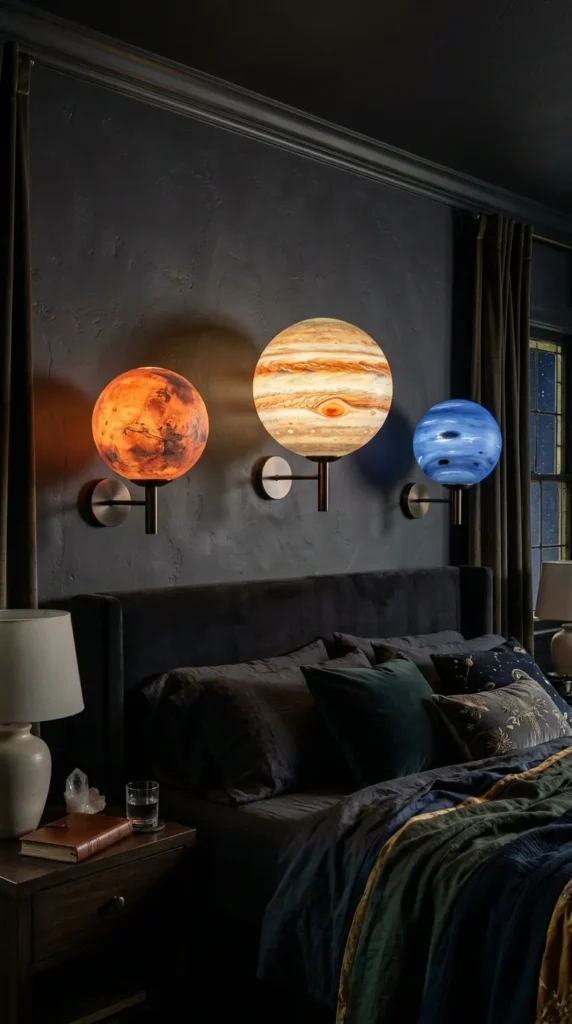
11. Illuminated Solar System Wall Sconces & Orbs
What This Idea Means
Bring 3D scale and soft functional illumination to your wall with custom illuminated solar system sconces. Hand-painted glass or resin globes representing planets are mounted at varying distances on custom metal wall arms, creating a functional piece of modern sculpture.
How to Make It
- Source Globe Shades: Obtain semi-translucent glass orb light shades in varying sizes (representing Mars, Jupiter, Saturn, etc.).
- Paint Planet Textures: Spray or hand-paint glass enamel paints across each orb to match planet textures—swirling creams and ochres for Jupiter, dusty reds for Mars, deep cyan for Neptune.
- Mount Sconce Fixtures: Attach modern black or brass wall sconce arms at staggered heights across your accent wall.
- Install Low-Wattage Bulbs: Insert warm, low-wattage LED bulbs (or smart color-changing bulbs) inside each planet orb and attach to the sconce bases.
Tips & Variations
- Tip: For Saturn, cut a thin brushed-brass disc to fit around the perimeter of the designated globe to act as planetary rings.
- Variation: If hardwiring sconces is not feasible, use battery-operated puck lights with remote controls inside the orb shades.
What You Need
- Semi-translucent spherical glass light covers (varying sizes)
- Glass paints & alcohol inks
- Wall-mounted lamp arms / sconce bases
- Low-wattage LED bulbs or remote-controlled puck lights
- Wall anchors & mounting screws
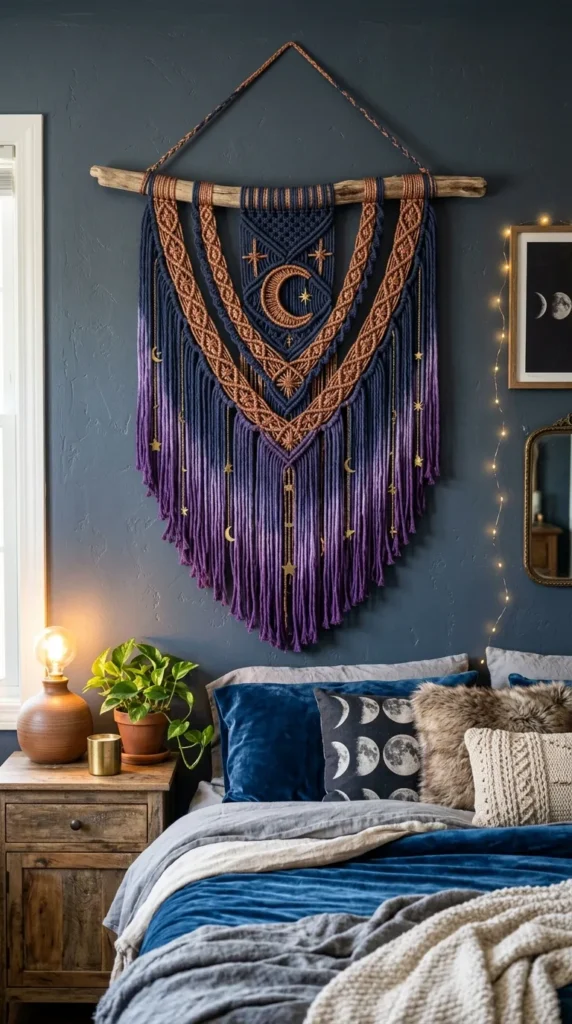
12. Metallic Copper & Indigo Macramé Celestial Wall Banner
What This Idea Means
This concept blends cozy fiber art with space-inspired aesthetics. A large macramé tapestry knotted from deep indigo and metallic copper yarn creates a rich tactile experience. Structural dip-dyed fibers and woven-in brass star charms add dimension and bohemian flair.
How to Make It
- Prepare Dowel: Treat a piece of natural wood or copper pipe with a dark sealant.
- Knot the Macramé: Using deep indigo cotton cord, tie foundational lark’s head knots along the bar and build out diamond patterns down the length.
- Incorporate Metallic Yarn: Interweave metallic copper cord into the knot patterns to simulate glittering cosmic dust.
- Dip-Dye Fringe: Dip the bottom fringe of the finished macramé into a violet textile dye bath to create a cosmic gradient, then attach small brass star pendants to select cord ends.
Tips & Variations
- Tip: Comb out the bottom fringe with a fine-tooth comb to create a soft, cloud-like edge at the bottom of the piece.
- Variation: Integrate small dark blue crystal beads into the center of each diamond knot pattern.
What You Need
- 4mm Cotton macramé cord (Midnight blue / Indigo)
- Metallic copper craft cord
- Wooden dowel or copper pipe (3-4 feet long)
- Textile dye (Violet/Magenta)
- Brass star pendants & comb
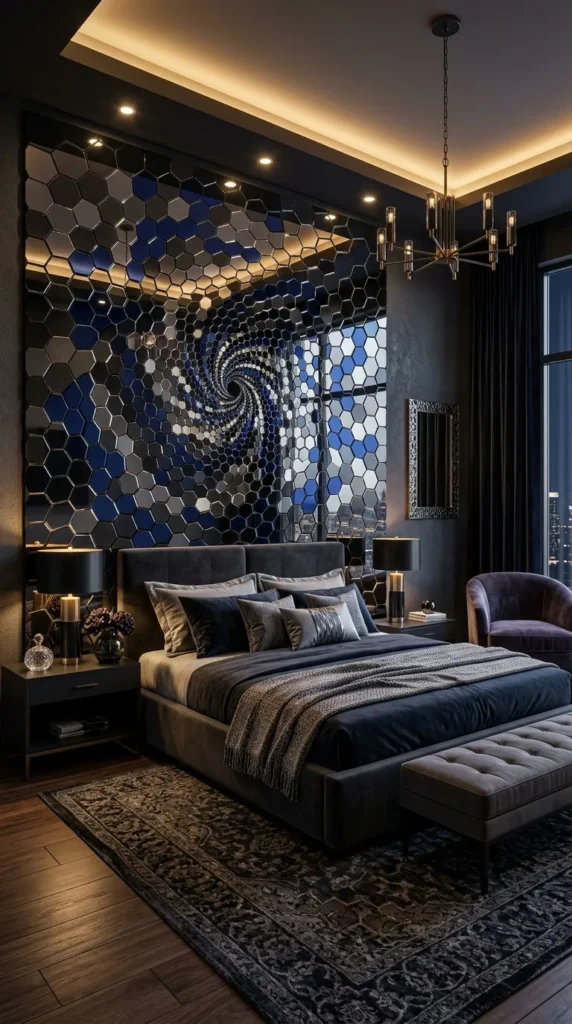
13. Mirror-Tiled Cosmic Vortex Feature Wall
What This Idea Means
A mirror-tiled cosmic wall combines reflective geometry with deep space color tones. By using tinted smoked glass, deep blue mirrors, and antique mirror tiles arranged in a spiral or radial pattern, this concept reflects ambient light while creating an intriguing sense of infinite depth.
How to Make It
- Layout the Design: Draw a large logarithmic vortex spiral on a piece of backing plywood cut to your desired dimensions.
- Cut Mirror Tiles: Use small square and triangular mirror tiles in three shades: smoked charcoal, deep cobalt blue, and clear silver.
- Tile the Vortex: Adhere the mirror tiles along the spiral lines using mirror mastic, mixing shades so darker mirrors sit in the center and silver tiles radiate outward.
- Grout and Clean: Apply dark charcoal grout between tile gaps, wipe clean with a damp sponge, and frame the panel with dark metal trim before mounting securely to wall studs.
Tips & Variations
- Tip: Install a warm dimmable LED strip around the rear of the framed panel to highlight the reflective edges of the glass.
- Variation: Instead of a full wall, create a compact round 24-inch mirror medallion as a striking accent above your vanity.
What You Need
- Assorted mirror tiles (Cobalt blue, Smoked black, Silver)
- Heavy-duty plywood backing board
- Mirror-safe mastic adhesive
- Dark grey or charcoal tile grout
- Metal border frame trim
14. Pressed Cosmic Florals & Celestial Glass Frames
What This Idea Means
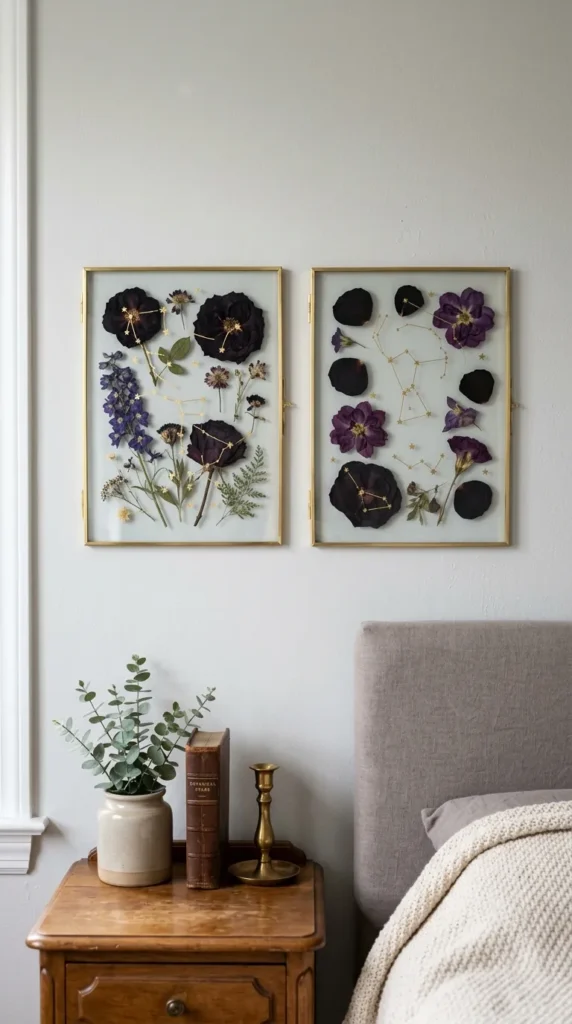
Combining nature with galaxy concepts, this idea uses dark dried botanical elements—like black roses, deep purple larkspur, and metallic-painted leaves—arranged alongside star constellations inside floating double-glass frames. It provides a moody, botanical take on space decor.
How to Make It
- Prepare Dried Botanicals: Press deep-toned flowers (dark dahlias, violet delphiniums, navy blue hydrangeas) in a flower press for two weeks until dry and flat.
- Gilded Accents: Lightly dust edges of the dried petals with metallic gold dust or gold paint pen lines.
- Assemble in Floating Frame: Open a double-paned glass floating frame. Arrange the pressed flowers inside to resemble celestial clusters and nebulae.
- Add Celestial Ink Details: Draw delicate constellation lines on the inner glass pane using a gold metallic paint pen to connect floral “stars.” Close and lock the frame.
Tips & Variations
- Tip: Use a dab of clear drying craft glue behind the thickest part of the stem to hold flowers firmly in place between glass panes.
- Variation: Place dried black star-flower seed pods inside the frame to mimic tiny star explosions.
What You Need
- Double-pane floating glass frames (Brass or Black metal edges)
- Pressed dark flowers (Violet, Deep Blue, Charcoal hues)
- Gold dust powder & fine paintbrushes
- Fine-tip gold metallic paint markers
- Clear flower adhesive
15. Glowing Celestial Neon Sign on Textured Velvet Backing
What This Idea Means
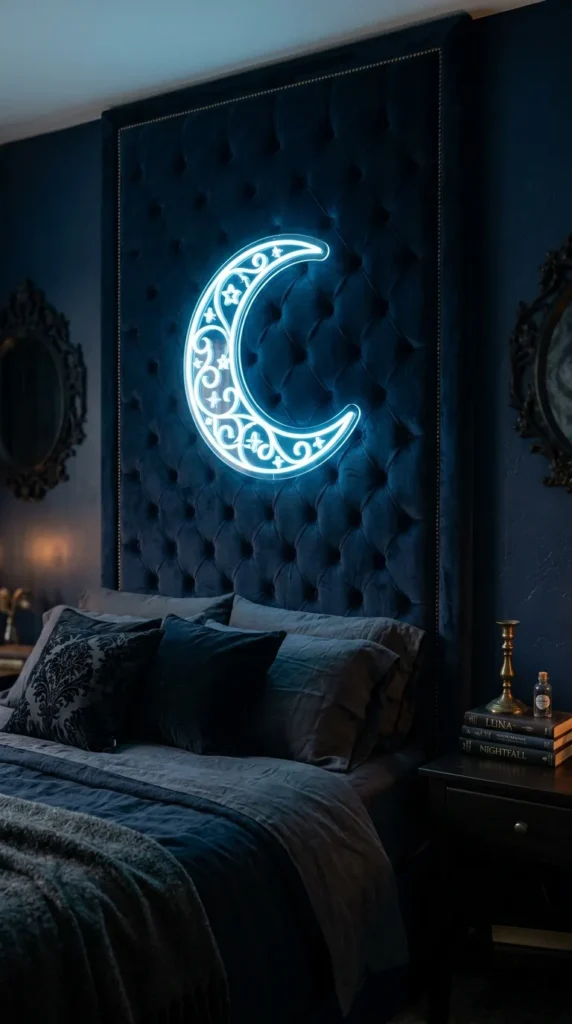
Modern LED neon signs deliver striking vibrant energy. To keep a neon sign feeling elegant rather than juvenile, mount a custom crescent moon or galaxy text neon sign onto a deep navy or emerald velvet upholstered wall panel. The plush fabric absorbs light glare while creating a rich, opulent contrast.
How to Make It
- Build Upholstered Panel: Wrap a piece of lightweight insulation board or thin plywood with dark navy crushed velvet, stapling the fabric taut on the back.
- Mount the Backing: Secure the velvet panel onto your wall using flush heavy-duty mounting strips.
- Mount the LED Neon: Position a custom flex-LED neon sign (e.g., in shapes like a crescent moon, Saturn, or cosmic script like “To the Stars”) over the velvet.
- Conceal Wiring: Pass the transparent power wire through a tiny slit in the velvet panel to keep wiring invisible.
Tips & Variations
- Tip: Choose warm white, soft pink, or ice blue neon colors; avoid harsh secondary red/green shades to maintain an elegant bedroom vibe.
- Variation: Frame the velvet panel with thin brass trim for a luxurious hotel suite appearance.
What You Need
- Custom LED flex-neon sign (Moon, Star, or Cosmic phrase)
- Dark navy or indigo crushed velvet fabric
- Plywood board & staple gun
- Concealed wire extension kit
- Brass frame molding (optional)
16. Sculptural 3D Plaster Crater Moon Wall Relief
What This Idea Means
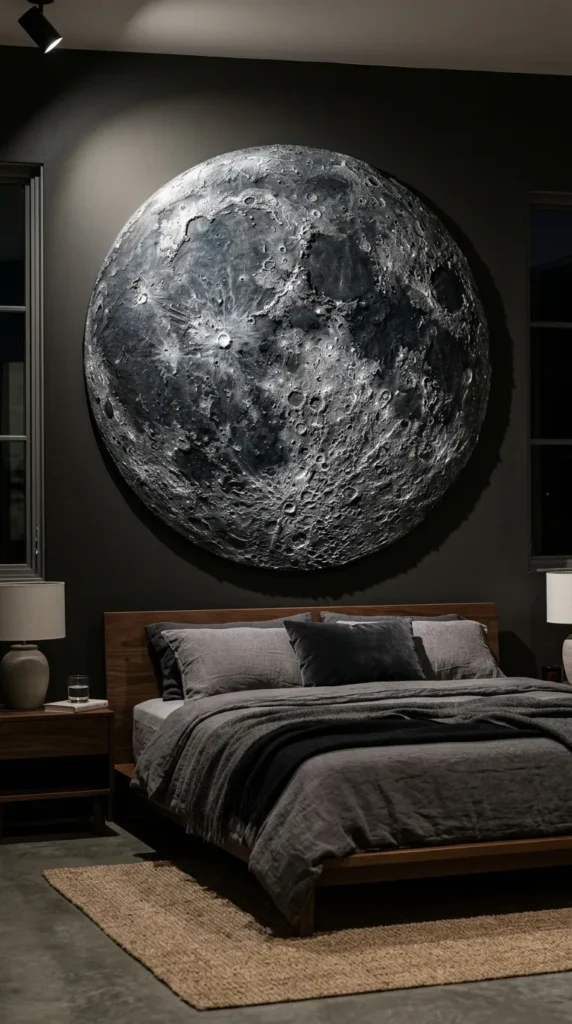
This tactile artwork brings real 3D texture into your bedroom. A large circular panel built up with joint compound, plaster, and sand replicates the rugged, cratered surface of the moon or distant planets. Painted in mineral tones with subtle mica shine, it functions as a museum-like wall sculpture.
How to Make It
- Prepare Circle Base: Cut a 30-inch to 40-inch circle from sturdy 1/2-inch MDF wood.
- Apply Joint Compound: Spread a thick 1/2-inch layer of joint compound or plaster across the disc.
- Sculpt Craters: Press circular bowls, bottle caps, and natural sponges into the wet plaster to form lunar craters and ridges. Sprinkle coarse sand along crater rims for texture.
- Paint with Mineral Layers: Once dry, paint the relief with layers of charcoal, slate gray, and ivory paints. Dry-brush pale silver mica paint over high ridges to catch light.
- Mounting: Attach a heavy-duty ring hanger on the back and mount securely to a wall stud.
Tips & Variations
- Tip: Direct a small directional wall spotlight at an angle toward the sculpture to cast deep, dramatic shadows inside the sculptured craters.
- Variation: Paint the entire sculpted relief deep midnight blue with gold crater rims for a stylized cosmic look.
What You Need
- Circular MDF board (30-40 inches diameter)
- Wall joint compound / plaster of Paris
- Sculpting tools, sponges, and coarse sand
- Acrylic paints (Charcoal, Slate, Off-White, Metallic Silver)
- Heavy-duty wall anchors
17. Celestial Constellation String Art Board
What This Idea Means
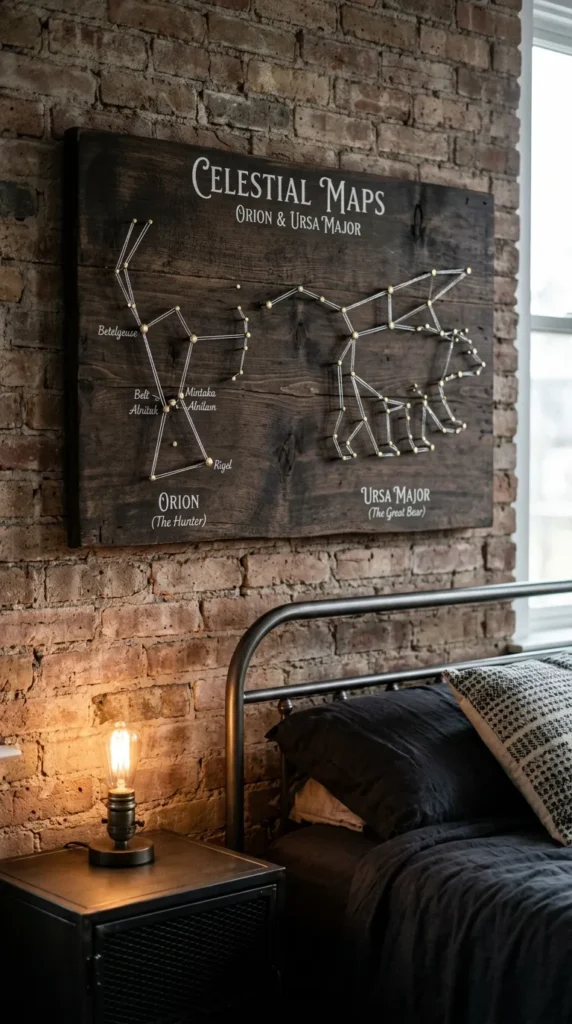
String art uses precise geometric lines to form intricate shapes. A large dark-stained wooden board featuring brass nails and metallic silver thread outlines real constellations, balancing industrial hand-craftsmanship with celestial beauty.
How to Make It
- Prepare the Wood Board: Stain a rustic pine or walnut board with dark ebony or jacobean wood stain. Seal with a satin finish.
- Template Transfer: Tape a printed full-scale paper template of selected constellations onto the board.
- Drive Brass Nails: Tap small brass linoleum nails halfway into the wood at every star point marked on the template. Tear away the paper template cleanly.
- Weave Metallic Thread: Tie silver or silver-coated metallic embroidery floss to a central nail and weave tightly between nails to map out stars and connecting constellation paths.
Tips & Variations
- Tip: Use tiny glow-in-the-dark beads placed on the nail heads before tying thread to make star nodes glow softly in the dark.
- Variation: Combine multiple smaller square boards, each dedicated to a single zodiac sign, into a personalized grid display.
What You Need
- Solid wood board (Stained dark ebony)
- Brass linoleum nails & small hammer
- Metallic silver embroidery floss / thread
- Printed constellation map templates
- Painter’s tape
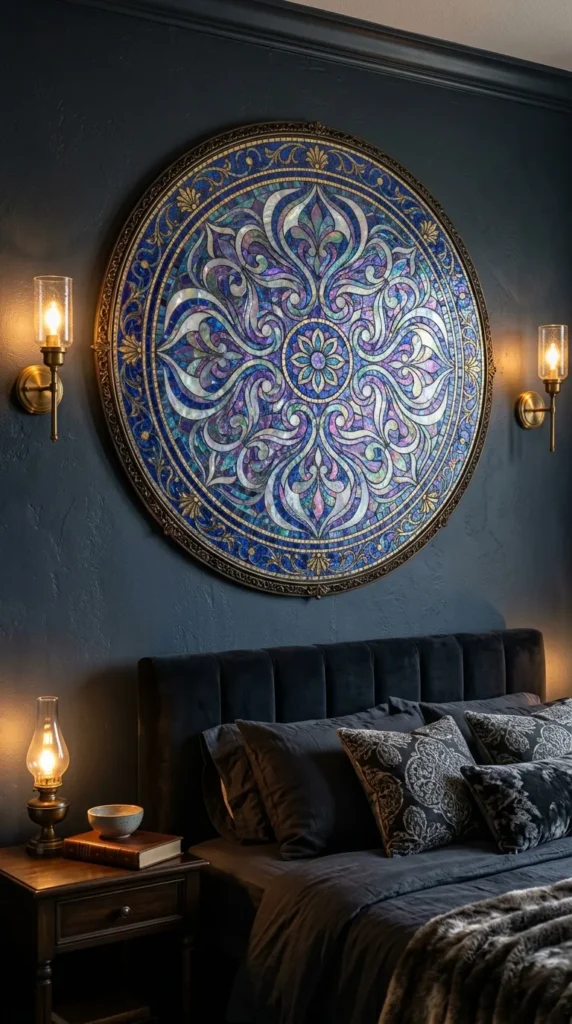
18. Iridescent Celestial Glass Tile Medallion
What This Idea Means
Iridescent glass tiles reflect a spectrum of oil-slick colors (purples, pinks, cyans) as you walk past them. A circular mosaic wall medallion made of iridescent glass tile pieces transforms your wall into a shimmering celestial portal.
How to Make It
- Prepare Mosaic Backer: Cut a circular mesh or cement backer board piece to your desired size (e.g., 24 inches diameter).
- Cut and Arrange Tiles: Nippers are used to cut iridescent dark blue, purple, and clear glass mosaic tiles into curved organic shapes.
- Adhere Mosaic: Glue tiles onto the board starting from the center and working outward in a swirling galaxy pattern using clear mosaic tile adhesive.
- Grout and Seal: Spread black sanded tile grout across the mosaic, filling all joints. Clean off tile surfaces thoroughly with a sponge once set, then seal grout.
Tips & Variations
- Tip: Place a round mirror in the center of the medallion to let the mosaic serve as an ornate frame around a functional wall mirror.
- Variation: Integrate pieces of mother-of-pearl shell for soft, natural luminescent stars within the glass tile layout.
What You Need
- Iridescent glass mosaic tiles (Deep blue, Purple, Pearl)
- Cement tile backer board
- Glass tile nippers & tile adhesive
- Black sanded tile grout & sponge
- Mosaic sealer
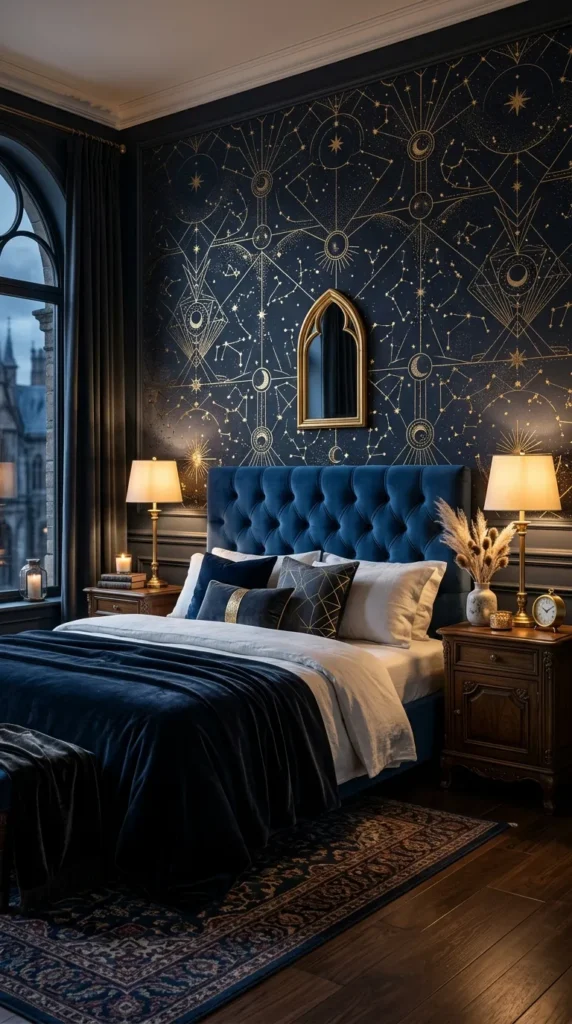
19. Dark Cosmic Wallpaper with Metallic Foil Details
What This Idea Means
For instant wall-to-wall transformation, luxury peel-and-stick or paste-the-wall galaxy wallpapers offer crisp geometric precision and deep color saturation. Selecting designs featuring subtle metallic gold or copper foil accents ensures the wallpaper feels rich rather than flat.
How to Make It
- Wall Preparation: Ensure the wall is clean, smooth, and primed with wallpaper primer.
- Measure & Drop Lines: Draw a straight vertical plumb line using a level to align the first wallpaper panel correctly.
- Apply Wallpaper: Apply peel-and-stick wallpaper or paste-the-wall paste, carefully aligning pattern repeats at seams.
- Smooth Bubbles: Smooth out air bubbles using a wallpaper smoothing tool, moving from the center toward outer edges. Trim top and bottom edges using a sharp utility knife and straightedge.
Tips & Variations
- Tip: Limit high-pattern cosmic wallpaper to a single accent wall (behind the bed), painting adjacent walls a matching solid matte charcoal or deep navy color.
- Variation: Use removable wallpaper inside recessed wall alcoves or picture frame moldings for a tailored architectural feature.
What You Need
- High-quality metallic foil celestial wallpaper
- Wallpaper smoothing tool & seam roller
- Plumb line level & tape measure
- Heavy-duty utility knife with fresh blades
- Wallpaper primer
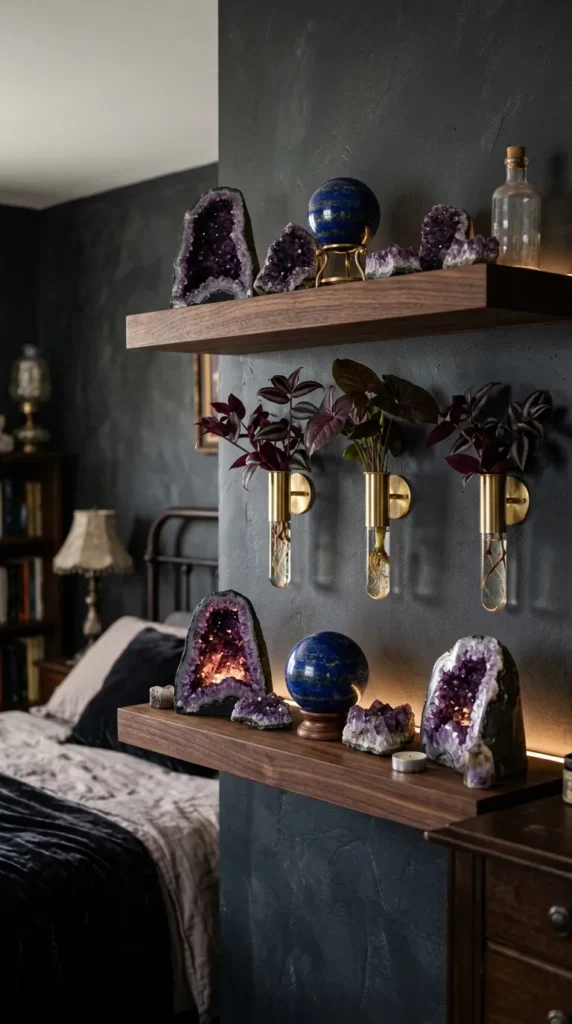
20. Floating Shelf Display of Celestial Geodes & Crystal Cluster Wall Vases
What This Idea Means
Bring tactile, real-world earth elements into your galaxy bedroom design. Dark stained floating shelves hold glowing raw deep-purple amethyst geodes, polished blue lapis lazuli spheres, and wall-mounted glass propagation tubes filled with dark foliage, grounding the celestial aesthetic in natural mineral beauty.
How to Make It
- Install Floating Shelves: Mount 2 to 3 minimalist black or dark walnut floating shelves at offset heights on your wall.
- Mount Wall Vases: Fasten brass-framed glass tube wall vases on either side of the floating shelves.
- Arrange Mineral Crystals: Place substantial raw mineral specimens on the shelves—deep purple amethyst cathedrals, cobalt blue azurite, iridescent bismuth, and polished black tourmaline.
- Style Botanicals: Place dried metallic-sprayed eucalyptus or dark purple heart wandering plant cuttings inside the glass wall vases.
Tips & Variations
- Tip: Add small warm LED battery puck lights directly behind large amethyst geodes to make the raw purple crystals illuminate from within.
- Variation: Incorporate brass celestial candleholders with tall dark navy taper candles to add flickering warmth to the shelf display.
What You Need
- Dark wood or black floating wall shelves
- Wall-mounted glass & brass propagation vases
- Natural raw crystals (Amethyst cathedrals, Lapis Lazuli, Bismuth)
- Mini LED puck lights
- Dried dark foliage (Eucalyptus, Lavender, Preserved ferns)