Spread the love

Staring at a pristine, stark white blank canvas can feel both incredibly thrilling and subtly daunting. The endless possibilities offered by an untouched canvas often lead to artist’s block—what colors should you mix? What textures should you explore? How do you create something that looks like it belongs in a high-end interior design studio rather than a quick weekend craft project?

Whether you are decorating a cozy boho apartment, a sleek Japandi living room, or a soft minimalist bedroom, custom artwork adds soul, character, and tactile warmth to your sanctuary. The secret to modern aesthetic canvas art isn’t years of classical art training—it is texture, color theory, intentionality, and embracing beautiful simplicity.

Here is an ultimate, deeply detailed guide to 20 blank canvas painting ideas. Each idea includes its core meaning, a materials list, step-by-step creation instructions, and styling tips to transform your blank canvas into a show-stopping focal point.
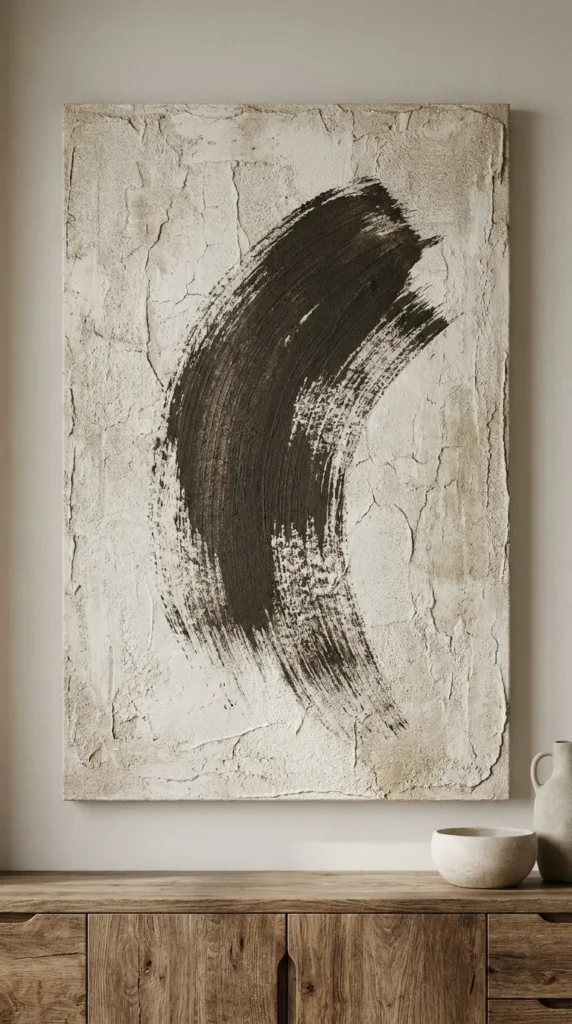
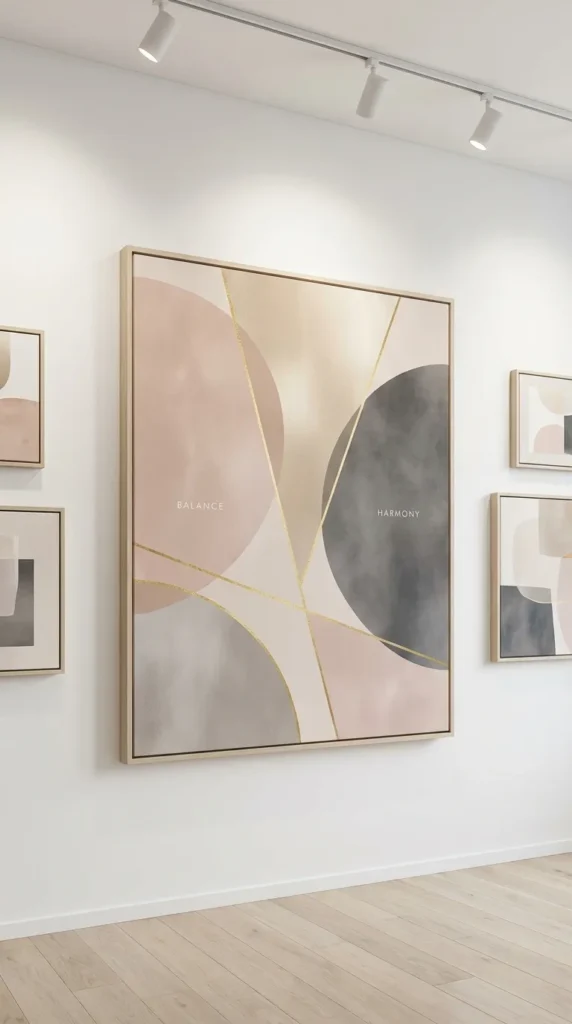
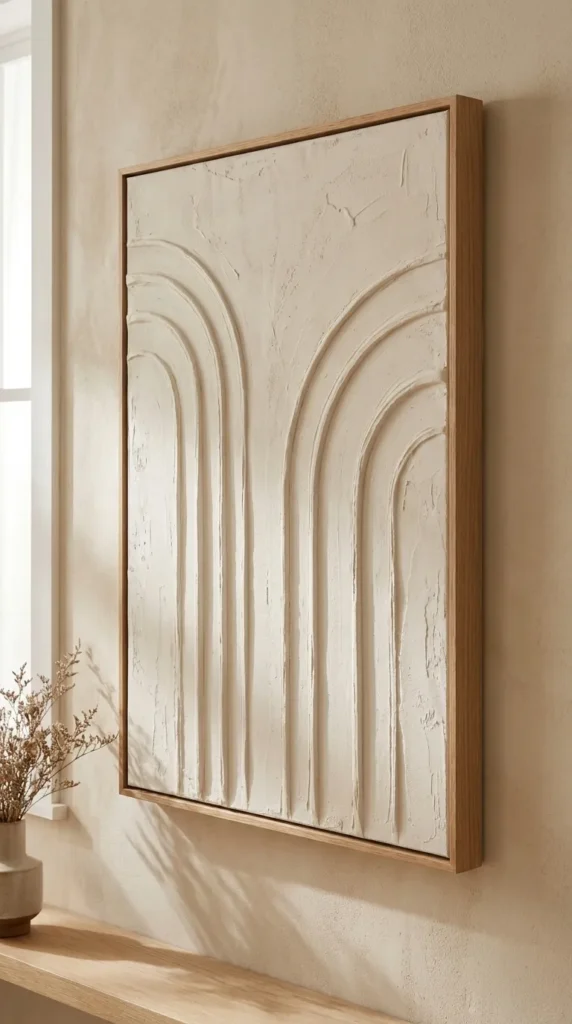
1. Minimalist Plaster Textured Arc

Introduction

The minimalist plaster arc has taken Pinterest and modern interior design by storm. Utilizing architectural structural paste or joint compound, this technique transforms a simple flat canvas into a three-dimensional tactile sculpture. It blends seamlessly into warm minimalism, Scandinavian, and organic modern interiors.

What This Idea Means

This piece celebrates form, light, and shadow over bold color. By using arching geometry, it evokes classical architecture, tranquility, and soft structural flow. The shadows cast by the raised plaster change throughout the day as natural sunlight shifts across your room, giving you dynamic, living art.

Materials Needed

  • Large stretched canvas
  • Premixed wall joint compound or heavy gel acrylic medium
  • Notched trowel or cake scraper (or an arc comb tool)
  • Palette knife
  • Matte interior paint or acrylics in warm beige, cream, or off-white
  • Fine-grit sandpaper (220-grit)

How to Make It

  1. Prep the Canvas: Place your canvas on a flat work surface. Lay down drop cloths.
  2. Apply Joint Compound: Scoop a generous amount of joint compound onto the canvas using a broad palette knife. Spread it evenly to a thickness of roughly 1/8 to 1/4 inch across the desired area.
  3. Scrape the Arch: Take your notched trowel or comb tool. Starting from the bottom left corner, draw a smooth, continuous arched line extending up toward the top center and sweeping smoothly down to the right.
  4. Clean up & Dry: Wipe away any excess plaster from the canvas edges. Let the canvas cure completely for 24 hours.
  5. Sand & Paint: Lightly sand any rough spikes. Wipe away dust with a dry cloth. Seal and paint the entire piece with a coat of matte cream or warm beige paint.

Tips and Variations

  • Monochrome vs. Contrast: Keep it entirely monochrome for a quiet Japandi feel, or paint the recessed grooves a shade darker to emphasize depth.
  • Double Arch: Create two overlapping arches of different heights for added visual rhythm.

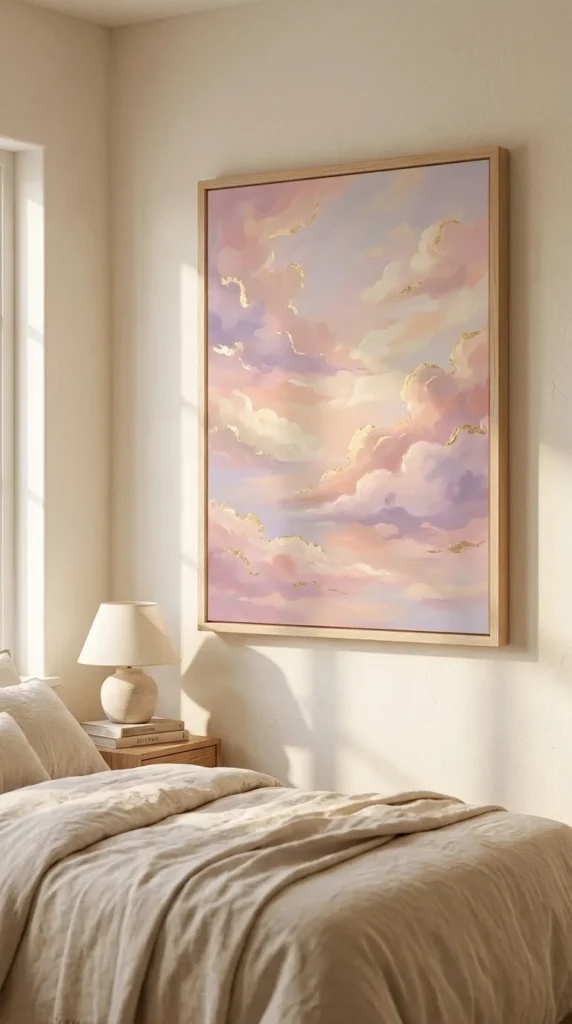
2. Soft Pastel Cloudscape with Gold Leaf

Introduction

Dreamy, ethereal, and deeply calming, a pastel cloudscape brings the peaceful essence of a golden hour sky directly into your bedroom or living space. Adding delicate accents of gold leaf gives it a touch of luxury and subtle luminosity.

What This Idea Means

This style represents escapism, stillness, and poetic beauty. It captures that fleeting moment right before sunset when the sky turns into a soft blending of blush, lavender, and warm peach, grounded by glittering metallic light.

Materials Needed

  • Stretched canvas
  • Acrylic paints (Blush pink, soft lavender, sky blue, butter yellow, titanium white)
  • Large round blending brushes and a broad flat wash brush
  • Imitation gold leaf sheets
  • Leafing size (glue) and a soft dry mop brush
  • Satin varnish

How to Make It

  1. Background Wash: Paint a soft gradient wash across the top half of the canvas using sky blue fading down into soft peach and warm cream. Keep the paint wet for smooth blending.
  2. Build Cloud Masses: Using a dry, fluffy round brush dipped in a mix of white and blush, apply soft circular motions to form fluffy cloud shapes.
  3. Add Shadows & Highlights: Blend hints of lavender into the underside of the clouds for dimension. Highlight the top edges with bright white and pale yellow.
  4. Apply Gold Leaf: Once the paint is dry, apply small dabs of gold leaf glue along the rim where the clouds catch the imaginary sunlight. Wait 5–10 minutes until tacky, lay down gold leaf sheets, and gently brush away excess leaf with a dry brush.
  5. Seal: Spray with a clear varnish to protect the foil from oxidizing.

Tips and Variations

  • Keep it Soft: Work with wet-on-wet acrylic techniques or add a slowing medium (retarder) to avoid harsh brush lines.
  • Silver Accent: Swap gold leaf for silver or copper leaf to better match cool-toned rooms or metallic fixtures.

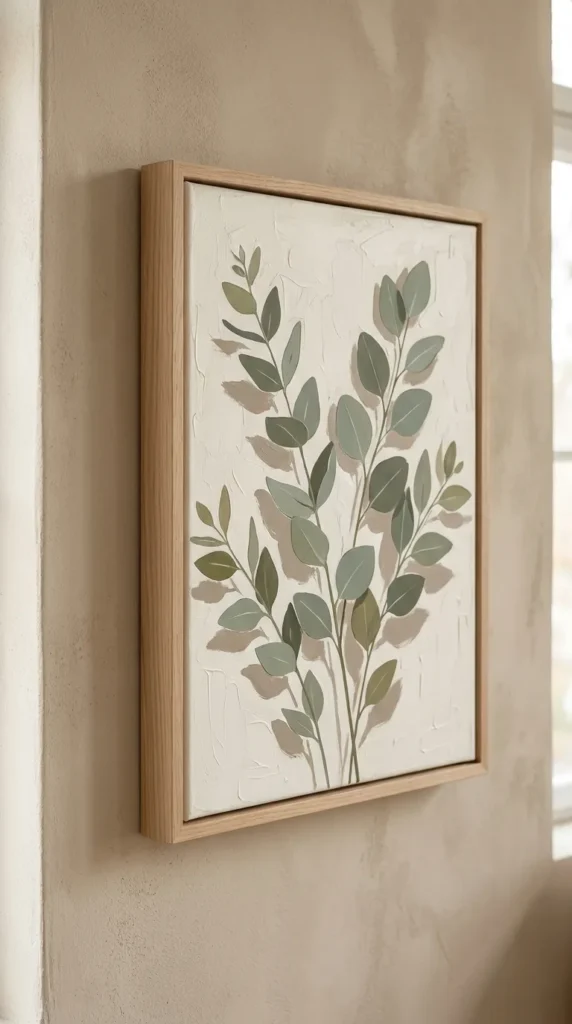
3. Botanical Sage & Cream Silhouette

Introduction

Botanical art remains a timeless trend. By focusing on exaggerated silhouettes and muted, nature-inspired palettes like sage green, taupe, and rich cream, this canvas idea brings the outdoors inside with sophisticated understatement.

What This Idea Means

It symbolizes growth, calm, and connection with nature. Rather than hyper-realistic rendering, the silhouette approach emphasizes organic shapes and graceful contours, rendering plant life into abstract graphic poetry.

Materials Needed

  • Medium to large canvas
  • Matte acrylic paint in Sage Green, Cream/Ivory, and Warm Taupe
  • Filbert and detail round brushes
  • Flat wash brush
  • Graphite pencil

How to Make It

  1. Basecoat: Apply two smooth coats of rich cream acrylic paint over the entire canvas. Allow it to dry fully.
  2. Sketch Outline: Lightly trace long, sweeping stems of eucalyptus, monstera, or olive branches using a graphite pencil. Focus on balanced composition and negative space.
  3. Block Color: Fill in the leaf shapes with sage green using a filbert brush, which naturally forms rounded leaf tips.
  4. Add Depth: Mix a touch of taupe into your sage green and paint subtle shadow lines along one side of the stems and leaf bases.
  5. Touch-Up: Clean up any edges with cream paint for crisp, clean lines.

Tips and Variations

  • Negative Space Flip: Paint the entire background sage green and render the botanical silhouettes in cream.
  • Framing: Pair this look with an unfinished oak floating frame to amplify the organic aesthetic.

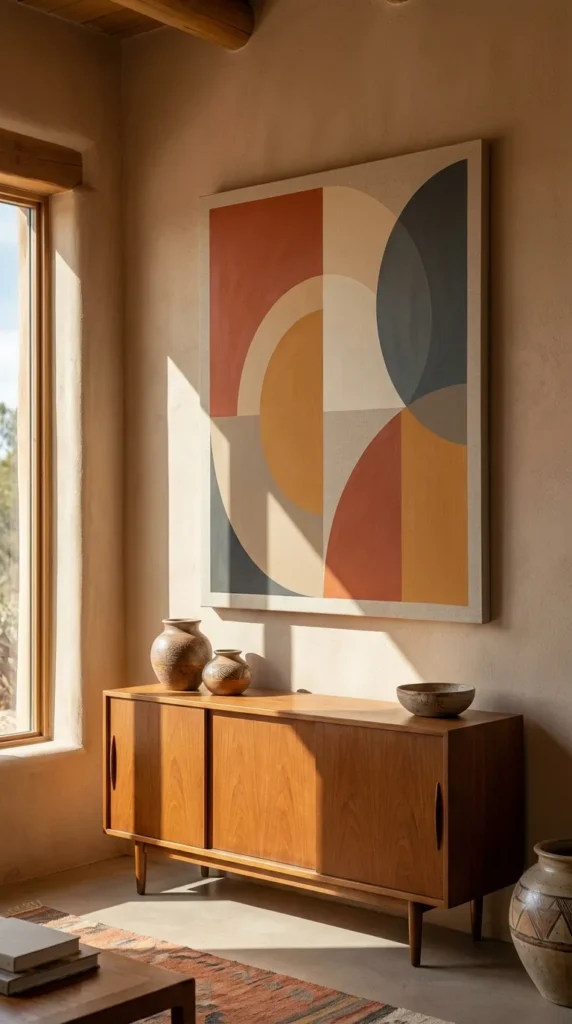
4. Abstract Terracotta & Ochre Color Block

Introduction

Terracotta, burnt orange, mustard ochre, and warm clay evoke Southwestern warmth, Mediterranean pottery, and mid-century modern design. Color block canvases bring energy, structure, and rich earthy tone to neutral walls.

What This Idea Means

Color blocking is about visual harmony, balance, and weight. It transforms abstract geometric shapes into a grounding visual center, balancing warm, energetic earth tones with cool or neutral backgrounds.

Materials Needed

  • Stretched canvas
  • Acrylic paints: Terracotta, Raw Sienna/Ochre, Sand Beige, Muted Charcoal
  • Painter’s delicate painter’s tape (FrogTape recommended)
  • Foam brushes or wide flat brushes
  • Ruler and pencil

How to Make It

  1. Plan the Design: Lightly mark intersecting geometric shapes (semicircles, triangles, rectangles) with a ruler and pencil.
  2. Tape Off Sections: Apply painter’s tape along your pencil lines. Press the edges firmly with your fingernail or a credit card to prevent paint bleed.
  3. Paint Shapes: Apply 2–3 coats of terracotta, ochre, and sand beige to their assigned geometric blocks.
  4. Peel Tape: Remove the tape while the last coat of paint is slightly damp for razor-sharp lines.
  5. Add Hand-Drawn Details: Optionally paint one shape freehand (like a half-moon) to break up rigid straight lines with organic warmth.

Tips and Variations

  • Muted Tones: Mix a drop of gray or brown into bright paints to keep the color palette grounded and vintage-inspired.
  • Curved Edges: Use a pin and string attached to a pencil to draw perfect circular arcs freehand.

5. Deep Midnight Indigo Wash with Constellations

Introduction

Atmospheric, mysterious, and deeply soothing, an indigo wash canvas creates a dramatic focal point. Adorned with delicate metallic gold constellations or splatters, it looks like a pocket of the night sky framed on your wall.

See also  12 Makeup Ideas Using the Athena Palette

What This Idea Means

This artwork speaks to wonder, night calm, and cosmic reflection. It brings the soothing qualities of dark, deep blues into spaces intended for rest and deep thought, such as bedrooms, reading nooks, or home offices.

Materials Needed

  • Stretched canvas
  • Acrylic or fluid paints: Midnight Blue, Deep Indigo, Black, Ultramarine, Titanium White
  • Fine metallic gold paint pen or gold fluid acrylic
  • Spray bottle with water
  • Wide hake brush and fine detail brush

How to Make It

  1. Wet the Canvas: Lightly mist your canvas with water using a spray bottle.
  2. Apply Ink/Paint Wash: Brush indigo, dark blue, and black paint across the canvas. Spritz more water to let the colors bleed, blend, and bloom organically across the surface.
  3. Create Depth: Dappled darker spots near the corners and keep the center slightly lighter to simulate a glowing nebula effect. Let dry completely.
  4. Paint Constellations: Use a fine-tip gold paint pen to trace actual celestial constellations (e.g., Orion, Ursa Major, or your zodiac sign) with delicate dots and thin connecting lines.
  5. Splatter Stars: Dip a stiff toothbrush in thin white or gold paint, and flick the bristles to create tiny, glittering starry specks.

Tips and Variations

  • Fluidity is Key: Don’t overthink the background wash; let fluid physics create natural pools and gradients.
  • Moon Phase Accent: Instead of stars, paint a textured gold or silver full moon right in the center.

6. Moody Emerald & Brass Fluid Marble

Introduction

Rich emerald greens combined with liquid brass or metallic bronze create an instant sense of moody opulence. Fluid marble paintings use pouring mediums to generate mesmerizing, swirling patterns that look like expensive cut stone or agate.

What This Idea Means

Fluid marble art mirrors natural geological beauty, fluid movement, and luxury. It brings a dramatic, hotel-chic ambiance into contemporary and modern art deco spaces.

Materials Needed

  • Canvas (preferably canvas board or tightly stretched canvas)
  • Acrylic pouring paints: Emerald Green, Deep Forest Green, Metallic Gold/Brass, Black, White
  • Acrylic Pouring Medium
  • Silicone oil (optional, for cell creation)
  • Cups and stirring sticks
  • Heat gun or small torch (optional)

How to Make It

  1. Mix Paints: Mix each acrylic color with pouring medium in separate cups (1 part paint to 2 parts medium) until it reaches the consistency of warm honey. Add 2 drops of silicone oil to each color except gold.
  2. Dirty Pour Method: Layer the colors sequentially into one large cup—emerald, black, gold, forest green, white—without stirring.
  3. The Pour: Tilt the cup over the center of the canvas and pour smoothly.
  4. Tilt & Spread: Pick up the canvas and tilt it slowly in circular motions, guiding the paint across all edges to cover the canvas entirely.
  5. Pop Bubbles: Pass a heat gun quickly over the surface to pop air bubbles and reveal glorious cell patterns. Let dry on a level surface for 48 hours.

Tips and Variations

  • Leveling: Ensure your drying table is 100% level, or the beautiful fluid pattern will slide off the canvas overnight.
  • Varnish: Top with a high-gloss pour-on resin for a glass-like polished marble finish.

7. Ethereal Watercolor Wildflowers

Introduction

Soft, loose, and delicate, watercolor-style floral paintings bring an airy freshness to any space. By using diluted acrylics or watercolor ground on canvas, you can create sweeping botanical stems that look like floating poetry.

What This Idea Means

This aesthetic captures impermanence, grace, and wild beauty. Loose floral art avoids strict realism, encouraging the viewer’s eye to fill in the details and feel the light breeze passing through meadow blooms.

Materials Needed

  • Canvas coated with Absorbent Ground (or standard matte white canvas)
  • Fluid acrylics or watercolor paints (Dusty rose, cornflower blue, olive green, warm ochre)
  • Soft round watercolor brushes (Sizes 6, 10, and 14)
  • Water jars and paper towels

How to Make It

  1. Prepare Surface: If using standard acrylic canvas, paint a layer of absorbent watercolor ground so the watercolor paint bleeds naturally without pooling slickly.
  2. Paint Stems: Wet your brush with sheer olive green paint and paint long, sweeping vertical curves up from the bottom of the canvas.
  3. Drop Petals: Load a large round brush with diluted dusty rose or cornflower blue. Touch the canvas softly, letting the brush belly create organic petal shapes.
  4. Wet-on-Wet Blending: Touch a damp brush with a darker shade to the base of the wet petals and watch the color bloom softly toward the tips.
  5. Detailing: Once dry, add micro-dots of yellow or brown ochre in the flower centers with a small detail brush.

Tips and Variations

  • Embrace Imperfection: Let colors run together where stems meet petals; these “happy accidents” make watercolor art charming.
  • Monochrome Meadow: Use only shades of sepia or indigo for a vintage illustration aesthetic.

8. Sculpted 3D Ribbon Waves

Introduction

Dynamic, tactile, and striking, 3D ribbon waves give your wall structural drama. Using modeling paste and specialized palette knives, you sculpt long, ribbon-like flowing waves that rise directly off the canvas plane.

What This Idea Means

Ribbon waves represent fluid energy, ocean movement, and modern sculptural art. This piece blurs the line between a traditional painting and a wall relief sculpture.

Materials Needed

  • Sturdy stretched heavy-duty canvas or wood panel
  • Heavy sculpturing modeling paste or 3D gel medium
  • Curved palette knives and flexible clay scrapers
  • Matte acrylic paint (Pure White, Sand, or Slate Gray)

How to Make It

  1. Apply Base Coat: Paint the canvas a solid matte background color.
  2. Load Modeling Paste: Scoop a generous, thick mound of modeling paste onto your palette knife.
  3. Sculpt Waves: Place the knife edge down firmly on the canvas and glide it across in an S-curve motion, tilting the knife slightly to lift one edge of the paste high into a raised ridge.
  4. Layer Ribbons: Repeat this process across the canvas, overlapping the base of previous ribbons so they appear to cascade over one another like flowing silk fabric.
  5. Dry Slowly: Allow the heavy paste to air-dry slowly over 24–48 hours to prevent cracking. Paint over with a protective coat once hardened.

Tips and Variations

  • Directional Lighting: Place this canvas near a window or beneath a wall sconce; the dramatic shadows highlight the sculptural ridges.
  • Gradient Tinting: Mix acrylic paint directly into your modeling paste before sculpting for rich through-color.

9. Vintage Neutral Linen & Charcoal Sketch

Introduction

Understated, rustic, and sophisticated, this aesthetic merges exposed raw textiles with loose, expressive charcoal or black paint sketches. It feels grounded, artisanal, and timelessly vintage.

What This Idea Means

This style celebrates texture, raw materials, and the beauty of unfinished, gestural art. It reminds us of a master artist’s private sketchbook page brought to life at a grand scale.

Materials Needed

  • Raw linen or canvas stretcher bar frame (or linen-toned canvas)
  • Willow charcoal sticks or black acrylic fluid paint
  • White gesso or chalk paint
  • Matte spray fixative
  • Wide brush and dry sponge

How to Make It

  1. Background Texture: Apply a thin, streaky wash of off-white chalk paint over parts of the raw linen canvas, allowing the natural brown fiber texture to show through in patches.
  2. Rough Gesture Sketch: Using a piece of willow charcoal, draw loose, swift gestural lines—such as a continuous line female silhouette, a minimalist vase, or abstract continuous loops.
  3. Smudge and Soften: Use a dry sponge or your fingers to smudge key lines, creating soft atmospheric shadows along the drawn edges.
  4. Highlight: Paint subtle brushstrokes of thick white gesso inside select areas of the sketch to make shapes pop.
  5. Fixing: Spray liberally with matte aerosol fixative to lock the charcoal down and prevent smudging.

Tips and Variations

  • Keep Hands Loose: Hold the charcoal stick at the far end rather than like a pencil for expressive, free-flowing line work.
  • Abstract Shapes: Draw simple intersecting circles or fluid gestures instead of figurative subjects.
See also  12 Valentine’s Day School Party Decorations for Kids Ideas

10. Golden Hour Horizon & Textured Sands

Introduction

A visual homage to coastal landscapes, this canvas combines warm golden hour sky tones with thick, sand-textured earth at the horizon. It evokes the feeling of standing on a serene beach at dusk.

What This Idea Means

It brings peace, horizon vistas, and nature’s quiet transitions into your home. The juxtaposition of smooth blended sky with gritty textured land creates rich visual interest.

Materials Needed

  • Large landscape canvas
  • Texture sand paste (or acrylic modeling paste mixed with real fine craft sand)
  • Acrylic paint (Soft amber yellow, warm coral, warm beige, soft warm white)
  • Palette knives and large blending flat brush

How to Make It

  1. Define Horizon: Draw a clean horizontal line across the lower third of the canvas.
  2. Paint Sky Gradient: Blend amber yellow at the horizon upwards into soft coral, then fading into warm cream at the top. Use long, horizontal brush strokes.
  3. Mix Sand Paste: Combine modeling paste with sand and beige paint until thick and grainy.
  4. Sculpt the Ground: Apply the sand mixture to the bottom third of the canvas with a palette knife, creating gentle textured ridges that mimic sand dunes or coastal tides.
  5. Add Sun Highlight: Dab a vibrant dot of warm off-white acrylic right on the horizon line and blend a soft aura around it.

Tips and Variations

  • Golden Leaf Horizon: Lay a ultra-thin strip of gold foil directly along the horizon line for a sunlit shimmering effect.
  • Cool Tone Coastal: Swap warm sunset tones for misty blues, grays, and wet sea foam sands.

11. Japandi Wabi-Sabi Tonal Brushstrokes

Introduction

Rooted in the Japanese philosophy of Wabi-Sabi (finding beauty in imperfection), this style relies on bold, deliberate, rustic brushstrokes applied over textured neutral backdrops. It fits perfectly into Japandi, organic modern, and minimalist spaces.

What This Idea Means

This artwork is an exercise in mindfulness, restraint, and intentional movement. A single, confident, imperfect stroke captures breath, energy, and presence.

Materials Needed

  • Square or vertical stretched canvas
  • Textured plaster base or coarse gesso
  • Dark charcoal, deep taupe, or warm black acrylic paint
  • Very wide calligraphy brush or large wall painting brush
  • Water Jars

How to Make It

  1. Base Preparation: Coat the canvas in coarse gesso or joint compound, leaving visible, rustic brush marks across the surface. Let dry.
  2. Color Choice: Prepare a dark, muted shade—never pure jet black; prefer charcoal or dark warm bronze-black.
  3. Execute the Stroke: Load your wide brush heavily with paint mixed with a little water. Take a deep breath and sweep one or two continuous strokes across the canvas (such as an Enso circle, a bold diagonal, or a single sweeping arc).
  4. Embrace Dry Brush Marks: Allow the brush bristles to dry out slightly toward the end of the stroke, leaving natural streaky gaps (dry brush effect).
  5. Leave As Is: Resisting the urge to fix or repaint the stroke is the essence of Wabi-Sabi.

Tips and Variations

  • Asymmetry: Offset your brushstroke toward one side or corner to honor asymmetrical balance.
  • Natural Pigments: Try using natural walnut ink or brewed coffee washes for an authentic, aged organic warmth.

12. Subtle Blush & Champagne Geometric Balance

Introduction

Elegant, gentle, and modern, this concept combines soft pastel blush, pale champagne tones, and delicate geometric lines. It creates a serene visual harmony that elevates chic, contemporary rooms.

What This Idea Means

Geometric balance represents order, elegance, and calm symmetry. The soft feminine palette softens the hard lines of geometry, creating a piece that feels both structured and tender.

Materials Needed

  • Canvas
  • Acrylics: Pale Blush Pink, Champagne/Nude Beige, Soft Warm Gray, Gold metallic paint
  • Painter’s tape
  • Fine paint pens (Gold or white)
  • Soft flat brushes

How to Make It

  1. Background Coat: Paint the canvas a soft champagne nude color.
  2. Map Out Forms: Tape off soft overlapping geometric shapes—half-circles, slender triangles, or stacked rectangles.
  3. Apply Soft Colors: Paint one section in pale blush, another in warm gray, and leave portions of the champagne base visible.
  4. Add Metallic Accents: Paint one small, focal element (like a small circle or thin divider line) in metallic gold.
  5. Linework: Use a fine gold paint pen to trace delicate accent lines through the shapes for a refined graphic finish.

Tips and Variations

  • Matte & Gloss Mix: Use matte paint for the color blocks and high-gloss varnish on the gold accents for beautiful light reflection contrast.

13. Monochromatic Black & White High-Contrast Texture

Introduction

Bold, dramatic, and unmistakably modern, a high-contrast black-and-white textured canvas makes a powerful statement. It skips color entirely to focus purely on dramatic form, deep shadows, and stark lines.

What This Idea Means

This idea embodies clarity, strength, and timeless modernity. It provides strong visual grounding in neutral or white-walled rooms, creating an anchor point for the entire interior.

Materials Needed

  • Canvas
  • Matte Black acrylic paint
  • Pure Titanium White paint
  • Thick gel medium or joint compound
  • Comb tool, heavy palette knife, or notched trowel

How to Make It

  1. Divide Canvas: Visually divide your canvas into dramatic contrasting sections (e.g., a bold diagonal split or a sharp offset square).
  2. Texturize One Side: Apply heavy gel medium to one section and carve heavy, sharp parallel ridges into it using a notched comb tool.
  3. Paint Deep Black: Once dry, paint the textured section with rich, deep matte black, ensuring the paint coats deep down into every crevice.
  4. Paint Smooth White: Paint the remaining section smooth, pristine titanium white.
  5. Crisp Edge: Ensure the border where white meets textured black is razor-sharp using painter’s tape or a fine edge knife.

Tips and Variations

  • Shattered Geometry: Cut the black and white sections into multi-faceted geometric shapes across the canvas plane.

14. Celestial Moon Phase Splatter Art

Introduction

Enchanting and cosmic, depicting the glowing phases of the moon across a dark atmospheric canvas brings a poetic, nocturnal charm to any bedroom or creative studio space.

What This Idea Means

Moon phases symbolize transformation, cycles, intuition, and passage of time. This piece reminds us of nature’s constant rhythmic evolution.

Materials Needed

  • Long horizontal or tall vertical canvas
  • Acrylics: Charcoal black, Navy blue, Titanium white, Pale yellow/silver
  • Stencil or round object (like a bowl or jar lid) to trace circles
  • Sponge, toothbrush, and detail brush

How to Make It

  1. Cosmic Backdrop: Paint the background dark charcoal fading into deep navy. Dappling white paint lightly with a sea sponge in the center to build a soft glowing lunar haze.
  2. Trace Moon Orbs: Lightly sketch 5 or 7 aligned circles across the canvas representing the moon’s progression (New Moon to Full Moon to Waning Moon).
  3. Texture the Moons: Sponge a mixture of white, silver, and pale yellow onto the full moon circle to mimic craters and lunar seas (maria).
  4. Paint Phases: Paint shadowy black crescents over the outer circles to construct waxing and waning shapes.
  5. Final Splatter: Flick thin white acrylic paint off a toothbrush to cover the background in fine, glowing cosmic stardust.

Tips and Variations

  • Real Metallic: Use real silver leaf or iridescent pearl acrylics for the lit portions of the moon phases so they catch evening room lighting.

15. Bohemian Arch with Pressed Dried Floral Impressions

Introduction

Blending painted graphics with natural 3D elements, this aesthetic features a soft bohemian arch background decorated with real pressed dried flowers, leaves, or palm spears attached directly to the canvas.

What This Idea Means

This artwork bridges the gap between botanical preservation and modern graphic art. It feels free-spirited, tactile, warm, and deeply earthy.

Materials Needed

  • Canvas
  • Muted paint colors: Terracotta, Ochre, Mustard, or Rust
  • Real dried pressed flowers (Eucalyptus, baby’s breath, fern fronds, or mini palm spears)
  • Clear matte decoupage glue (Mod Podge) or clear craft resin
  • Flat paintbrushes
See also  10 Amazing Face Painting for Kids Ideas

How to Make It

  1. Paint the Arch: Freehand or tape off a large painted arch in the center of the canvas using terracotta or rust paint.
  2. Arrange Florals: Arrange your dried pressed flowers over the painted arch on the dry canvas until you find a pleasing, organic composition.
  3. Glue Florals down: Carefully brush a thin layer of decoupage glue on the back of each pressed botanical element and press them firmly onto the canvas.
  4. Seal: Brush a gentle protective coat of clear matte decoupage sealer over the tops of the dried plants to seal them against dust and moisture.

Tips and Variations

  • 3D Dried Bouquet: Instead of flat pressed flowers, attach small 3D dried bunny tails or pampas grass using a clear hot glue gun for extra dimension.

16. Soft Ombré Dusk Gradient

Introduction

Simple yet breathtakingly effective, a seamless ombré gradient canvas shifts softly from one rich color to another. It delivers a calming, atmospheric wash of color without distracting lines or heavy figures.

What This Idea Means

Gradient art represents fluidity, transitions, and pure color field appreciation. It acts as a soothing visual diffuser in modern rooms, setting a gentle ambient mood.

Materials Needed

  • Stretched canvas
  • Acrylic colors (e.g., Deep plum to dusty violet to peach cream)
  • Acrylic blending medium or retarder (keeps paint wet longer)
  • Large wide blending brushes (Hake brushes work wonderfully)

How to Make It

  1. Apply Paint Bands: Squeeze horizontal strips of paint across your canvas: dark plum at the bottom, dusty violet in the middle, peach cream at the top.
  2. Mix Blending Medium: Mix a little acrylic retarder into the paint on the canvas to slow down drying time.
  3. Blend Horizontally: Sweep a wide, clean hake brush back and forth horizontally along the borders where the colors meet, slowly blending the transition until no hard lines remain.
  4. Feather Edges: Use light, feather-soft vertical strokes if needed to blend further, then finish with long horizontal passes.
  5. Varnish: Seal with a satin varnish to unify the sheen across all blended colors.

Tips and Variations

  • Vertical Ombré: Blend colors vertically from side-to-side instead of top-to-bottom for a fresh, contemporary orientation.

17. Modern Minimalist Typographic Quote with Gold Foil

Introduction

Combine inspiring words with sleek modern graphic design. A typographic canvas features a subtle, meaningful word or phrase (e.g., “Amor Fati”, “Solitude”, “Breathe”, or coordinates) rendered in crisp modern serif font with metallic accents.

What This Idea Means

It serves as a personal daily reminder, affirmation, and poetic visual anchor. It combines literary beauty with high-end graphic interior styling.

Materials Needed

  • Canvas
  • Background acrylic paint (Muted olive, charcoal, or off-white)
  • Carbon transfer paper
  • Printed font template from computer
  • Gold leaf gilding kit or metallic gold gel pen

How to Make It

  1. Background: Paint your canvas a smooth, solid matte background color and let it dry.
  2. Transfer Typography: Print your chosen phrase in an elegant serif font (like Cormorant Garamond or Bodoni). Place carbon paper under the printout on the canvas and trace the letter outlines with a hard pencil.
  3. Fill Letters: Paint inside the traced letter outlines using gold leaf adhesive size or a fine metallic gold paint pen.
  4. Gilding: If using gold leaf, apply the foil sheets over the tacky glue size, press down gently, and dust away excess foil with a soft brush.
  5. Touch Up: Clean up letter edges with a tiny detail brush dipped in background paint for razor-sharp typography.

Tips and Variations

  • Subtle Tone-on-Tone: Paint the typography just one shade darker or lighter than the background for an ultra-subtle, sleek look.

18. Abstract Ocean Wave Foam & Turquoise Resins

Introduction

Bring the vibrant power of the sea into your living room with rich ocean turquoise acrylics combined with lacy white foam cells made with silicone or heat-manipulated pouring techniques.

What This Idea Means

This style represents vitality, refreshing coastal energy, depth, and movement. It turns a blank canvas into a dynamic window overlooking surging ocean waves.

Materials Needed

  • Canvas or wooden gallery board
  • Acrylics: Deep Navy, Turquoise, Teal, White
  • Pouring medium
  • White alcohol ink or cell-activator liquid
  • Heat gun or hair dryer with a concentrator nozzle

How to Make It

  1. Layer Ocean Depths: Paint the top half dark navy, transitioning into rich turquoise and clear teal toward the bottom edge.
  2. Pour White Line: Mix white acrylic paint with pouring medium and a drop of alcohol ink. Pour a thick horizontal line along the boundary between dark and light blue.
  3. Blow Foam Waves: Point a hair dryer or heat gun at low speed towards the white line, blowing the white paint over the wet blue paint in feather-thin ribbons to create ocean foam edges.
  4. Form Cells: Watch as the blown white paint creates lacy, reticulated foam patterns over the blue base.
  5. Dry Flat: Allow to cure on a flat, level surface.

Tips and Variations

  • Add Real Beach Sand: Glue actual beach sand along the very bottom edge of the canvas before pouring your blue wave transitions.

19. Ethereal Forest Mist Wash

Introduction

Moody, serene, and atmospheric, this idea uses soft, watery washes of pine green, fog gray, and muted slate to create a misty pine forest silhouette rising out of atmospheric haze.

What This Idea Means

It evokes the quiet, quiet solitude of early morning mountain forests, bringing a peaceful natural escape and deep breathing room into high-stress home environments.

Materials Needed

  • Canvas
  • Acrylic paints: Deep Forest Green, Slate Gray, Soft Mist White, Sepia
  • Spray water bottle
  • Fan brush and large mop brush

How to Make It

  1. Misty Background: Paint the upper two-thirds in soft mist white and pale gray. Spritz with water to keep the wash soft and dreamy.
  2. Distant Trees (Light Gray): Using a fan brush dipped in pale gray, dab the shapes of distant evergreen treetops. Mist with water so they bleed softly into the background haze.
  3. Mid-ground Trees (Medium Green-Gray): Layer a second row of pine trees below the first using a slightly darker muted green, keeping tree bases soft and blurry.
  4. Foreground Trees (Dark Forest Green): Paint sharp, detailed pine tree silhouettes in the foreground using dark, rich forest green and crisp fan brush strokes.
  5. Add Light Rays: Softly dry-brush sheer white diagonal lines coming down from one top corner to simulate sunbeams piercing the forest fog.

Tips and Variations

  • Minimalist Horizon: Keep details to an absolute minimum—let the misty atmospheric washes do most of the visual work.

20. Minimalist Grid Pattern with Textured Paste

Introduction

Structured yet warm, a minimalist grid canvas features subtle raised plaster lines formed into neat square or rectangular grids over a warm neutral background. It combines geometric precision with tactile organic warmth.

What This Idea Means

Grid art stands for balance, order, spatial clarity, and modern architectural design. The subtle hand-carved quality softens what could otherwise be a rigid mathematical pattern.

Materials Needed

  • Canvas
  • Joint compound or heavy modeling paste
  • Long metal ruler / T-square
  • Stylus tool, wooden skewer, or notched grid comb
  • Neutral chalk paint (Warm Oatmeal or Greige)

How to Make It

  1. Apply Paste: Spread a smooth 1/8-inch layer of joint compound over the canvas surface.
  2. Mark Grid Lines: Using a long ruler as a guide, gently drag a stylus tool or wooden skewer through the wet paste to carve neat horizontal and vertical grid lines (e.g., 2-inch or 3-inch squares).
  3. Clean Grid Borders: Gently wipe away squeezed-up paste at the ends of the lines.
  4. Let Dry: Allow the plaster to dry completely for 24 hours. Lightly sand away any sharp roughness.
  5. Paint: Seal and finish the entire canvas with two coats of warm oatmeal or greige chalk paint.

Tips and Variations

  • Offset Grid: Experiment with asymmetrical rectangular grids (Mondrian-style layouts) instead of uniform squares.
  • Two-Tone Grid: Paint inside every alternating grid square with a slightly darker shade for a subtle checkerboard pattern.

By Alexis