
As the crisp autumn breeze begins to sweep through the trees and the leaves transform into a breathtaking canopy of gold, amber, and crimson, our desire for cozy, handmade comfort naturally intensifies. Autumn is the ultimate season for crochet enthusiasts, inviting rich color palettes, tactile stitches, and functional pieces that bring both warmth and rustic elegance to our living spaces and daily wardrobes. Whether you want to refresh your interior décor for harvest gatherings or wrap yourself in stylish layers as the temperature drops, these 20 elegant crochet autumn ideas offer endless inspiration.
Explore these detailed breakdowns, complete with material lists, step-by-step instructions, pro design tips, and creative variations to guide your next seasonal crafting session!



1. The Rustic Tweed Pumpkin Centerpiece
Brief Introduction
Charming, sophisticated, and wonderfully textured, the Rustic Tweed Pumpkin Centerpiece brings the timeless beauty of the harvest patch indoors without the mess of real gourds.
What This Idea Means
This project utilizes textured tweed yarns and simple shaping techniques to create sculptural, heirloom-quality pumpkins complete with cinnamon stick stems and natural jute twine details, making them ideal for fall tablescapes.
What is Needed to Make That Thing
- Yarn: 1 skein of aran or worsted-weight tweed yarn in burnt orange, oatmeal, or olive green.
- Hook Size: 5.0 mm (H-8) crochet hook.
- Notions: Polyfill stuffing, a real cinnamon stick or wooden stem, jute twine, and a tapestry needle.
How to Make It
- The Rectangle Panel: Crochet a wide rectangular panel using flat back-and-forth rows of half double crochet in the back loop only to create vertical ribbing.
- Seaming the Tube: Seam the short ends together using a mattress stitch to form an open cylinder tube.
- Cinching the Bottom: Weave a strong yarn tail through the bottom edge stitches and pull tight to close the base securely.
- Stuffing and Shaping: Stuff the pumpkin firmly with polyfill, then pull the top edge closed tightly and knot it.
- Creating Segments: Wrap jute twine tightly around the vertical grooves of the pumpkin multiple times to pull and sculpt the classic segmented gourd shape. Secure with a cinnamon stick stem glued into the top center.
Tips and Variations
- Tip: Add a handful of dried beans or poly-pellets to the very bottom of the pumpkin before stuffing to give it a weighted, stable base.
- Variation: Make a trio of pumpkins in varying heights and complementary autumn hues to style together on a mantelpiece.
2. The Amber Gradient Fall Leaf Garland
Brief Introduction
Delicate, vibrant, and bursting with seasonal color, the Amber Gradient Fall Leaf Garland strings together handcrafted maple and oak leaves to celebrate nature’s autumn transformation.
What This Idea Means
This project serves as a versatile interior decoration that can be draped across a fireplace mantel, hung over a bookshelf, or styled along a dining room table for Thanksgiving dinner.
What is Needed to Make That Thing
- Yarn: Small scrap amounts of DK or sport-weight cotton yarn in mustard, burnt orange, burgundy, and golden yellow.
- Hook Size: 3.5 mm (E-4) crochet hook.
- Notions: Tapestry needle, scissors, and a long length of jute twine or crocheted chain for stringing.
How to Make It
- Leaf Foundation: Chain a small foundation row following a specific leaf pattern chart (incorporating slip stitches, half double crochets, and treble crochets to form pointed lobes).
- Shaping the Edges: Work picot stitches along the tips of the leaf points to create sharp, realistic leaf outlines.
- Stem Creation: End each leaf with a short chain stem. Make 15 to 20 leaves in varying gradient shades.
- Assembly: Weave the finished leaves securely onto a long, rustic jute twine string or a long crocheted chain at regular intervals.
- Hanging: Secure loops at both ends of the garland for easy mounting on walls or mantels.
Tips and Variations
- Tip: Lightly starch or stiffen the finished leaves with a fabric stiffener spray so they hold their flat shape perfectly without curling.
- Variation: Mix in crocheted acorns or tiny pumpkins along the garland strand for added texture.
3. The Cinnamon Spice Ribbed Slouchy Beanie
Brief Introduction
Cozy, stylish, and effortlessly chic, the Cinnamon Spice Ribbed Slouchy Beanie is designed to keep you warm while complementing your favorite fall jackets and scarves.
What This Idea Means
This hat focuses on stretchy, elastic vertical ribbing that hugs the head comfortably while offering a relaxed, slouchy silhouette at the crown.
What is Needed to Make That Thing
- Yarn: 1 to 2 skeins of worsted-weight wool-blend yarn in rich cinnamon, terracotta, or rust.
- Hook Size: 5.0 mm (H-8) crochet hook.
- Notions: Tapestry needle, measuring tape, and an optional faux-fur pom-pom.
How to Make It
- The Ribbed Band: Work a long strip of vertical ribbing (using slip stitches or half double crochets in the back loop only) matching your head circumference.
- Joining the Band: Slip stitch the short ends of the ribbed band together to form a seamless hat band.
- Working Upward: Pick up stitches along the edge of the band and work circular rounds of half double crochet or thermal stitch upward.
- Crown Decrease: Gradually decrease stitches evenly across the top four rows to taper the hat toward the crown.
- Cinch and Finish: Thread a yarn tail through the final remaining stitches, pull tight to close, and attach a pom-pom if desired.
Tips and Variations
- Tip: Choose a superwash wool blend to ensure your beanie is soft against the forehead and machine washable.
- Variation: Fold the brim upward for a snugger, double-layered ear-warmer fit.
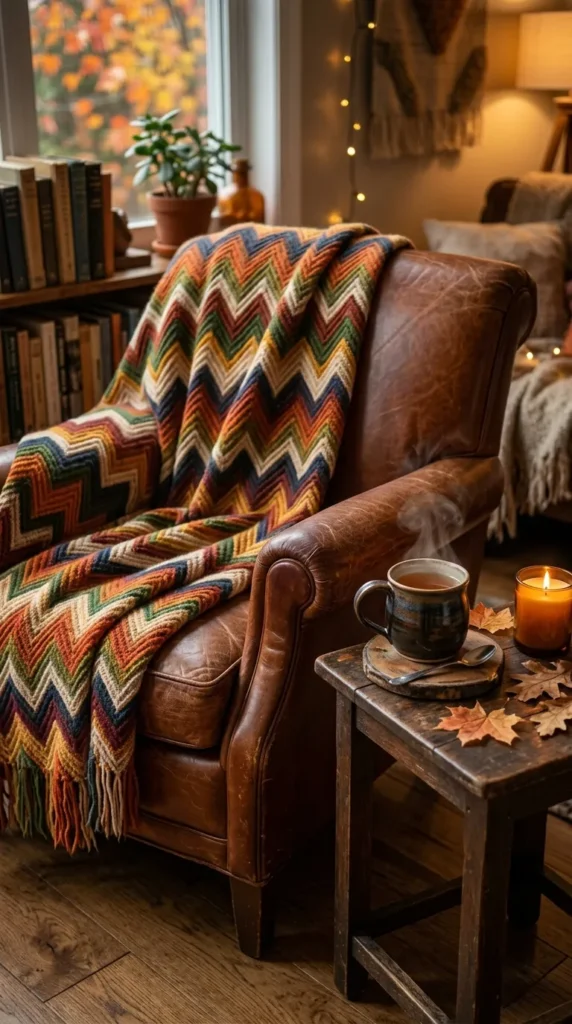
4. The Harvest Festival Chevron Throw Blanket
Brief Introduction
Warm, expansive, and richly colored, the Harvest Festival Chevron Throw Blanket features sharp zig-zag waves in a gorgeous palette of autumn harvest tones.
What This Idea Means
The chevron stitch creates natural peaks and valleys that provide a rhythmic, meditative crochet experience and a stunning geometric result that anchors autumnal living room decor.
What is Needed to Make That Thing
- Yarn: 6 to 7 skeins of worsted-weight yarn in cream, mustard, rust, olive, and chocolate brown.
- Hook Size: 5.5 mm (I) crochet hook.
- Notions: Tapestry needle and scissors.
How to Make It
- Foundation Chain: Chain a multiple of the chevron pattern repeat plus turning chains to reach your desired throw width (approx. 45 inches).
- Establishing the Ripple: Work rows of double crochet, incorporating strategic increases at the peaks and decreases at the valleys to form the zig-zag waves.
- Striping Sequence: Change colors every 2 to 4 rows to create clean, rhythmic horizontal autumn stripes.
- Length Adjustment: Continue repeating rows until the blanket reaches your desired rectangular length (approx. 60 inches).
- Border: Add a clean single crochet border along the top and bottom edge to straighten the initial foundation and final row.
Tips and Variations
- Tip: Count your stitches carefully at the end of every single row—chevron increases and decreases are easy to miscount if distracted!
- Variation: Use a self-striping gradient yarn cake to let the zig-zags shift colors automatically without cutting yarn tails.
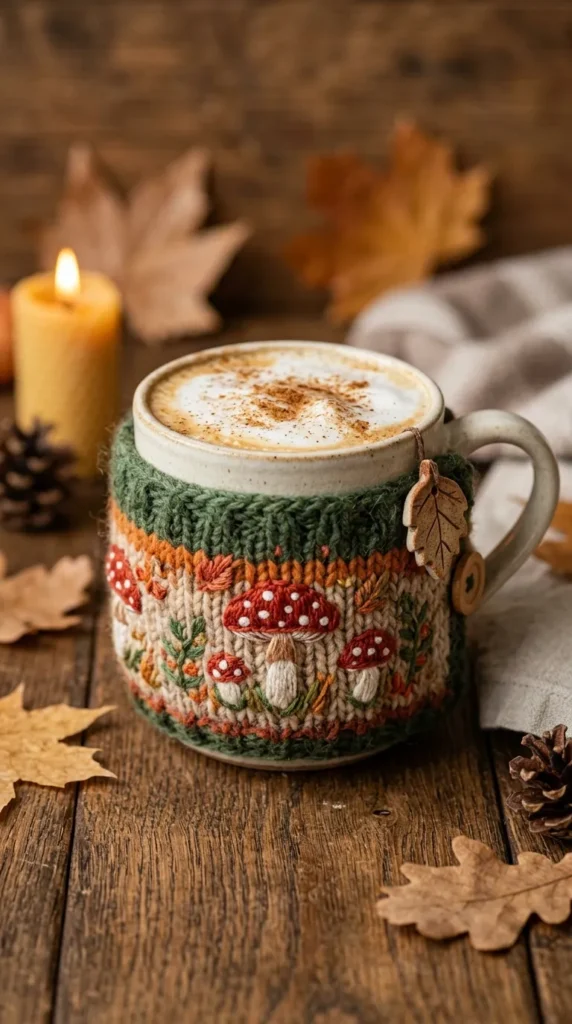
5. The Cozy Woodland Mushroom Mug Cozy
Brief Introduction
Whimsical and functional, the Cozy Woodland Mushroom Mug Cozy keeps your hands protected while sipping hot pumpkin spice lattes on chilly autumn mornings.
What This Idea Means
This quick weekend project wraps your favorite ceramic mug in a textured band featuring a charming red-and-white toadstool mushroom motif.
What is Needed to Make That Thing
- Yarn: Small amounts of worsted-weight cotton yarn in cream, crimson red, and forest green.
- Hook Size: 4.0 mm (G-6) crochet hook.
- Notions: A small wooden button, tapestry needle, and your favorite mug.
How to Make It
- Band Foundation: Chain a length that wraps snugly around the body of your mug just under the handle, then join in the round or work flat with a button loop.
- Textured Body: Work rows of half double crochet in cream yarn to form the background cylinder.
- Mushroom Appliqué: Crochet a small red toadstool cap with white embroidered spot dots, then attach it to the center of the cozy band.
- Button Fastening: Attach a small wooden button on one end to secure the cozy around the mug handle securely.
- Finishing: Weave in all loose ends cleanly.
Tips and Variations
- Tip: Always use 100% cotton yarn for mug cozies so the material is heat-resistant and washable.
- Variation: Add miniature embroidered green moss or tiny leaves around the base of the mushroom.
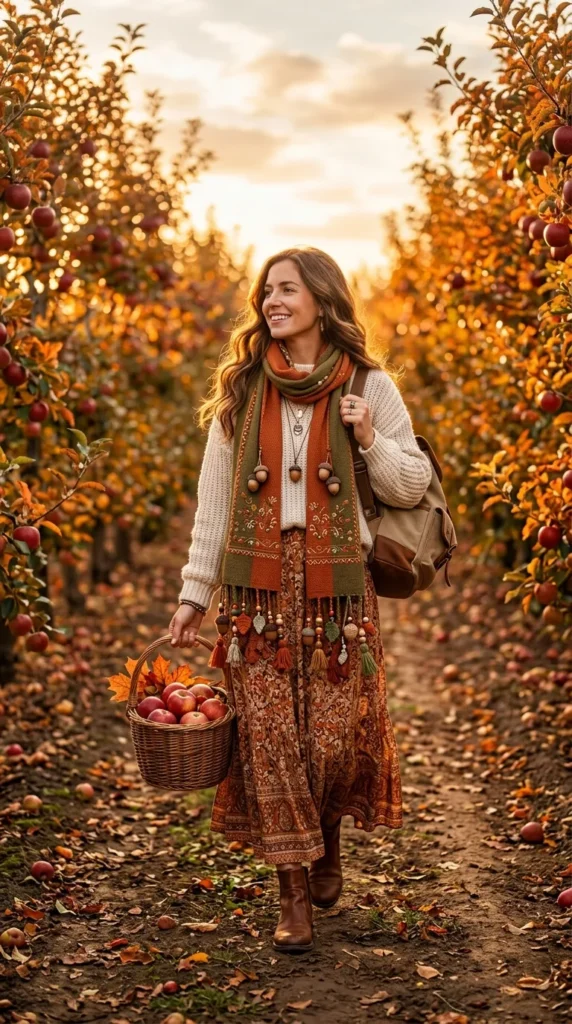
6. The Acorn Accented Boho Scarf
Brief Introduction
Textured, free-spirited, and elegantly draped, the Acorn Accented Boho Scarf features delightful crocheted acorn charms dangling from its fringed ends.
What This Idea Means
Combining rich stitch textures with playful 3D accessories, this scarf brings festival fashion and autumn woodland charm together into one wearable statement piece.
What is Needed to Make That Thing
- Yarn: 4 skeins of chunky or aran-weight yarn in oatmeal, bronze, and dark brown.
- Hook Size: 6.0 mm (J-10) crochet hook.
- Notions: Tapestry needle, scissors, and a cardboard template for fringe.
How to Make It
- Scarf Body: Work in rows of an alternating moss stitch or textured basketweave stitch using oatmeal yarn to create a warm, drapey fabric.
- Crafting Acorns: Crochet small textured acorn caps in dark brown and rounded nut bodies in bronze, stuffing them slightly before closing.
- Attaching Charms: Secure the crocheted acorns to the ends of the scarf using sturdy yarn tails.
- Fringe Addition: Add thick bundles of matching fringe alongside the acorn charms for a rich bohemian finish.
- Blocking: Lightly steam block the scarf to relax the stitches.
Tips and Variations
- Tip: Ensure the acorn caps are securely stitched to the nut bodies so they don’t detach with wear.
- Variation: Make a matching headband featuring smaller acorn appliqués.
7. The Golden Hour Honeycomb Shawl
Brief Introduction
Lush, geometric, and breathtakingly elegant, the Golden Hour Honeycomb Shawl wraps you in a warm triangle of intricate hexagonal lace stitches.
What This Idea Means
Using honey-yellow and amber yarn, this shawl mimics the structure of a natural honeycomb, offering a lightweight yet incredibly warm layering piece for autumn evenings.
What is Needed to Make That Thing
- Yarn: 3 to 4 skeins of fingering or sport-weight merino wool in golden honey or amber.
- Hook Size: 4.5 mm (7) crochet hook.
- Notions: Tapestry needle and blocking pins.
How to Make It
- Top-Down Triangle: Start with a magic ring at the top center back, working increasing rows outward to form a wide triangle shawl.
- Honeycomb Stitch Pattern: Incorporate linked treble crochets and chain spaces to build the interlocking hexagonal honeycomb grid.
- Expanding Wings: Continue increasing at the center spine and outer edges until the shawl reaches your desired wingspan.
- Border Trim: Finish with a delicate picot edge along the bottom triangular point.
- Aggressive Blocking: Wet block the shawl aggressively on foam mats to open up the honeycomb lace windows.
Tips and Variations
- Tip: Merino wool blocks exceptionally well and will give your honeycomb stitches crisp, defined geometry.
- Variation: Add small crocheted bees hovering near the border for an adorable thematic touch.


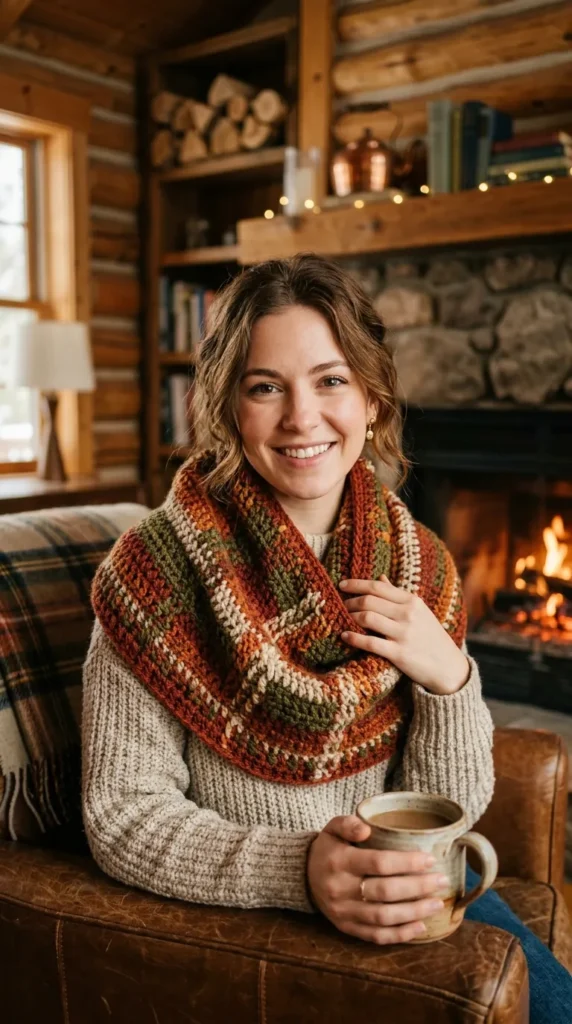

8. The Plaid Flannel Look Crochet Cowl
Brief Introduction
Rugged, cozy, and stylishly classic, the Plaid Flannel Look Crochet Cowl replicates the iconic appearance of traditional plaid flannel shirts using clever colorwork.
What This Idea Means
By working single crochets and layering surface slip-stitch grid lines, this cowl creates a faux-plaid illusion that looks complex while remaining approachable to make.
What is Needed to Make That Thing
- Yarn: Worsted-weight yarn in forest green, navy, red, and black.
- Hook Size: 5.0 mm (H-8) crochet hook.
- Notions: Tapestry needle and scissors.
How to Make It
- Cowl Foundation: Chain a circumference that fits comfortably around your neck, then join in the round.
- Solid Background: Work circular rows of single crochet in forest green as your base fabric.
- Surface Slip Stitching: Use a contrasting black and red yarn to work surface slip-stitch grids vertically and horizontally across the fabric to form the plaid check pattern.
- Height Adjustment: Continue working rows until the cowl reaches chin height.
- Border Trim: Add a ribbed border along the top and bottom edges.
Tips and Variations
- Tip: Keep your surface slip stitches loose and elastic so the cowl retains its natural stretch.
- Variation: Use traditional autumn buffalo plaid colors like black, grey, and burnt orange.
9. The Vintage Farmhouse Pumpkin Wreath
Brief Introduction
Welcoming and stylish, the Vintage Farmhouse Pumpkin Wreath combines a rustic grapevine ring with handcrafted crochet pumpkins and autumn foliage for your front door.
What This Idea Means
It sets an inviting, seasonal tone for guests before they even step inside your home, blending natural textures with handmade yarn artistry.
What is Needed to Make That Thing
- Yarn: Assorted worsted-weight yarns in cream, burnt orange, and sage green.
- Hook Size: 4.5 mm (7) crochet hook.
- Notions: 12-inch grapevine wreath base, floral wire, hot glue gun, and a burlap bow.
How to Make It
- Crochet Gourds: Make 3 to 4 small pumpkins in varying sizes and colors following basic stuffed pumpkin patterns.
- Crochet Foliage: Make a set of large autumn oak and maple leaves in sage green and mustard.
- Arranging on Wreath: Position the grapevine wreath flat and arrange your pumpkins and leaves in an asymmetrical cluster on the lower side.
- Securing Elements: Secure the pumpkins and leaves firmly to the grapevine base using floral wire and hot glue.
- Hanging Loop: Tie a burlap ribbon bow at the top of the wreath with an integrated hanging loop.
Tips and Variations
- Tip: Use sturdy floral wire pushed through the base of the pumpkins to anchor them firmly into the thick grapevine branches.
- Variation: Add wooden letter cutouts spelling “FALL” or “GATHER” in the center of the wreath.
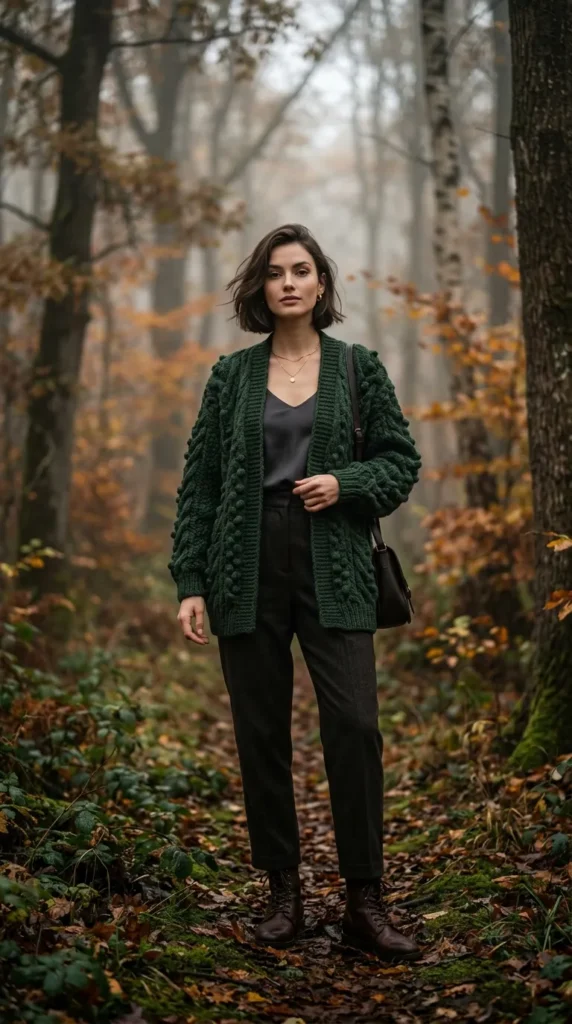
10. The Twilight Forest Bobble Stitch Cardigan
Brief Introduction
Luxurious, warm, and packed with tactile charm, the Twilight Forest Bobble Stitch Cardigan features rows of raised textured bobbles that evoke forest berries.
What This Idea Means
This garment combines structural warmth with delightful tactile play, making it a statement layering piece for chilly autumn days spent apple picking or visiting pumpkin patches.
What is Needed to Make That Thing
- Yarn: 6 to 8 skeins of bulky-weight wool yarn in deep forest green or twilight plum.
- Hook Size: 6.0 mm (J-10) crochet hook.
- Notions: 5 large wooden buttons, tapestry needle, and measuring tape.
How to Make It
- Yoke and Panels: Work top-down with raglan increases to shape the shoulders and sleeves seamlessly.
- Body and Bobbles: Incorporate bobble stitches at regular intervals in the lower body rows to create a raised berry texture.
- Sleeves: Work the sleeves in the round, tapering down to a ribbed wrist cuff.
- Buttonbands: Add sturdy ribbed front button bands along the cardigan opening.
- Button Attachment: Sew large wooden buttons securely through the pre-made buttonhole spaces.
Tips and Variations
- Tip: Bulky yarn makes this cardigan work up faster than expected, but be mindful of total garment weight.
- Variation: Use contrasting cream-colored yarn for the bobbles to make them pop like berries against green foliage.
11. The Crimson Berry Lace Table Runner
Brief Introduction
Exquisite, delicate, and deeply traditional, the Crimson Berry Lace Table Runner adds a touch of harvest elegance to your dining room table.
What This Idea Means
This project utilizes fine cotton thread and intricate lacework patterns interspersed with raised bobble “berries” to create a stunning centerpiece for autumn dinners.
What is Needed to Make That Thing
- Yarn: 3 spools of size 3 crochet cotton or fine fingering-weight bamboo yarn in deep burgundy or crimson.
- Hook Size: 3.5 mm (E-4) crochet hook.
- Notions: Tapestry needle and blocking pins.
How to Make It
- Foundation Chain: Chain a multiple of pattern repeats to reach your desired table runner length.
- Lace and Berries: Work rows of openwork mesh lace interspersed with textured bobble stitch clusters representing autumn berries.
- Growing the Width: Continue repeating pattern rows until the runner reaches your desired width (approx. 14 inches).
- Border Trim: Finish the entire outer perimeter with a delicate scalloped shell border.
- Blocking: Wet block the finished runner aggressively on a blocking mat to open up the lace windows and crisp up the berries.
Tips and Variations
- Tip: Starch the runner lightly after blocking so it lays perfectly flat on wooden dining tables.
- Variation: Use natural unbleached linen cotton yarn for a rustic farmhouse aesthetic.
12. The Chestnut Brown Thermal Fingerless Gloves
Brief Introduction
Practical, snug, and stylishly textured, the Chestnut Brown Thermal Fingerless Gloves keep your hands warm while leaving your fingers free for typing or holding a hot mug.
What This Idea Means
Using a dense thermal stitch, these gloves create a thick, insulated fabric that blocks out the biting autumn wind while offering complete finger dexterity.
What is Needed to Make That Thing
- Yarn: 1 skein of DK or worsted-weight wool yarn in rich chestnut brown.
- Hook Size: 4.0 mm (G-6) crochet hook.
- Notions: Tapestry needle and stitch markers.
How to Make It
- Cuff Foundation: Work a short ribbed cuff band that fits comfortably around your wrist.
- Thermal Stitch Body: Pick up stitches and work circular rows of the thermal stitch (working into back loops and dropped lower loops) to create a thick, corrugated fabric.
- Thumb Gusset: Leave a gap for the thumb opening by chaining and skipping stitches on round four.
- Thumb Guard: Work a short thermal tube around the thumb opening to complete coverage.
- Finishing: Finish edges with a neat slip stitch trim.
Tips and Variations
- Tip: Thermal stitch creates a stiff fabric initially; choose a soft merino wool so it softens comfortably with wear.
- Variation: Add faux-leather buttons along the wrist cuff for a refined tailored look.
13. The Sunflower Fields Granny Square Pillow
Brief Introduction
Bright, cheerful, and bursting with late-summer-to-autumn warmth, the Sunflower Fields Granny Square Pillow brings golden floral beauty into your living room decor.
What This Idea Means
This pillow cover features large, textured sunflower motifs framed by neutral square borders, creating a striking statement piece for armchairs or sofas.
What is Needed to Make That Thing
- Yarn: Worsted-weight yarn in golden yellow, chocolate brown, and oatmeal.
- Hook Size: 5.0 mm (H-8) crochet hook.
- Notions: 16×16 inch pillow insert, tapestry needle, and matching thread.



How to Make It
- Sunflower Center: Start with a dark brown puff stitch center, surrounded by textured golden yellow petal rounds.
- Squaring the Circle: Work corner stitches in oatmeal yarn to transform the round flower into a crisp square motif.
- Making Panels: Make 4 identical sunflower squares and join them together into a front panel, plus a solid granny square back panel.
- Assembly: Place panels wrong sides together and single crochet around three sides, insert the pillow form, and sew the final side closed.
- Finishing: Weave in all yarn tails.
Tips and Variations
- Tip: Use an envelope-style back opening if you prefer a removable, washable pillow cover.
- Variation: Make a cluster of four smaller sunflower squares instead of one giant central flower.
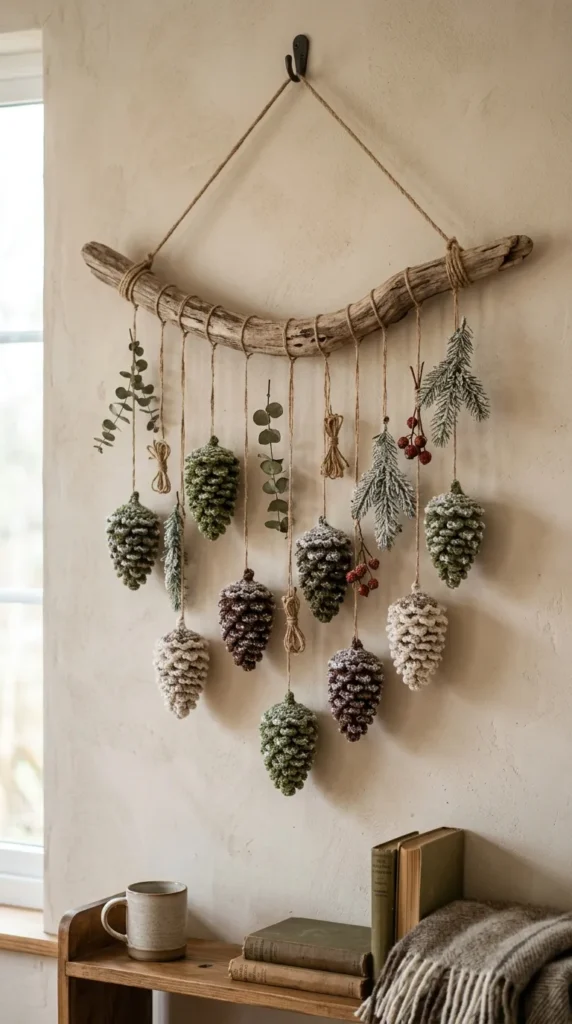
14. The Frost-Kissed Pinecone Wall Hanging
Brief Introduction
Rustic, organic, and beautifully tactile, the Frost-Kissed Pinecone Wall Hanging features textured crocheted pinecones suspended from a natural driftwood branch.
What This Idea Means
This sculptural wall art piece celebrates the quiet beauty of late autumn woods, utilizing crocodile stitch scales to mimic realistic pinecone textures.
What is Needed to Make That Thing
- Yarn: Worsted-weight yarn in deep brown and a touch of white (for frost edges).
- Hook Size: 4.5 mm (7) crochet hook.
- Notions: Natural driftwood branch, tapestry needle, and twine for hanging.
How to Make It
- Pinecone Core: Start at the pointed base of the pinecone and work upward in spirals.
- Crocodile Stitch Scales: Use crocodile stitch overlapping scales to create the textured, layered wooden bracts of the pinecone.
- Frost Edging: Work a final round of surface slip stitches in crisp white along the tips of the scales to simulate morning frost.
- Hanging Cords: Attach jute twine loops to the top of each pinecone and tie them at varying heights along the driftwood branch.
- Wall Mount: Tie a main hanging cord to both ends of the driftwood branch.
Tips and Variations
- Tip: Stuff the interior of the pinecones lightly with polyfill so they maintain a full, 3D shape while hanging.
- Variation: Add small crocheted pine needles and acorns alongside the pinecones.
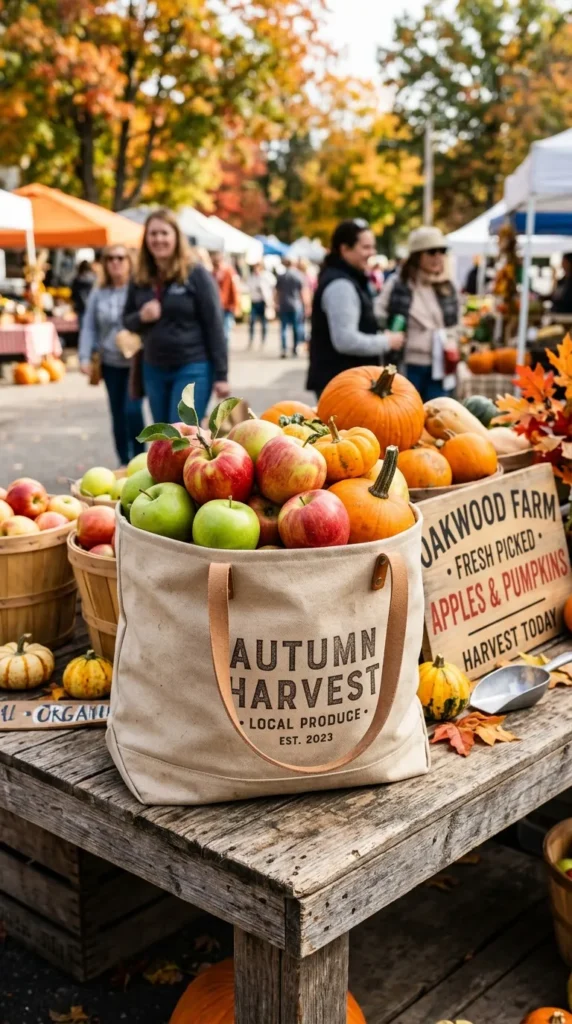
15. The Harvest Bounty Market Bag
Brief Introduction
Sturdy, expandable, and eco-friendly, the Harvest Bounty Market Bag is your ideal companion for farmers’ market trips, apple picking, and pumpkin patch visits.
What This Idea Means
Utilizing a stretchy mesh stitch grid, this bag expands to hold heavy produce and pumpkins while folding down compactly when not in use.
What is Needed to Make That Thing
- Yarn: 2 skeins of durable cotton worsted-weight yarn in natural unbleached tan or olive.
- Hook Size: 5.5 mm (I) crochet hook.
- Notions: Tapestry needle and scissors.
How to Make It
- Reinforced Base: Start with a flat circular or oval base using dense single crochet stitches to ensure heavy weight capacity.
- Mesh Body: Transition into a breathable mesh stitch pattern (chain spaces alternating with double crochets) to build the main bag walls.
- Expanding Grid: Work upward until the bag reaches deep storage capacity.
- Sturdy Handles: Work multiple rounds of solid single crochet along the top rim, extending into two thick, reinforced shoulder straps.
- Finishing: Securely weave in all starting and ending tails.
Tips and Variations
- Tip: Cotton yarn is essential for market bags because it doesn’t stretch out permanently under heavy loads like acrylic does.
- Variation: Add a faux-leather base patch for extra durability and a boutique finish.
16. The Spiced Latte Coffee Sleeve with Appliqué
Brief Introduction
Adorable, quick, and festive, the Spiced Latte Coffee Sleeve features a cute crocheted autumn leaf or coffee cup emblem to brighten your daily caffeine run.
What This Idea Means
This eco-friendly reusable sleeve replaces cardboard cup wrappers with a stylish, heat-insulating handmade accessory tailored for autumn beverage lovers.
What is Needed to Make That Thing
- Yarn: Small cotton yarn scraps in cream, caramel, and burnt orange.
- Hook Size: 4.0 mm (G-6) crochet hook.
- Notions: Tapestry needle and scissors.
How to Make It
- Sleeve Cylinder: Chain a tapered loop matching standard coffee cup dimensions, joining in the round.
- Textured Ribbing: Work circular rows of half double crochet in back loops only to create a snug, gripping texture.
- Leaf Appliqué: Crochet a tiny burnt orange autumn leaf separately.
- Attaching Appliqué: Sew the leaf securely onto the center of the coffee sleeve.
- Finishing: Weave in all loose ends.
Tips and Variations
- Tip: Make several sleeves in different colors to match your daily outfits and moods.
- Variation: Swap the leaf for a tiny crocheted pumpkin or cinnamon stick icon.
17. The Velvet Autumn Wind Headband
Brief Introduction
Plush, luxurious, and wonderfully soft, the Velvet Autumn Wind Headband keeps your ears warm on breezy days while framing your hair with rich velvet texture.
What This Idea Means
Using plush velvet yarn and a twisted knot construction, this headband offers high-end fashion appeal with beginner-friendly crochet techniques.
What is Needed to Make That Thing
- Yarn: 1 skein of super bulky velvet yarn in rich plum, mustard, or olive.
- Hook Size: 6.5 mm (K-10.5) crochet hook.
- Notions: Tapestry needle and sewing thread.
How to Make It
- Rectangle Strip: Crochet a long rectangular band using half double crochet stitches until it fits comfortably around your head.
- Twist Technique: Fold the two ends of the strip together in a clever figure-eight twist configuration to create a center knot look.
- Seaming: Sew the edges together securely at the twist point.
- Flipping: Turn the headband right-side out to hide the seam inside the knot.
- Finishing: Check that the velvet pile flows smoothly.
Tips and Variations
- Tip: Velvet yarn can be slippery; use locking stitch markers to keep your edge stitches straight.
- Variation: Add a decorative metallic button at the center twist.
18. The Orchard Apple Basket Storage Bin
Brief Introduction
Chunky, structured, and practical, the Orchard Apple Basket Storage Bin helps you organize fall accessories while bringing rustic orchard charm to your shelves.
What This Idea Means
Using two strands of yarn held together or super bulky cord, this basket stands upright on its own without needing wire frames, providing sturdy home organization.
What is Needed to Make That Thing
- Yarn: 3 to 4 skeins of chunky cotton cord or t-shirt yarn in red or oatmeal.
- Hook Size: 8.0 mm (L-11) crochet hook.
- Notions: Tapestry needle and stitch markers.
How to Make It
- Flat Base: Start with a magic ring and work flat circular rounds of single crochet to form a sturdy bottom base.
- Working Upward: Work in back loops only for the first transition round to create a sharp 90-degree corner, then work straight rounds upward.
- Structured Walls: Use tight single crochet stitches to ensure the basket walls stand stiff and upright.
- Handles: Create reinforced side handle cutouts by chaining and skipping stitches on the final upper rows.
- Finishing: Securely fasten off and weave in thick yarn tails.
Tips and Variations
- Tip: T-shirt yarn provides incredible structural rigidity for heavy-duty storage baskets.
- Variation: Add an embroidered apple motif on the front of the bin.
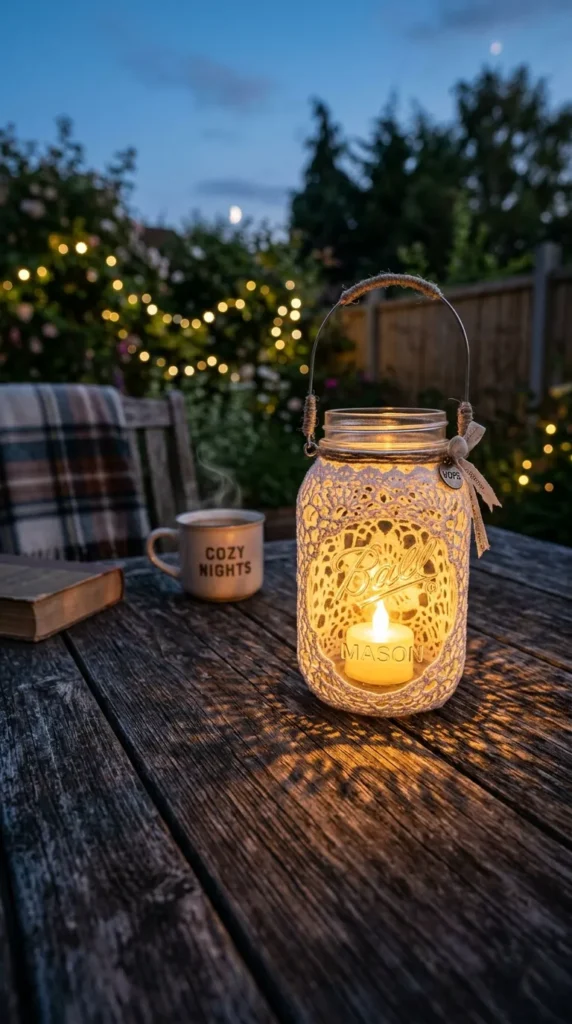
19. The Twilight Lantern Mason Jar Cover
Brief Introduction
Magical, glowing, and atmospheric, the Twilight Lantern Mason Jar Cover transforms ordinary glass jars into ambient autumn lanterns for evening patio gatherings.
What This Idea Means
This openwork lace cozy fits snugly over mason jars, casting intricate geometric shadows when an LED tealight candle is placed inside.
What is Needed to Make That Thing
- Yarn: Small ball of cotton crochet thread size 10 or fine DK yarn in warm bronze or gold.
- Hook Size: 3.0 mm crochet hook.
- Notions: Standard glass mason jar and LED tealight candle.
How to Make It
- Jar Base: Crochet a flat circular base matching the bottom diameter of your mason jar.
- Mesh Body: Work upward in open mesh lace rounds that hug the glass container snugly up to the neck.
- Neck Shaping: Decrease slightly around the threaded neck of the jar so the cozy stays locked in place.
- Rim Trim: Finish with a decorative picot top edge.
- Assembly: Slip the lace cozy over the jar and insert an LED candle.
Tips and Variations
- Tip: Never use real open-flame candles inside yarn-covered glass jars for safety reasons.
- Variation: Tie a rustic jute bow around the jar rim with a tiny autumn leaf charm attached.
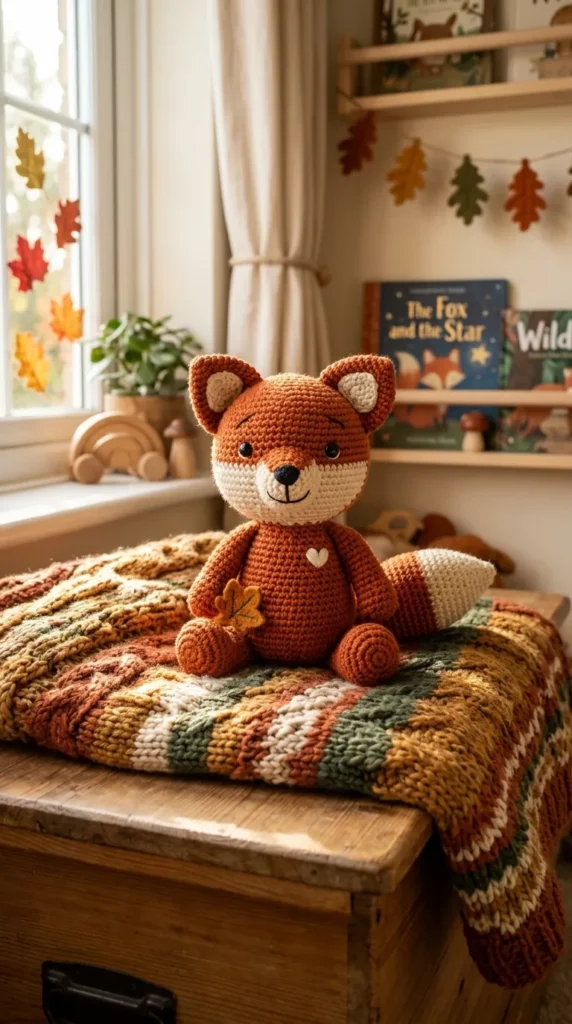
20. The Woodland Fox Stuffed Toy
Brief Introduction
Adorable, cuddly, and full of autumn spirit, the Woodland Fox Stuffed Toy is a heartwarming companion for children and a darling nursery decor piece.
What This Idea Means
Using amigurumi crochet techniques, this project shapes a cute little woodland fox complete with pointed ears, a white snout, and a bushy tail in autumnal orange tones.
What is Needed to Make That Thing
- Yarn: Sport or worsted-weight yarn in burnt orange, white, and charcoal black.
- Hook Size: 3.5 mm (E-4) crochet hook.
- Notions: Polyfill stuffing, safety eyes, embroidery floss, and tapestry needle.
How to Make It
- Head and Body: Crochet the head and pear-shaped body in continuous spiral rounds of single crochet using burnt orange yarn.
- Snout and Ears: Craft white snout details and sharp pointed ears with black tips, then sew them onto the head.
- Limbs and Tail: Crochet stubby legs, arms, and a curved bushy tail featuring a white tip.
- Assembly: Stuff all parts firmly with polyfill and sew them securely to the main torso.
- Facial Features: Attach safety eyes and embroider a sweet smiling nose with black embroidery floss.
Tips and Variations
- Tip: Use locking stitch markers at the start of every amigurumi round to keep your stitch counts accurate.
- Variation: Give the fox a tiny crocheted autumn scarf to wear around its neck.





more ideas to come in future addition
