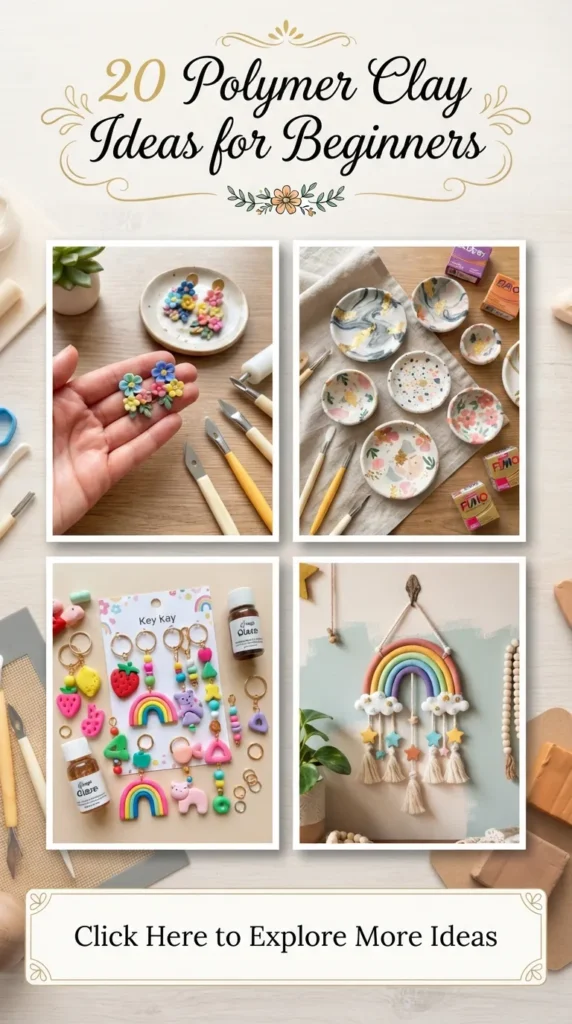
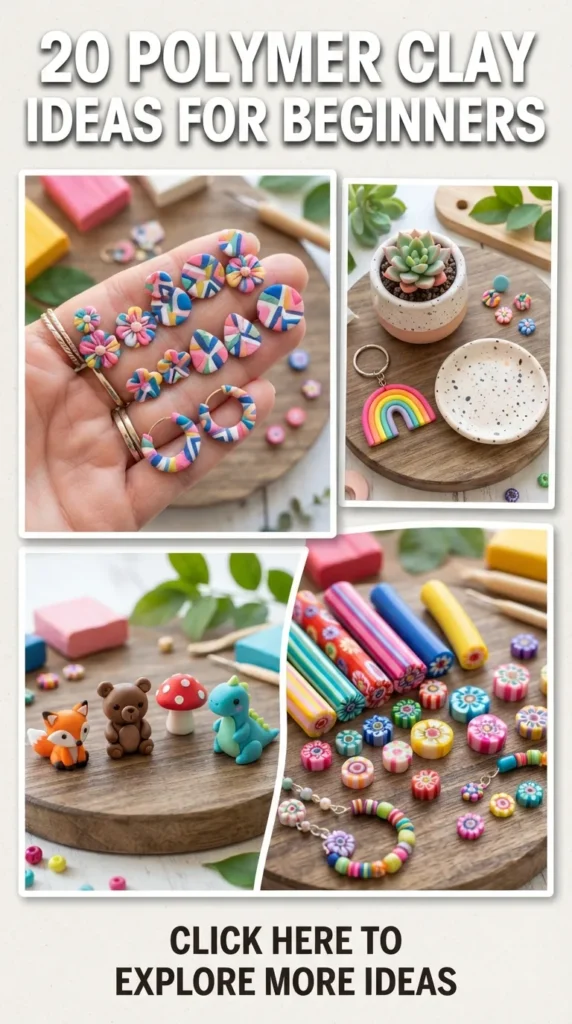
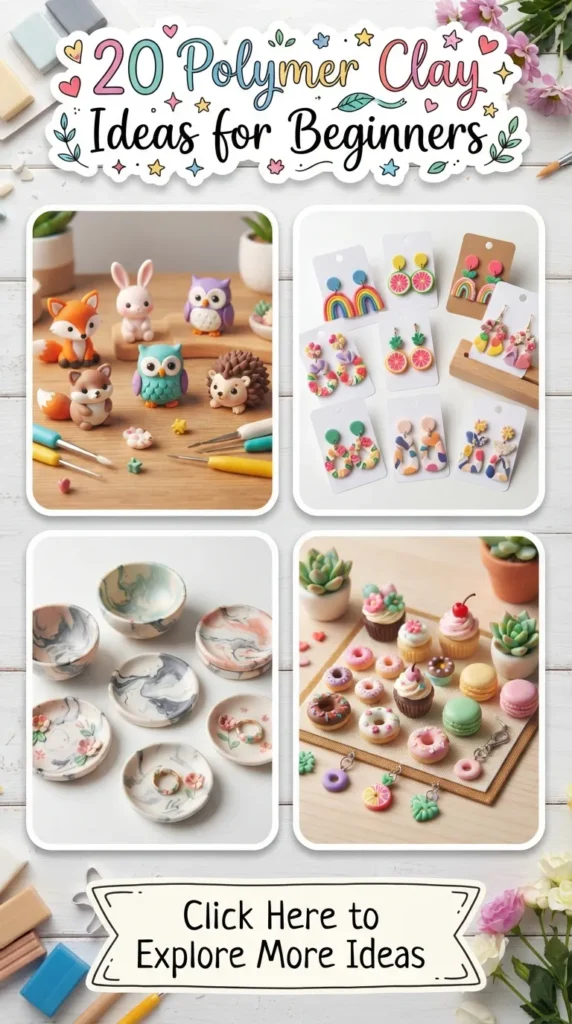
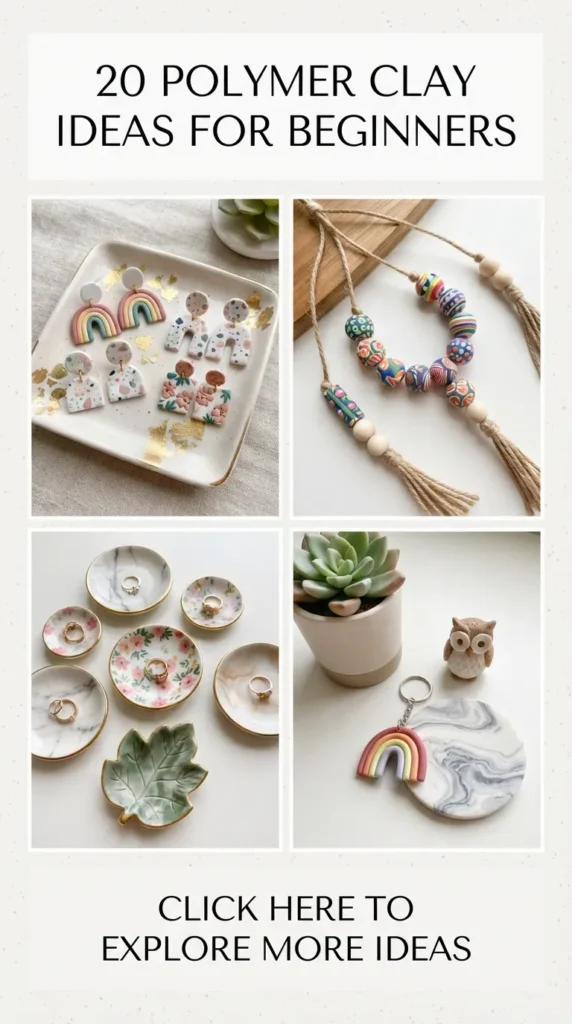
Polymer clay is one of the most versatile, approachable, and rewarding mediums for crafters, artists, and home decor enthusiasts. Unlike traditional ceramics that require an industrial kiln running at extreme temperatures, polymer clay cures fully in a standard kitchen oven. It is pliable, comes in an infinite array of colors, maintains sharp detail, and can mimic anything from natural stone and glazed porcelain to vintage leather and frosted glass.
If you have spent any time browsing visual platforms, you know that aesthetic handmade clay items—terrazzo trinket trays, minimalist arch earrings, botanical wall hangings, and ribbed candle holders—are everywhere. Crafting these items yourself is not only cost-effective; it allows you to curate color palettes and textures that fit your personal home decor and style.
Whether you are unboxing your first block of clay or looking for fresh inspiration to elevate your handmade craft game, this comprehensive guide covers 20 stunning, beginner-friendly polymer clay projects. Each idea includes an introduction, design philosophy, step-by-step instructions, and creative variations to help you master the craft.
The Essential Beginner’s Toolset
Before diving into the projects, assemble these basic tools to ensure smooth surfaces and clean edges:
- Baking Surface: A ceramic tile or tempered glass sheet allows you to roll, cut, and bake directly on the same surface without distorting your clay during transfers.
- Acrylic Roller: Non-porous and smooth, acrylic rollers ensure consistent sheet thickness without leaving wood-grain impressions.
- Tissue Blade (Slicing Blade): A flexible, razor-sharp blade essential for slicing clean edges, cane cutting, and lifting flat shapes off work surfaces.
- Needle Tool & Dotting Tools: Perfect for piercing jump-ring holes, adding delicate indentations, and sculpting textures.
- Baking Oven & Oven Thermometer: An external thermometer is non-negotiable. Built-in oven dials are notoriously inaccurate, and precise temperature control prevents both under-curing (brittle clay) and burning.
- High-Grit Wet/Dry Sandpaper (400 to 1500 grit): Sanding under running water creates an ultra-smooth, satin-matte finish on cured pieces.
1. Minimalist Terrazzo Trinket Dish
Introduction & Aesthetic Concept
The terrazzo pattern originated in 15th-century Venice as a way to reuse marble remnants set in concrete. In modern interior design, terrazzo represents playful minimalism. A terrazzo trinket dish combines a clean, neutral base with speckled, colorful clay chips to hold daily jewelry, loose coins, or keys with effortless mid-century charm.
How to Make It
- Condition the Base: Roll out a block of white, cream, or sand-colored clay into a flat slab roughly 4mm thick using your acrylic roller.
- Create the Terrazzo Flecks: Choose 3 to 4 contrasting accent colors (such as terracotta, olive green, mustard yellow, and charcoal). Roll tiny scraps of these colors into paper-thin sheets, or chop small cured/uncured pieces into irregular, geometric chips.
- Embed the Flecks: Scatter the colorful flecks randomly over the base slab. Place a sheet of parchment paper over the top and roll firmly with your acrylic roller until the chips are completely flush and embedded into the base.
- Cut the Shape: Use a circular cookie cutter, a bowl edge, or an arch cutter to slice out your desired tray outline.
- Form the Dish: Gently drape the cut circle into an oven-safe glass or ceramic bowl to give it curved, raised edges.
- Bake and Finish: Bake according to package instructions (typically 130°C / 275°F for 30 minutes). Once cooled, wet-sand the surface with 800-grit sandpaper for an authentic, stone-smooth tactile finish.
Pro Tips & Variations
- Monochrome Terrazzo: Use black, grey, and translucent chips over a pure white base for an ultra-modern Scandinavian look.
- Gold Leaf Accents: Mix micro-fragments of imitation gold leaf alongside your clay chips for a subtle hint of luxury.

2. Scandinavian Ribbed Arch Candle Holders
Introduction & Aesthetic Concept
Architectural arches and fluted textures are cornerstones of Nordic interior styling. A ribbed arch candle holder adds structural, sculptural weight to a mantle, dining table, or nightstand. This piece serves as functional modern art, framing taper or chime candles in crisp geometric lines.
How to Make It
- Form the Arch Structure: Roll a thick, uniform snake of clay (about 2cm in diameter) or stack several flat rectangular sheets to build a solid arch block roughly 2 inches wide and 3 inches high.
- Add the Ribbed Detail: Using a clay extruder with a grooved disk, extrude several half-round clay strips. Alternatively, use a ruler or a dull modeling tool to impress deep, evenly spaced vertical lines down the face and sides of the arch.
- Form the Candle Well: While the clay is raw, press the base of the actual candle you plan to use (wrapped in cling film) into the top center of the arch to create a custom-fit recess. Remove the candle before baking.
- Bake Thoroughly: Because this piece is thick, tent it with aluminum foil and bake at the recommended temperature for 45 to 60 minutes to ensure the core fully cures without scorching the exterior.
Pro Tips & Variations
- Double Arch Bridge: Create an inverted “U” shape with candle recesses on both apex shoulders for a dramatic centerpiece.
- Stone Texture Effect: Mix sand, dried tea leaves, or granite polymer clay into the batch before shaping to give the arch the authentic heft and appearance of carved limestone.

3. Botanical Imprint Ring Dishes
Introduction & Aesthetic Concept
Botanical imprint dishes celebrate nature’s organic geometry. By pressing fresh garden clippings, fern fronds, or delicate wildflowers directly into raw clay, you capture realistic leaf venation and petal contours permanently in porcelain-like dishes.
How to Make It
- Prepare the Clay Slab: Condition translucent or porcelain-white clay and roll it out to a 3mm thickness on a smooth tile.
- Press the Botanical: Place a fresh, sturdy leaf (like sage, rosemary, or fern) vein-side down onto the clay. Roll over it firmly with your acrylic roller to emboss the texture deep into the surface.
- Reveal the Impression: Use fine tweezers to peel away the organic material cleanly.
- Shape and Bake: Cut the clay into an organic oval or circle, lift it into a small tart pan or ceramic bowl to form a rim, and bake.
- Accentuate Details: After baking, brush liquid acrylic paint (burnt umber or soft moss green) into the leaf impressions, then immediately wipe the flat surface clean with a damp cloth so color remains settled only within the veins.
Pro Tips & Variations
- Metallic Wash: Use a metallic mica powder applied with a soft dry brush over the raised veins before baking for an antique gilded relief.
- Raw Edge Finish: Instead of cutting a neat geometric circle, tear the edges of the raw slab manually to create a rustic, deckled-paper look.

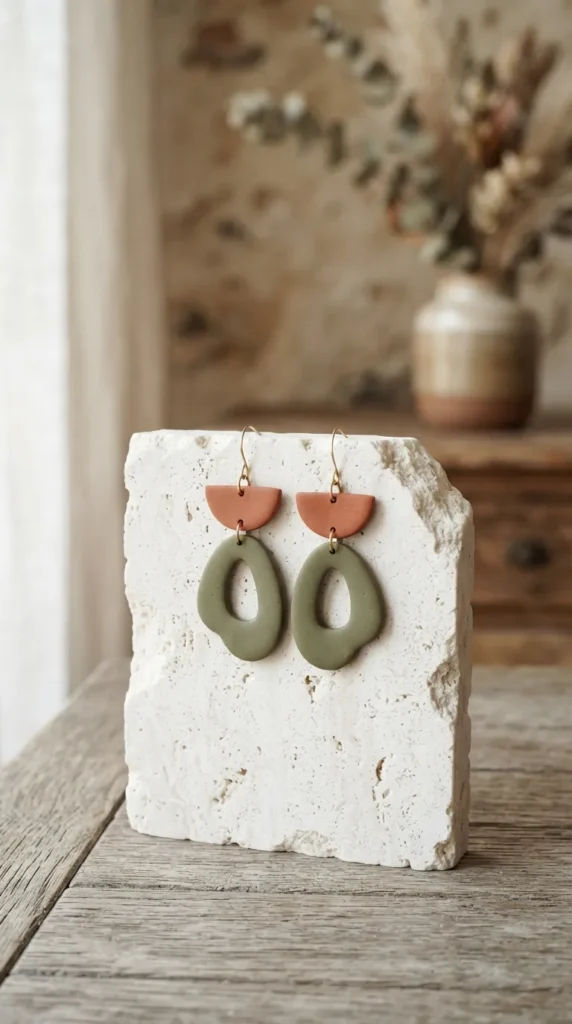
4. Modern Abstract Dangle Earrings
Introduction & Aesthetic Concept
Polymer clay earrings revolutionized the indie jewelry scene due to their featherlight weight and infinite design potential. Modern abstract earrings focus on asymmetry, bold color blocking, and geometric combinations (arches, semicircles, and hollow loops) that elevate any outfit.
How to Make It
- Roll and Color Blend: Roll two complementary sheets of clay (e.g., muted terracotta and soft sage green) to an exact 2mm thickness using rolling guides.
- Cut the Geometric Components: Use specialty stainless steel or 3D-printed polymer clay cutters to stamp out various shapes: trapezoids, open circles, and half-moons.
- Pierce Assembly Holes: Use a 1.2mm needle tool or hand drill punch to make clean holes near the tops and bottoms of shapes where jump rings will join them. Ensure holes are not placed too close to the edges.
- Bake on Flat Surfaces: Sandwich the pieces between two flat ceramic tiles lined with parchment paper to prevent warping during baking.
- Assemble: Once cured and cooled, connect the components using stainless steel or brass jump rings with flat-nose pliers, and attach hypoallergenic earring posts with jewelry glue or a small dot of UV resin.
Pro Tips & Variations
- Matte vs. Gloss: Leave the clay with its raw matte finish for a contemporary feel, or apply high-gloss liquid clay glaze to select pieces for mixed-finish visual interest.
- Texture Inlays: Press coarse linen fabric onto the raw clay before cutting to create a woven canvas texture on abstract shapes.
5. Faux Marble Coaster Set
Introduction & Aesthetic Concept
The timeless luxury of Carrara or Nero Marquina marble can be replicated using polymer clay. Faux marble coasters provide a heat-resistant, waterproof, and shatterproof surface for coffee mugs and glasses, bringing organic stone veining to your living space.
How to Make It
- Form the Clay Logs: Roll out a thick log of primary color (white or slate grey) and several pencil-thin snakes of accent colors (black, translucent, and metallic gold).
- Twist and Marble: Wrap the thin accent snakes around the main log. Twist the entire roll like a candy cane, fold it in half, twist again, and roll it into a compact ball. Repeat 2–3 times—do not overmix, or the colors will blend into a solid muddy hue.
- Slice and Roll: Use your tissue blade to slice the ball into thick cross-sections. Lay the slices adjacent to one another on a tile and roll flat to merge the seams, revealing dynamic marble veins.
- Cut Hexagons or Squares: Cut out uniform shapes using a geometric coaster cutter.
- Bake and Seal: Bake the flat coasters weighted between parchment and tiles. Sand through grits up to 1500 for a polished stone feel, and add small self-adhesive cork pads to the underside.
Pro Tips & Variations
- Emerald Jade Marble: Replace white with deep forest green, mint, and translucent clay, weaving in veins of gold leaf for an opulent faux-gemstone coaster.
- Raw Gilded Edge: Hand-paint the outer rim of the finished coaster with liquid gold leaf paint.

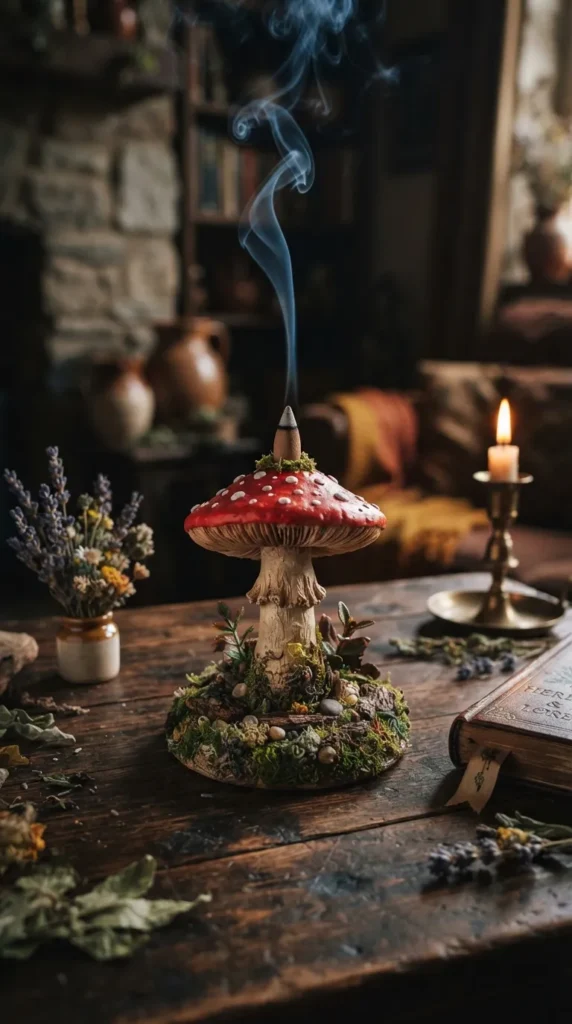
6. Whimsical Cottagecore Mushroom Incense Burner
Introduction & Aesthetic Concept
Cottagecore aesthetics celebrate rustic simplicity, woodlands, and vintage countryside charm. A sculpted mushroom incense burner features a sturdy mossy forest-floor base with spotted toadstools designed to hold stick or cone incense safely while catching ash.
How to Make It
- Sculpt the Base: Roll a flat, organic earth-brown or moss-green clay base roughly 10cm across.
- Form the Mushrooms: Roll white or beige clay into tapered mushroom stems. Form deep red or ochre clay into rounded domes for the caps. Add tiny white clay balls to the caps, pressing them flat to create iconic toadstool spots.
- Secure and Pierce: Blend the mushroom stems securely onto the base. Use an actual incense stick to pierce a deep, angled hole into the base or through the top of a mushroom cap. Test that the angle catches falling ash.
- Add Woodland Details: Score moss textures around the base using a stiff-bristled toothbrush. Add miniature clay pebbles, leaves, or tiny sculpted shelf fungi.
- Bake and Cure: Bake until sturdy. Paint clear water-based satin sealant over the mushroom caps for a dewy, freshly rained-upon appearance.
Pro Tips & Variations
- Backflow Incense Tower: Sculpt a hollow large mushroom with an internal chimney to let backflow incense smoke pour like mist over smaller surrounding mushrooms.
- Glow-in-the-Dark Gills: Use phosphorescent clay under the mushroom caps so the gills glow softly in low light.




7. Chunky Wavy Checkerboard Picture Frame
Introduction & Aesthetic Concept
Playful, retro-maximalist decor has brought wavy silhouettes and checkerboard patterns back to modern desks and gallery walls. A chunky polymer clay frame transforms an ordinary photograph or art print into a vibrant statement piece.
How to Make It
- Build the Base Frame: Cut a sturdy backing mat or wood craft frame to serve as your foundation, or sculpt a self-supporting clay frame backed with armature wire.
- Create the Checkerboard Cane: Roll equal-sized square logs of two contrasting colors (e.g., lilac and butter yellow, or cream and cobalt blue). Assemble them into a 4×4 or 6×6 alternating grid block. Compress the block evenly and slice it into thin, uniform checkerboard sheets.
- Apply to a Wavy Outline: Lay the checkerboard sheets over a wide clay border cut with a gentle, undulating wave contour. Smooth the seams with your roller over parchment paper.
- Fit and Bake: Wrap the clay cleanly around the front and outer edges of your base frame. Bake carefully on a flat, foil-lined tray.
- Secure the Artwork: Once cooled, attach your glass or acrylic photo insert and secure the back with swivel tabs or strong adhesive.
Pro Tips & Variations
- Distorted Checkerboard: Gently stretch and twist your checkerboard cane before slicing to create a psychedelic, optical illusion wave pattern.
- Monochrome Grid: Stick to crisp black and white for a clean retro-diner aesthetic.
8. Pastel Checkerboard Hair Claws and Barrettes
Introduction & Aesthetic Concept
Functional fashion accessories made of polymer clay bring tactile artistry into daily wear. Custom hair barrettes and claw clips featuring pastel checkerboards, daisies, or checkerboard-swirl hybrids add handmade luxury to simple hairstyles.
How to Make It
- Create Patterned Sheets: Roll out pastel pink and ivory clay, assemble a miniature checkerboard cane, and slice wafer-thin tiles. Roll them together on a 1.5mm flat backing sheet.
- Cut Barrette Shapes: Cut sleek rectangles, curved ovals, or teardrop shapes sized to match your metal alligator clips or snap barrette blanks.
- Bake with Proper Curve: If covering a curved barrette, drape the raw clay over a metal tube or rolled aluminum foil of matching curvature during baking.
- Sand to a Silky Touch: Wet-sand the edges and top surface to ensure no sharp clay corners catch on hair strands.
- Affix to Hardware: Clean the metal clip surface with rubbing alcohol. Secure the cured clay piece to the metal using two-part epoxy or industrial-strength jewelry adhesive (such as E6000), clamping gently until fully set.
Pro Tips & Variations
- Hair Claw Overlay: Cover the outer flat prongs of plain acrylic claw clips with thin, patterned clay strips, curing them directly on the clips if heat-safe, or gluing them post-cure.
- Inlaid Daisies: Press tiny pastel-centered floral stamps into the checkerboard squares before curing.
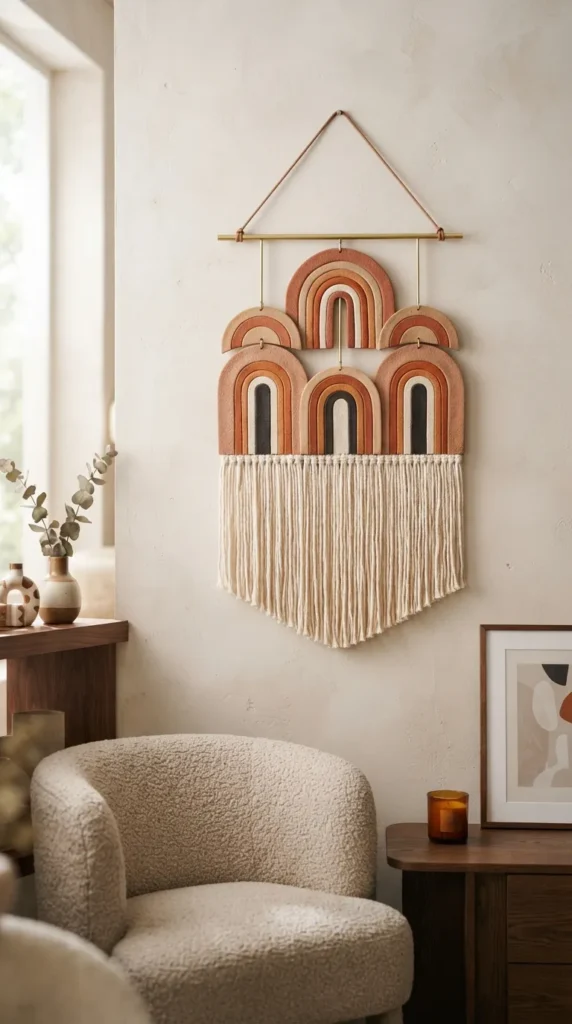
9. Minimalist Textured Wall Hanging
Introduction & Aesthetic Concept
Clay wall hangings bring softness, geometry, and artisan texture to blank walls. Composed of interlocking clay arches, dangling discs, textured pendants, and cotton cord or brass rods, these mobiles represent modern bohemian wall decor.
How to Make It
- Plan the Silhouette: Sketch your design on paper—such as a large central arch, a crescent moon, several suspended discs, and dangling fringe.
- Roll and Texture: Roll clay to a sturdy 3.5mm thickness. Imprint varied textures onto different components using woven burlap, lace, ribbed stamps, or coarse sandpaper.
- Cut and Pierce: Cut the individual components with precision blades. Punch connecting holes (2–3mm wide) at all joint points before baking.
- Bake Flat: Bake all pieces flat beneath a parchment-lined ceramic tile to ensure absolute planarity.
- Assemble with Hardware and Fiber: Connect clay components using large brass jump rings. Thread unbleached cotton macramé cord through bottom holes to create combed fringe, and attach a top hanging cord.
Pro Tips & Variations
- Earth-Tone Gradient: Mix a base terracotta clay with increasing amounts of white clay to create an ombre hanging that transitions from deep rust to soft blush.
- Brass Accents: Alternate clay components with cut raw brass geometric stampings for mixed-media contrast.
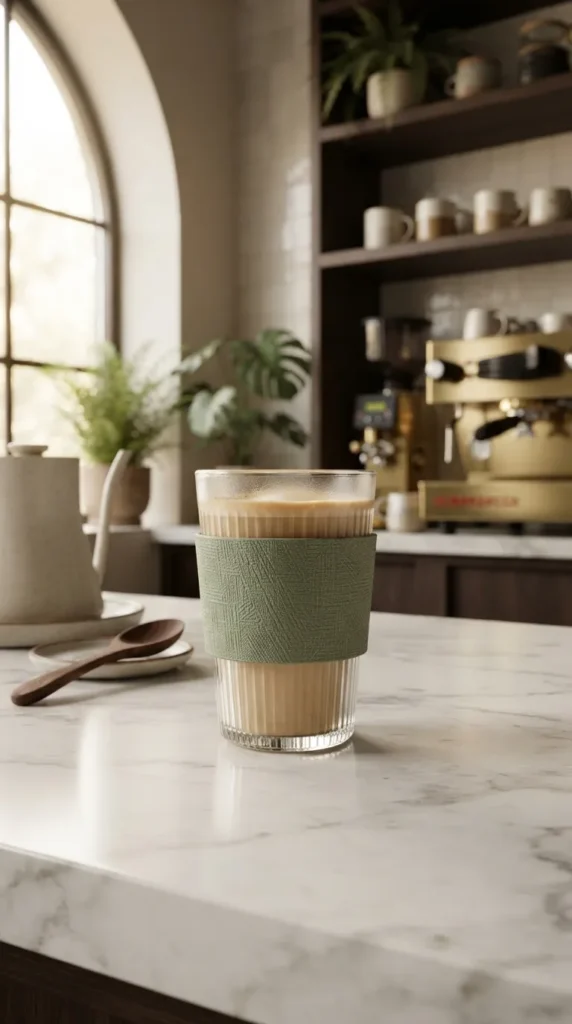
10. Textured Matcha Cup Sleeves & Plant Pot Wraps
Introduction & Aesthetic Concept
Transform plain glass cups, ceramic mugs, or basic terracotta nursery pots with custom-fitted, textured polymer clay sleeves. These wraps add grip, heat insulation, and an earthy tactile experience to morning beverage rituals or indoor plant displays.
How to Make It
- Measure the Vessel: Measure the circumference and height of the pot or glass with a flexible tape measure.
- Roll a Large Uniform Slab: Roll a large sheet of clay to a uniform 3mm thickness, cut to your precise measurements with a slight 5mm overlap.
- Apply Surface Texture: Roll a rough wooden texture roller, linen sheet, or geometric texture mat across the entire slab.
- Wrap and Join: Carefully wrap the raw clay around the heat-safe glass or ceramic pot. Smooth the overlapping seam together using a silicone blending tool, matching the texture across the joint.
- Bake on the Vessel: Bake the vessel with the clay wrap installed directly in the oven. As the clay cures, it bonds snugly to the vessel’s contours.
Pro Tips & Variations
- Two-Tone Dipped Look: Combine two contrasting clay colors horizontally across the sleeve for a dipped ceramic glaze effect.
- Cut-Out Windows: Use mini shape cutters to punch geometric cutouts into the wrap, allowing the inner glass or ceramic color to peek through.
11. Sculptural Squiggle Bookends
Introduction & Aesthetic Concept
Wavy, organic squiggles and Memphis-design curves turn bookends into eye-catching desk sculptures. These chunky, sinuous forms provide the weight needed to support heavy novels while bringing playful color into reading nooks.
How to Make It
- Build a Weighted Core: Polymer clay alone can be light; wrap thick aluminum foil around heavy metal L-brackets or lead weights to form a stable inner armature.
- Condition and Wrap: Roll thick sheets of clay in warm ochre, cobalt, or olive. Encase the weighted armature completely, smoothing all seams until invisible.
- Shape the Squiggle: Sculpt a serpentine, ribbon-like wave down the vertical face of the bookend, ensuring the base remains flat and level.
- Bake with Support: Support the curves with crumpled aluminum foil or mounds of cornstarch during baking so the waves do not sag under oven heat.
- Add Non-Slip Base: After cooling, glue heavy felt or rubber pads to the underside to protect shelving and prevent sliding.
Pro Tips & Variations
- Chunky Tube Snake: Form an ultra-thick continuous snake, fold it into a vertical triple-loop, and slice the bottom flat for a minimalist tubular design.
- Matte Sand Finish: Dust the raw clay with fine colored sand or baking soda before baking for a cast-concrete texture.
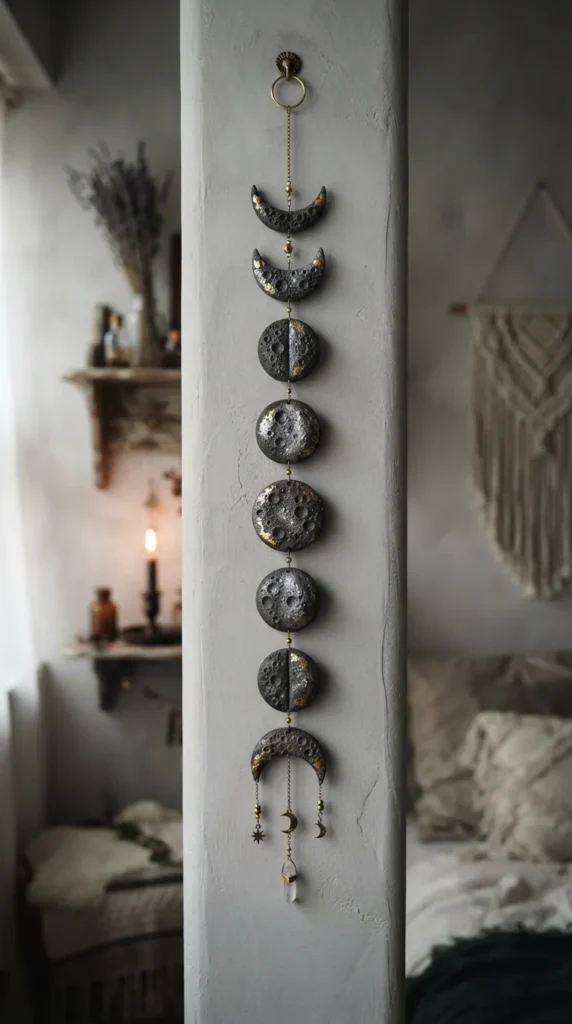
12. Celestial Moon Phase Wall Garland
Introduction & Aesthetic Concept
Celestial imagery brings quiet mystique into interiors. A moon phase garland showcases the lunar cycle from new moon to waxing crescents, quarter moons, gibbous moons, and the glowing full moon, strung along brass chains or metallic cord.
How to Make It
- Color the Clay: Use a rich midnight blue, charcoal, or translucent pearlescent clay mixed with micro-fine silver glitter.
- Cut the Phases: Roll a 3mm thick slab. Use a circular cutter to stamp out five to seven identical discs. Use the same cutter offset against the discs to slice out the inner crescents and gibbous profiles.
- Add Crater Texture: Lightly press irregular sea sponges, crumpled foil, or the tip of a ball tool into the clay faces to create realistic lunar topography.
- Punch Suspension Holes: Punch two holes (top and bottom, or left and right) into each moon phase depending on whether you want a vertical or horizontal garland.
- Bake and Link: Bake completely flat. Join the cooled moons with delicate brass jewelry chains, jump rings, and small raw crystal points or stars suspended between them.
Pro Tips & Variations
- Black & White Contrast: Use black clay with bright white marbled swaths to emphasize moonlit clarity.
- Gilded Edges: Brush silver or gold leaf along the curved rim of each crescent phase for a shimmering night-sky finish.
13. Sculpted Floral Taper Candle Ring Wreaths
Introduction & Aesthetic Concept
Candle rings fit around the base of taper candles, catching stray wax drops while turning simple tapers into romantic centerpieces. Sculpted clay floral rings featuring delicate white petals, ranunculus, and eucalyptus leaves bring perpetual garden charm to tablescapes.
How to Make It
- Form the Base Ring: Roll a clay snake into a circular ring with an inner diameter matching the width of your taper candle holder.
- Sculpt Petals and Leaves: Flatten tiny teardrop-shaped clay balls between your thumb and forefinger to create wafer-thin floral petals. Layer 5 to 8 petals together to form open wild roses or layered ranunculus blooms.
- Attach to Base: Arrange and press the flowers, clay eucalyptus leaves, and tiny clay berries firmly onto the base ring. Use liquid polymer clay (bakeable adhesive) at the contact points for a secure bond.
- Bake Carefully: Bake on a bed of polyfill batting or cornstarch to support the delicate petals and prevent them from flattening under their own weight.
- Wash with Color: Add subtle depth to petal edges after baking using dry soft pastels brushed lightly before sealing.
Pro Tips & Variations
- Monochrome Ceramic Look: Sculpt entirely in pure translucent-white clay without surface color for an elegant, glazed porcelain appearance.
- Autumnal Palette: Use burnt sienna, deep burgundy, and mustard yellow leaves for seasonal holiday tables.
14. Modern Geometric Drawer Knobs & Pulls
Introduction & Aesthetic Concept
Upcycling thrifted dressers or plain flat-pack furniture with handmade polymer clay hardware is an impactful home decor DIY. Custom geometric drawer knobs—spheres, arches, cylinders, and pill shapes—add boutique design value to any cabinet.
How to Make It
- Select Hardware Base: Purchase standard blank cabinet hardware screws and threaded metal inserts or basic wooden craft knobs.
- Encase the Hardware: Sculpt firm clay (such as Sculpey Premo or Kato Polyclay for maximum structural strength) securely around the head of the bolt or wooden base. Ensure the mechanical screw threading remains completely clean and unobstructed.
- Sculpt Sharp Geometry: Form crisp geometric solids—half-cylinders, faceted cubes, or chunky arches—using your tissue blade and acrylic smoothing blocks.
- Bake for Strength: Bake for the maximum recommended time to ensure structural durability, as drawer pulls endure repeated pulling force.
- Reinforce: If using loose threaded inserts, bond them inside the cured clay knob cavities using high-strength two-part epoxy resin.
Pro Tips & Variations
- Faux Granite Pulls: Mix black pepper or dark mica powder into stone-grey clay for realistic architectural granite pulls.
- Half-Moon Pairing: Make two semi-circular pulls that mount on adjacent cabinet doors to form a complete circle when doors are closed.




15. Miniature Desktop Plant Pots for Air Plants
Introduction & Aesthetic Concept
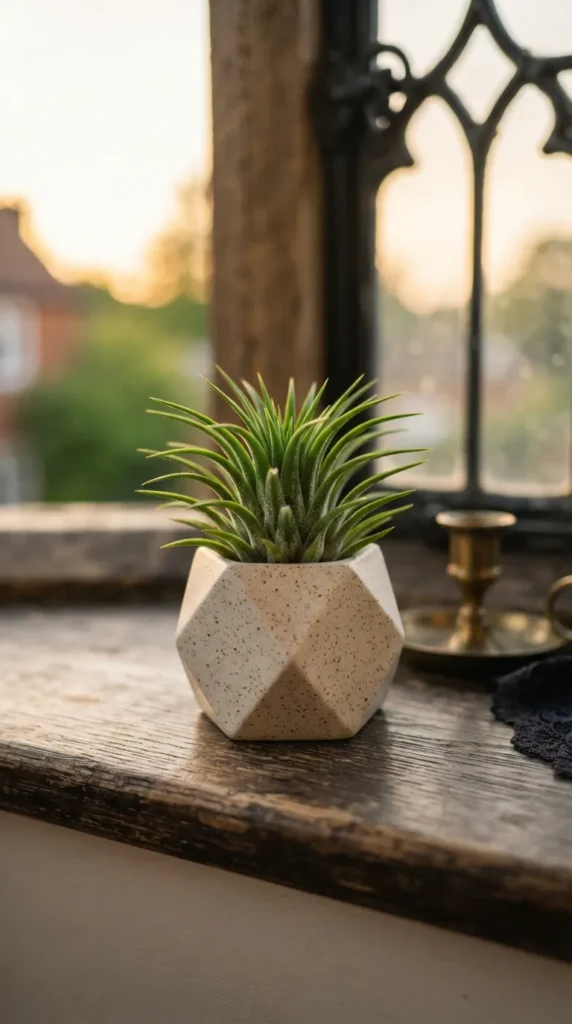
Air plants (Tillandsia) require no soil, making them the ideal companions for artistic polymer clay planters. Tiny geometric prism pots, sculpted animal vessels, or mini speckled cauldron planters add green life to workspaces and shelves.
How to Make It
- Form the Core: Roll a solid ball of clay (about the size of a golf ball).
- Hollow the Cavity: Press your thumb firmly into the center while rotating the ball to create an even, thick-walled pinch pot. Ensure the interior cup is sized comfortably to seat an air plant base.
- Shape the Facets: Use a sharp tissue blade to slice clean, angular flat planes across the exterior, creating a modern geometric succulent/air plant prism.
- Smooth and Flatten Base: Press the pot firmly down on your work tile to establish a stable, flat base.
- Bake and Seal: Bake the planter. Because air plants require occasional misting, coat the interior with a thin layer of waterproof water-based polyurethane varnish.
Pro Tips & Variations
- Hanging Planters: Punch three equidistant holes near the top rim before baking and suspend the planter using thin leather cords or brass wires.
- Footed Planter: Add three small clay sphere feet or tapered pegs to the base for mid-century modern height.
16. Whimsical Food & Fruit Keychains
Introduction & Aesthetic Concept
Miniature food art has a dedicated following across the craft community. Sculpting aesthetic, stylized fruit charms—such as cross-section avocados, glossy strawberries, miniature croissants, or citrus slices—yields durable, adorable accessories for bags and keyrings.
How to Make It
- Mix Custom Tints: Blend realistic, appetizing tones. For citrus, mix translucent clay with a touch of cadmium yellow or orange to achieve authentic fruit-pulp translucency.
- Build a Fruit Cane: For lemons and oranges, build a central core, surround it with triangular segment logs wrapped in thin white pith clay, wrap the whole cylinder in translucent pulp color, and finish with a thin outer rind layer.
- Slice and Shape: Reduce the cane by squeezing and rolling it outward evenly, then slice thin circular cross-sections to reveal the internal segments.
- Insert Hardware: Insert a threaded metal eye-pin with a dab of liquid clay directly into the top of the fruit slice before curing.
- Bake and Glaze: Bake thoroughly. Apply a high-shine UV resin or gloss varnish to the fruit pulp areas while leaving the rind matte for realistic contrast.
Pro Tips & Variations
- Croissant Keyrings: Roll thin triangular sheets of light tan clay, roll them into crescent shapes, texture with a stiff needle, and dust with brown chalk pastels for a baked-pastry crust.
- Charm Clusters: Combine 3 to 4 mini fruit charms onto a single gold lobster clasp for a stacked charm aesthetic.
17. Aesthetic Phone Grips & Socket Tops
Introduction & Aesthetic Concept
Customizing phone grips with polymer clay transforms an everyday tech accessory into a personalized fashion item. From marbled resin-topped disks to 3D floral reliefs and checkerboard patterns, clay adds unique tactile charm to your phone.
How to Make It
- Prepare the Base: Pop the flat plastic decorative cap off a standard collapsible phone grip base. Clean the surface with isopropyl alcohol.
- Cut the Clay Topper: Roll a decorative patterned clay slab (e.g., terrazzo, marble, or miniature landscape) to a 2mm thickness. Cut out a circle that matches the diameter of the phone grip cap.
- Secure and Texture: Press the clay circle onto the plastic cap using bakeable adhesive (if the plastic cap is heat-safe) or bake the clay disc separately flat between tiles.
- Bake Carefully: If baking raw clay directly on the plastic cap, keep temperatures at or below 130°C (275°F) to avoid melting the plastic, or bake the clay disc independently.
- Topcoat with Resin: For maximum durability against hand oils and pocket friction, dome the top of the cured clay with scratch-resistant UV resin and cure under a UV lamp for 2 minutes.
Pro Tips & Variations
- Liquid Clay Swirl: Pour mixed liquid polymer clay colors inside a small metal bezel frame for an abstract fluid-art phone grip.
- Pressed Flower Inlay: Embed micro-dried flowers onto the raw clay before coating with a crystal-clear resin dome.
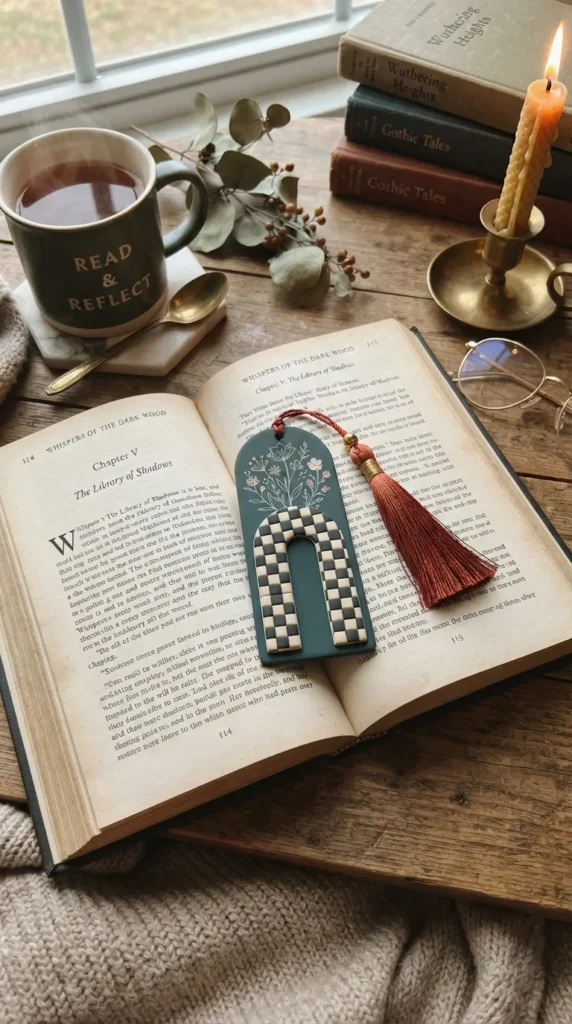
18. Modern Ribbed & Checkerboard Bookmarks
Introduction & Aesthetic Concept
Ultra-thin polymer clay bookmarks combine visual art with practical reading utility. When rolled thin and backed with sturdy reinforcement, polymer clay remains flexible without snapping, sliding between novel pages without damaging the binding.
How to Make It
- Roll Paper-Thin Clay: Using a dedicated pasta machine on setting 4 or 5 (about 1mm to 1.5mm thick), roll out conditioned, high-flexibility clay (such as Cernit or Sculpey Premo).
- Apply Graphic Patterns: Layer mini checkerboard patterns, horizontal stripes, or delicate botanical leaves over the thin sheet. Roll smoothly to blend.
- Cut Long Silhouettes: Cut a slim rectangle (approx. 2.5cm wide by 12cm long) with rounded, organic corners using a ruler and precision blade.
- Punch Ribbon Hole: Punch a neat hole at the top center.
- Bake and Flex: Bake flat between ceramic tiles. High-quality polymer clay baked at the correct temperature remains completely bendable and resilient at this thickness. Thread a silk tassel or velvet ribbon through the top hole.
Pro Tips & Variations
- Arched Top: Cut the top edge of the bookmark into an architectural Roman arch for an elegant silhouette.
- Metallic Inscription: Stamp inspiring literary quotes into the raw clay with micro-alphabet letter presses and fill the indentations with gold paint.
19. Textured Clay Landscape Art Tile Coasters
Introduction & Aesthetic Concept
Framed miniature clay tiles capture textured landscapes—desert sand dunes, rolling hills, sunsets, and ocean waves—using layered clay strips. These tiles function as display art on mini easels or as coaster tiles.
How to Make It
- Form the Sky Canvas: Roll a flat square base slab (10cm x 10cm) in soft sky blue or sunset peach.
- Layer the Dunes and Hills: Roll various earth-toned clay snakes (sage green, dusty pink, mustard, warm brown). Flatten them into organic, undulating curved strips with torn, textured upper edges.
- Assemble the Landscape: Layer the clay strips from back to front onto the sky base, overlapping them to create perspective and depth.
- Add Sun and Textures: Cut a small, bright yellow or gold half-circle and tuck it behind the horizon hills. Add micro-textures to each hill using toothpicks, stiff brushes, or fabric stamps.
- Bake and Mount: Bake the tile flat. Display it on a miniature wooden desktop easel or mount it inside a shadowbox frame.
Pro Tips & Variations
- Ocean Wave Variation: Use gradients of turquoise, seafoam, and translucent clay topped with torn white clay foam lines to depict ocean surf crashing on a sandy shore.
- 3D Cloud Relief: Add soft, fluffy white clay clouds rolled and shaped in light relief over the sky area.
20. Sculptural Incense Cone & Palo Santo Tray
Introduction & Aesthetic Concept
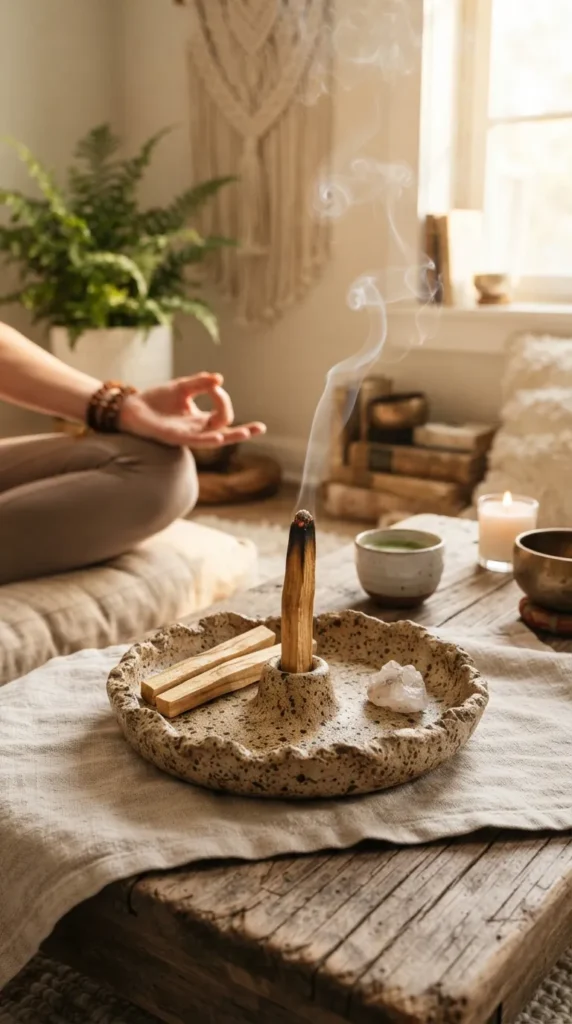
Palo Santo wood sticks and incense cones require wider, heat-resistant burning surfaces. A sculptural, hand-pinched polymer clay Palo Santo dish featuring an integrated stick cradle, organic curved rim, and raw earthy glazes brings mindful calm to meditation corners.
How to Make It
- Pinch the Plate Base: Take a conditioned ball of stone-textured or beige clay and slowly pinch it outward from the center to create a 12cm wide dish with soft, organically raised rims.
- Sculpt the Cradle Post: Sculpt a curved clay pillar, arch, or spiral cup in the center of the dish designed to hold a Palo Santo wood stick upright or safely catch a burning incense cone.
- Blend Seamlessly: Blend the central cradle securely into the base plate using silicone shaping tools and liquid clay for a solid bond.
- Add Earthy Mottling: Lightly speckle the raw clay with dry brown watercolor pigments, ground coffee, or black pepper to replicate raw unglazed ceramic stoneware.
- Bake and Fire-Proof Safety: Bake thoroughly until cured.
(Safety Note: Polymer clay is heat-resistant when cured, but should not be exposed directly to open flames. Always ensure the glowing tip of the incense rests above the clay or sits on an embedded brass coin/metal disc).
Pro Tips & Variations
- Hand-Shaped Mudra: Sculpt the center cradle as an abstract cupped hand holding the smudge stick.
- Crackled Rim: Stretch the edges of the raw slab until natural micro-tears appear along the perimeter for an authentic wabi-sabi finish.
Polymer Clay Troubleshooting & Pro Baking Secrets
To ensure your handmade projects turn out studio-quality every time, keep these essential clay principles in mind:
- Proper Conditioning: Never skip conditioning. Work your clay with your hands, an acrylic roller, or a clay-dedicated pasta machine until it is pliable, warm, and free of air bubbles. Brittle, crumbling baked clay is almost always caused by under-conditioning or under-baking.
- Preventing Bubbles: When layering slabs, place pieces down from one side to the other, gently pressing air out as you go. Prick any trapped air pockets with a sharp needle before smoothing.
- Bake Time vs. Temperature: Temperature is critical; bake time is flexible. Polymer clay cures via a chemical cross-linking process that occurs when plasticizers are fully activated at the manufacturer’s exact specified heat. Under-baking leaves pieces weak and prone to breaking. If in doubt, tent your piece with aluminum foil to protect colors and bake for 10–15 minutes longer than the minimum.
- Dust Control: Keep a pack of alcohol-free baby wipes and a roll of painter’s tape on your desk. Clean your hands, tile, and roller between color shifts. Use a piece of light tape to lift stray dust particles off raw light-colored clay before baking.
- Waterproof Finishing: For items exposed to moisture (such as planters or coasters), apply two coats of water-based polyurethane or UV-cured resin. Avoid spray paints and oil-based enamels, which can react with polymer clay over time, leaving surfaces sticky.