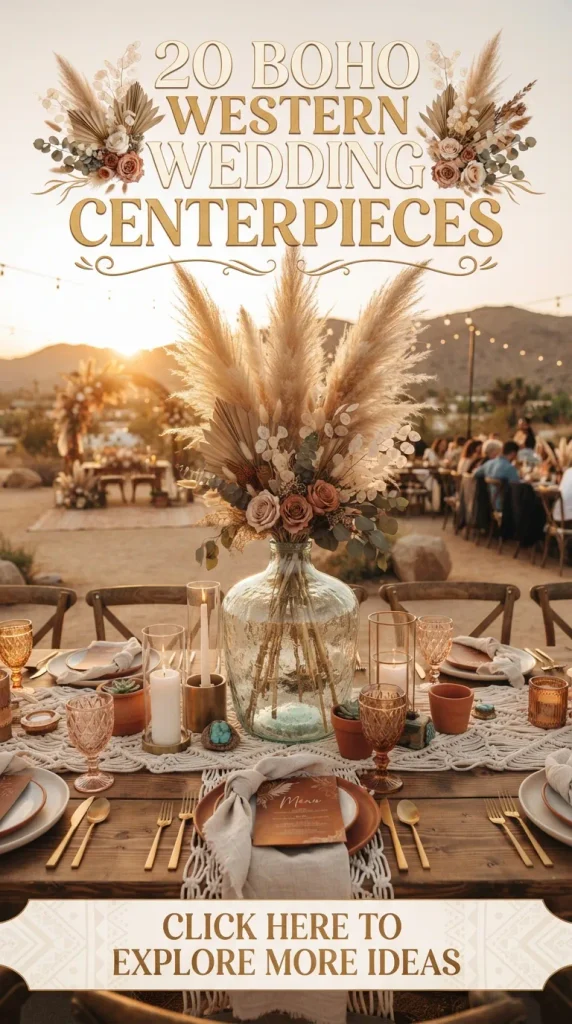
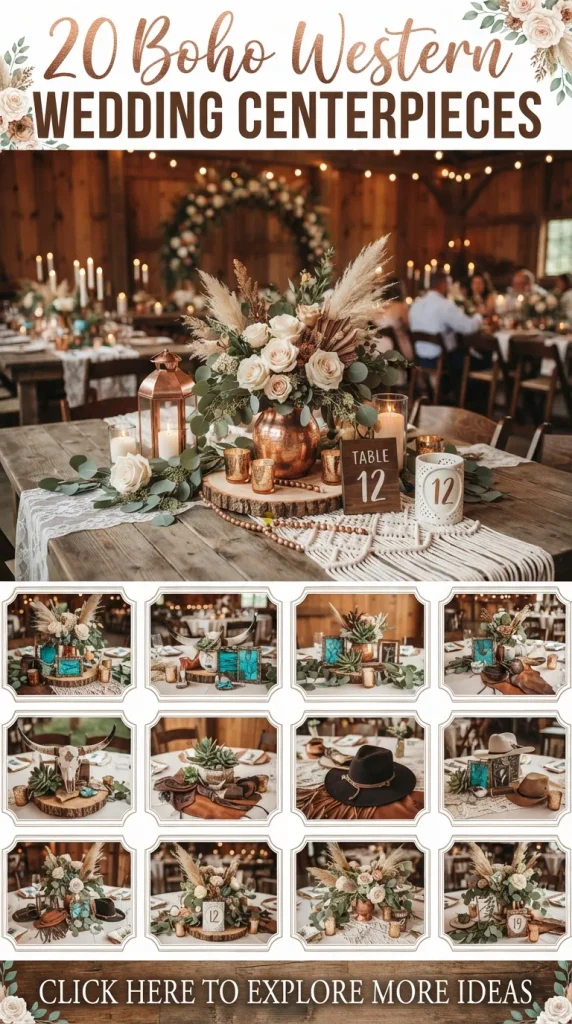
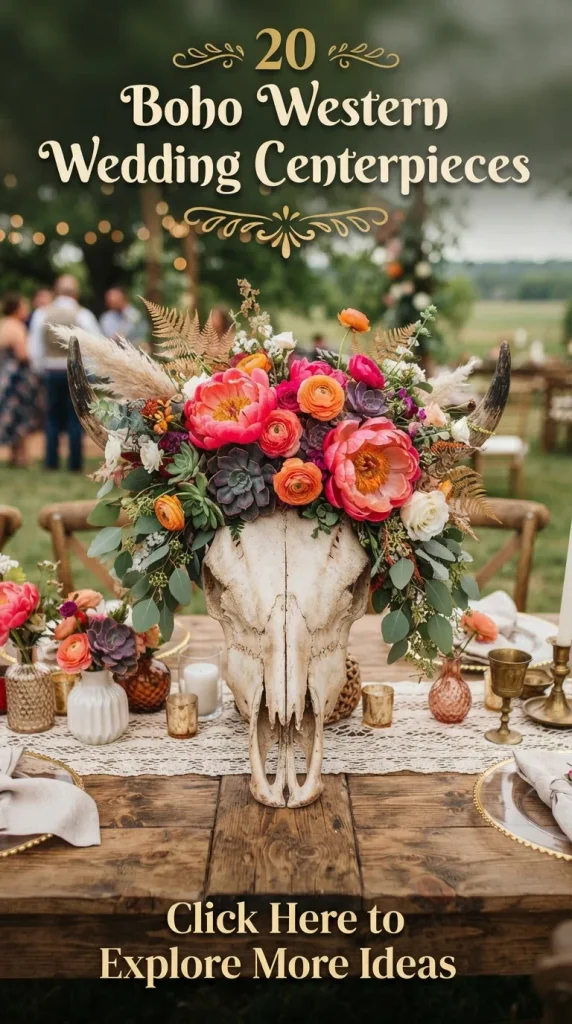
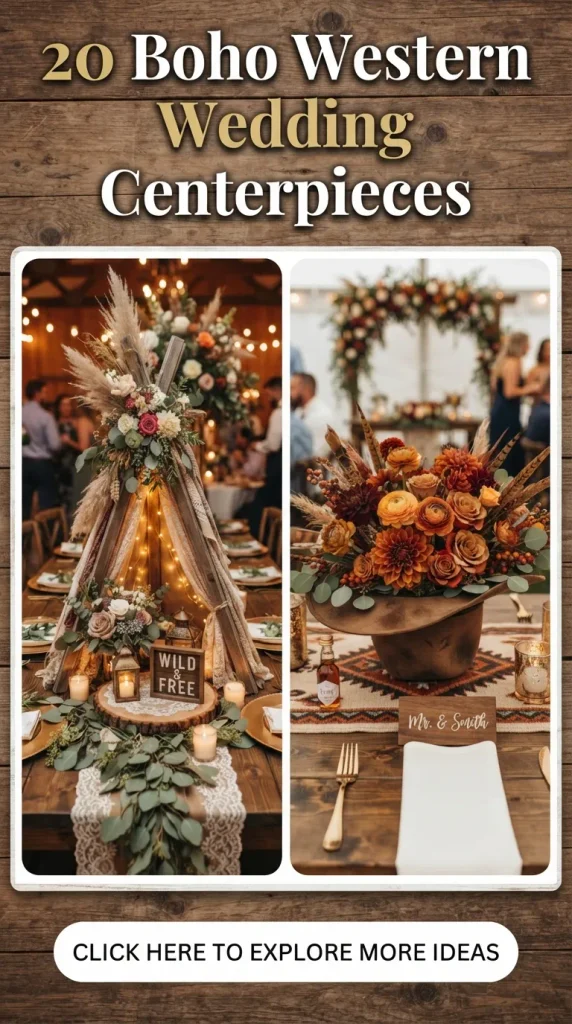
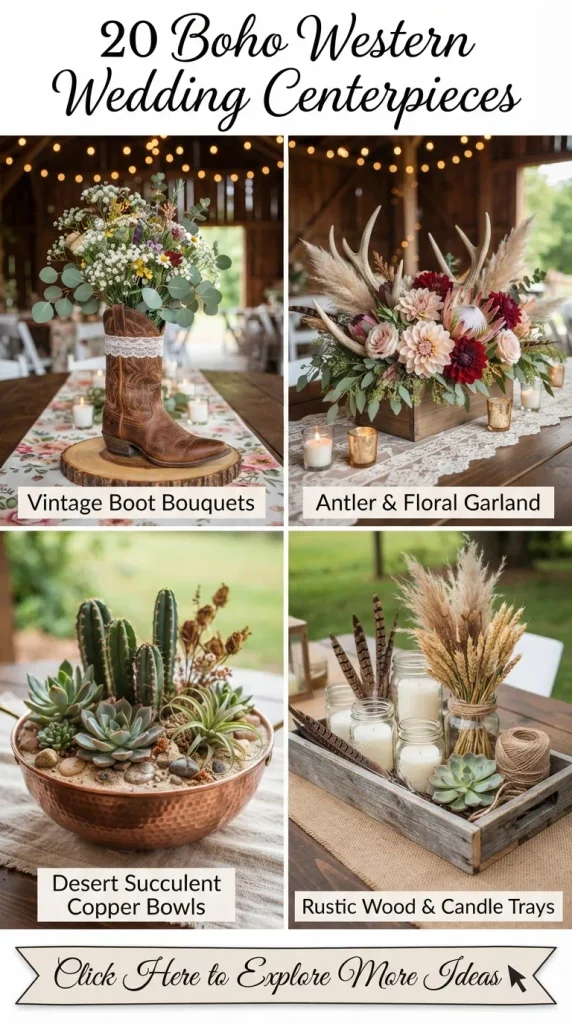
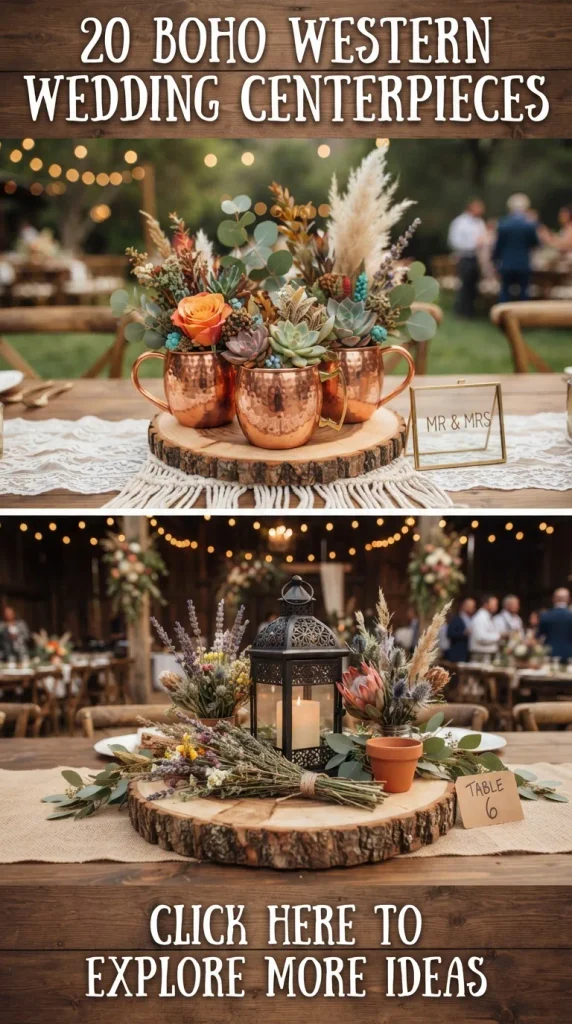
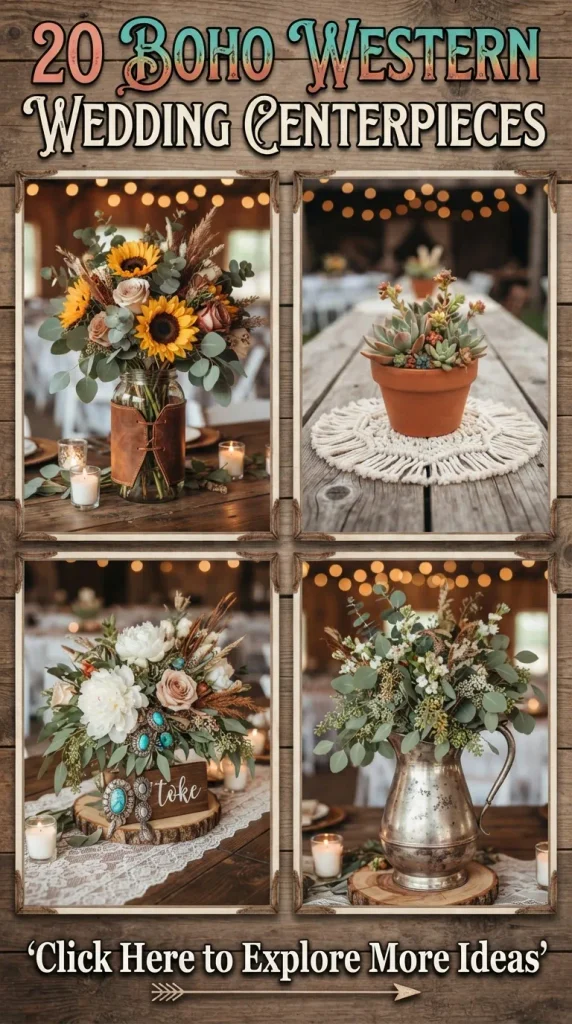
The rustic romance of the American frontier combined with the effortless, free-spirited soul of bohemian design creates one of the most captivating celebration aesthetics of the modern era. Picture weathered reclaimed wood meeting delicate macramé, sun-bleached pampas grass intertwined with vibrant desert blooms, and flickering candlelight casting long, amber shadows across tables set for an unforgettable gathering. A boho western wedding is not merely an event; it is an atmosphere—an immersive experience rooted in earthy textures, artisanal details, and organic beauty. At the heart of this aesthetic lie the reception tables, anchored by centerpieces that command attention while inviting intimate conversation.
Designing centerpieces for this unique cross-section of styles requires a delicate balance. You must harmonize the rugged, masculine elements of the West—such as galvanized metal, leather accents, turquoise accents, and distressed wood—with the feminine, ethereal touches of bohemian flair, including cascading dried florals, crocheted lace runners, dangling crystals, and soft, cascading grasses. Whether you are planning an intimate desert elopement under the stars, a vibrant ranch celebration in the sprawling countryside, or a chic barn reception adorned with thousands of fairy lights, the right tablescape transforms the entire environment.
Creating these showstopping installations doesn’t require an unlimited budget or a professional design team; it requires vision, a collection of curated materials, and a willingness to embrace handcrafted imperfection. Every centerpiece featured in this guide bridges the gap between rugged terrain and bohemian grace. For each design, you will discover the core aesthetic vision, a complete supply list, a step-by-step assembly tutorial, insider designer tips to elevate the look, and creative variations to match your exact color palette and venue scale.
1. The Desert Sunset Antler and Pampas Cloud
The marriage of bleached antlers and oversized pampas plumes embodies the ultimate bohemian western fusion. This dramatic centerpiece draws the eye upward, making it ideal for high-ceiling barns or open-air pavilion tents where height adds grandeur without obstructing guests’ line of sight across the table.
Materials Needed
- 1 large naturally shed elk or deer antler
- 5-7 stems of extra-large fluffy pampas grass
- 3-4 stems of bleached Italian ruscus
- 8-10 stems of terracotta-toned craspedia (billy balls)
- 3 amber glass apothecary jars in varying heights
- Pillar candles in ivory and burnt orange
- Floral foam bricks and waterproof floral tape
- Heavy-duty zip ties and wire cutters
Step-by-Step Assembly Instructions
- Anchor your floral foam securely inside a low, shallow galvanized metal tray or heavy terracotta saucer using waterproof floral tape to prevent shifting.
- Position the large shed antler horizontally across the center of the tray, allowing the tines to frame the sides naturally. Secure the base of the antler to the foam or tray using heavy-duty zip ties if stability is required.
- Insert your tallest pampas grass stems toward the center and back of the arrangement, creating a sweeping vertical and horizontal spread that mimics the wild expanse of the desert.
- Layer in the bleached Italian ruscus to create structural depth, weaving the foliage through the lower tines of the antler.
- Pop in the terracotta craspedia stems, distributing the round, textured balls evenly to inject a vibrant pop of earthy color against the neutral background.
- Surround the central base with your amber apothecary jars and pillar candles, ensuring the flame heights vary to create a warm, layered glow.
Tips and Variations
- Tip: Lightly mist your pampas grass with high-hold hairspray before assembling to prevent shedding throughout the evening.
- Variation: Replace terracotta craspedia with deep burgundy scabiosa pods and rich mauve roses for a moody autumn evening celebration.

2. The Hand-Carved Wooden Dough Bowl Meadow
Long, narrow wooden dough bowls are a staple of rustic interior decor that translate seamlessly into breathtaking wedding tablescapes. Filled with a dense, wild meadow arrangement that appears as though it was just foraged from a wildflower field, this centerpiece brings organic life directly to the center of rectangular farm tables.
Materials Needed
- 1 vintage carved wooden dough bowl (approx. 30 inches long)
- Waterproof plastic liner cut to fit inside the bowl
- Wet floral foam bricks soaked in water
- 15 stems of cream-colored garden roses
- 10 stems of white delphinium for height
- 2 bunches of seeded eucalyptus
- 6 stems of pink astilbe for delicate texture
- A mix of small glass votive candles with tealights
Step-by-Step Assembly Instructions
- Place the waterproof plastic liner snugly inside the wooden dough bowl to protect the vintage wood from moisture damage.
- Soak your floral foam bricks completely and pack them tightly inside the lined dough bowl, ensuring the foam sits just below the rim of the wood.
- Establish your height boundaries by placing the tall white delphinium stems at staggered intervals along the center line of the bowl.
- Insert your garden roses next, clustering them in odd numbers (groups of three work best) to create focal points of lush texture.
- Fill the gaps between the focal blooms with seeded eucalyptus, letting the trailing vines spill over the wooden edges of the bowl toward the table surface.
- Tuck delicate pink astilbe stems into the arrangement to introduce a soft, feather-like contrast against the structured roses.
- Scatter small glass votive candles down both sides of the dough bowl on the bare wood of the table to complete the warm ambiance.
Tips and Variations
- Tip: Soak your eucalyptus in warm water for an hour prior to arranging to keep the foliage hydrated and crisp throughout a long reception.
- Variation: Substitute garden roses with wildflowers like yellow yarrow, blue cornflowers, and chamomile daisies for an authentic, bohemian meadow-to-table feel.

3. The Macramé Tied Mason Jar Cluster
Macramé is a hallmark of boho design, offering intricate knotwork texture that softens hard surfaces. Grouping mason jars wrapped in handmade macramé holders creates an approachable, DIY-friendly centerpiece that celebrates artisanal craftsmanship.
Materials Needed
- 6 standard mason jars (pint and quart sizes)
- 1 spool of 3mm natural cotton macramé cord
- Assorted dried wheat stalks, bunny tails (lagurus), and lavender
- Twine and vintage brass scissors
- A round slice of natural tree birch wood (approx. 14 inches diameter)
- 6 unscented white taper candles in brass holders
Step-by-Step Assembly Instructions
- Create or purchase simple macramé plant hangers or sleeves sized specifically to fit your collection of mason jars, using square knots and alternating hitch patterns.
- Slip the macramé sleeves securely over each mason jar, ensuring the knots sit evenly around the glass circumference.
- Place your large birch wood slice dead center on the reception table as a natural foundation base.
- Group the macramé-wrapped jars tightly on top of the wood slice, varying heights by placing some jars on inverted wooden blocks hidden beneath.
- Fill individual jars with distinct botanical elements—one jar entirely with dried wheat, another with fluffy white bunny tails, and a third with fragrant dried lavender.
- Intersperse your brass taper candle holders around the perimeter of the birch slice to add vertical contrast and romantic lighting.
Tips and Variations
- Tip: Dip the bottom edges of the cotton macramé cord in a watered-down terracotta dye bath beforehand for an ombre dip-dyed effect that matches your wedding palette.
- Variation: Use colored vintage amber or blue mason jars instead of clear glass to catch and refract the candlelight differently.

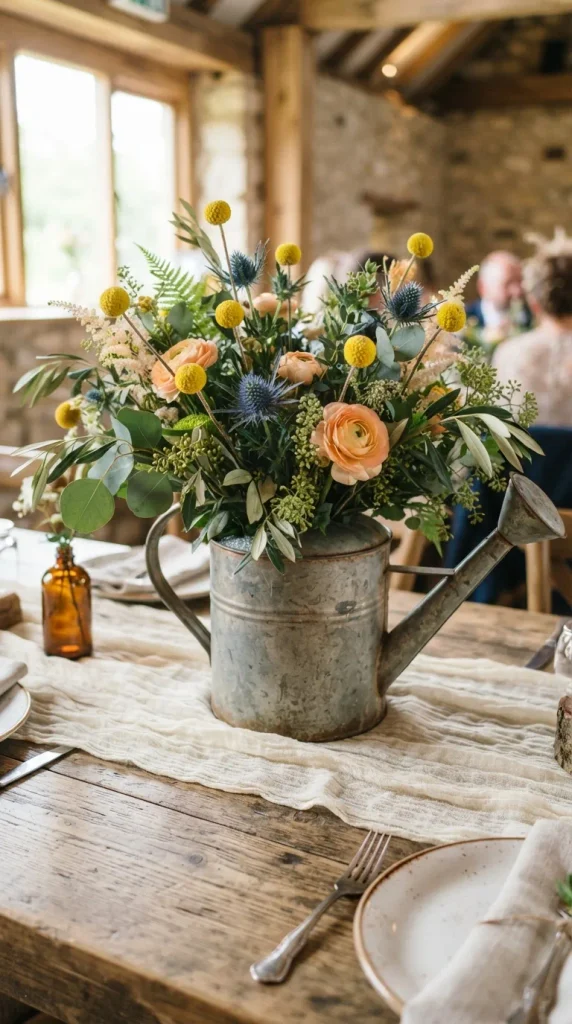
4. The Galvanized Watering Can Wildflower Cascade
Leaning heavily into authentic western heritage, vintage galvanized watering cans make wonderfully unexpected vessels for sprawling floral installations. The contrast between industrial metal and delicate, wind-swept petals captures the adventurous spirit of the frontier.
Materials Needed
- 1 vintage galvanized metal watering can with a long spout
- Chicken wire or floral frog pin holders
- 12 stems of yellow craspedia
- 10 stems of blue thistle (eryngium)
- 2 bunches of fresh wheatgrass or maiden grass
- 8 stems of peach ranunculus
- Jute twine wrapped around the watering can handle
Step-by-Step Assembly Instructions
- Clean the vintage watering can thoroughly and place a crumpled ball of chicken wire inside the top opening to act as a mechanics grid for your stems.
- Wrap a length of rustic jute twine tightly around the metal handle, securing the ends with a dab of hot glue hidden underneath.
- Build the foundational structure by inserting tall stalks of maiden grass into the back of the watering can opening, allowing them to fan out dramatically.
- Add the blue thistle and yellow craspedia stems, creating a playful contrast of electric blue and sunny gold against the metallic grey of the can.
- Nestle the peach ranunculus blooms closer to the rim of the watering can, letting a few shorter stems tumble gracefully out of the side spout as if water were pouring forth.
- Wipe down any moisture on the outside of the metal can and set it atop a folded gauze cheesecloth runner.
Tips and Variations
- Tip: Ensure the watering can is watertight before assembling, or place a hidden plastic cup inside the main cavity to hold your water and floral foam.
- Variation: Paint the watering can in a matte pastel sage or dusty rose hue for a softer, modernized take on western rustic styling.
5. The Turquoise and Succulent Terrarium Ring
Turquoise is the jewel of the American West, symbolizing protection and good fortune. Combining geometric glass terrariums with succulent rosettes and turquoise-hued stones introduces a sleek, modern bohemian edge to your tablescape.
Materials Needed
- 1 large geometric brass-edged glass terrarium (house or prism shape)
- Assorted live potted succulents (Echeveria, Haworthia, Sedum)
- Polished turquoise chips and river rocks for drainage
- Air plants (Tillandsia) of various sizes
- 3 slim brass pillar candle stands with white candles
- Fine-grit potting soil and a small gardening scoop
Step-by-Step Assembly Instructions
- Line the bottom of the glass terrarium with a one-inch layer of river rocks to ensure proper drainage for the live succulents.
- Add a layer of fine-grit potting soil directly over the rocks.
- Carefully de-pot your live succulent rosettes and arrange them inside the terrarium, creating a miniature desert garden landscape.
- Top the soil surface around the plants with a generous layer of polished turquoise chips, letting the bright blue stones contrast richly with the green and purple succulent leaves.
- Nestle sculptural air plants among the glass panels and on top of the rocks for an ethereal, floating feel.
- Position your brass pillar candle stands immediately adjacent to the terrarium to illuminate the faceted glass at night.
Tips and Variations
- Tip: Mist the air plants and succulents lightly with water two days before the wedding so they look plump and vibrant without dripping inside the glass.
- Variation: Use copper-edged terrariums paired with malachite stones instead of turquoise for an emerald-toned forest-meets-desert aesthetic.

6. The Horn-Embellished Leather Wrapped Cylinder
For couples seeking an upscale, sophisticated western aesthetic, leather and polished horn details offer refined masculinity. This centerpiece relies on clean lines, luxurious textures, and a monochromatic neutral color palette.
Materials Needed
- 3 cylindrical glass vases of varying heights (e.g., 6, 8, and 10 inches)
- 2 yards of genuine brown leather strap or faux leather banding
- Hot glue gun and heavy-duty fabric scissors
- 2 small polished cow horn accents or decorative brass western conchos
- 15 stems of white stock flowers
- 10 stems of bleached pampas grass plumes
- White floating candles for the glass cylinders
Step-by-Step Assembly Instructions
- Wrap the genuine brown leather strap snugly around the lower third of each glass cylinder, securing the ends neatly with a thin line of hot glue.
- Affix a decorative brass western concho or a miniature polished horn element to the front center of the leather band on each vase for an authentic branded look.
- Fill the glass cylinders three-quarters full with clean water.
- Trim your white stock flower stems to varying heights and arrange them inside the cylinders, ensuring the blooms sit proudly above the rim.
- Slip a few wispy stems of bleached pampas grass behind the stock flowers to add feathery height and movement.
- Float a pristine white candle on the surface of the water in the shortest cylinder to cast a gorgeous glow through the glass and leather.
Tips and Variations
- Tip: Use leather conditioner on your straps the day before assembly to give them a rich, supple sheen that catches the venue lighting.
- Variation: Substitute brown leather for embossed turquoise or saddle tan leather to match specific bridal party accessories.


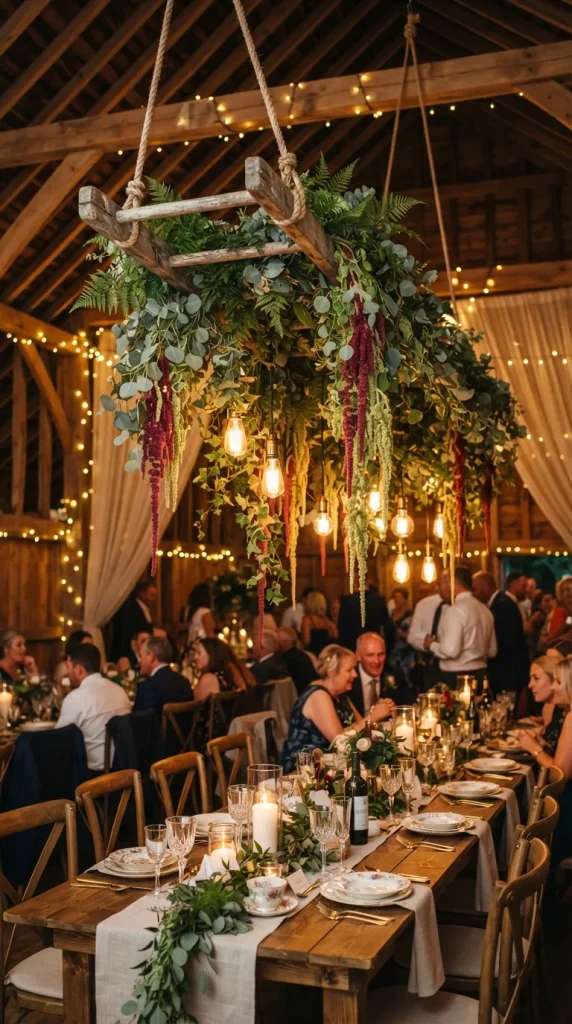

7. The Hanging Botanical Wooden Ladder Installation
Elevated centerpieces free up valuable table space for food platters, glassware, and conversation. Suspending a weathered wooden ladder from ceiling beams or a sturdy branch above the table creates an immersive canopy of bohemian greenery.
Materials Needed
- 1 vintage wooden orchard ladder (approx. 4 to 5 feet long)
- 4 heavy-duty ceiling hooks and sturdy industrial rope or chains
- 15-20 stems of trailing leatherleaf fern and English ivy
- 10 stems of hanging amaranthus (burgundy or green)
- 8 Edison bulb pendant lights wired safely along the ladder rungs
- Floral zip ties and green floral wire
Step-by-Step Assembly Instructions
- Securely anchor your ceiling hooks into structural beams above the designated reception table, ensuring the weight capacity is fully tested and safe.
- Tie industrial rope or chains to both ends of the vintage wooden ladder and hoist it to your desired hanging height over the table center.
- Weave strings of Edison bulb pendant lights loosely along the rungs of the ladder, plugging them into a discreet ceiling or floor power source.
- Attach lush trailing ferns to the top rungs of the ladder using green floral wire, letting the fronds cascade downward toward the table below.
- Insert dramatic strands of hanging amaranthus so their velvet tassels sway gracefully at varying lengths above where guests will sit.
- Step back to check the balance of the ladder, adjusting the hanging ropes until the entire installation hangs level and secure.
Tips and Variations
- Tip: Keep the ladder high enough so that tall guests standing up do not brush against the trailing greens or light fixtures.
- Variation: Weave dried orange slices and cinnamon bundles into the greenery for a warm autumn wedding with an incredible natural scent.
8. The Vintage Galvanized Tub with Succulents and Cacti
When you want a centerpiece with serious presence that demands admiration, a large galvanized wash tub filled with an eclectic desert garden creates an unforgettable statement piece for round banquet tables.
Materials Needed
- 1 wide, shallow galvanized metal wash tub (approx. 18-20 inches diameter)
- Expanded clay pebbles for bottom drainage layer
- Cactus and succulent potting mix
- 3 medium potted prickly pear cactus pads (rooted)
- 5 assorted rosette succulents and jade plants
- White decorative river gravel for top dressing
- 4 pillar candles enclosed in hurricane glass chimneys
Step-by-Step Assembly Instructions
- Fill the bottom of the galvanized wash tub with a 2-inch layer of expanded clay pebbles to ensure optimal root health for the desert plants.
- Pour in your specialized cactus and succulent potting mix until the tub is three-quarters full.
- Wearing heavy-duty leather gardening gloves, carefully plant your rooted prickly pear cacti toward the center of the tub to establish height.
- Surround the cacti with your assorted rosette succulents and jade plants, packing them tightly for a lush, overgrown desert garden look.
- Cover all exposed soil completely with a clean layer of white decorative river gravel to create a striking color contrast against the dark green plants and grey metal tub.
- Arrange your four hurricane-enclosed pillar candles in a square formation around the base of the tub on the table.
Tips and Variations
- Tip: Handle cacti using kitchen tongs wrapped in thick cloth to avoid painful spines during the arrangement process.
- Variation: Include blooming desert cacti that feature bright pink or yellow flowers for a splash of seasonal color.
9. The Raw Edge Tree Slice with Dried Floral Cone
Embracing raw, earthy textures is central to rustic boho decor. This minimalist yet striking centerpiece uses a thick slice of tree timber as a base for a suspended or standing cone arrangement made from dried natural elements.
Materials Needed
- 1 thick circular slice of pine or cedar wood with bark intact (approx. 16 inches diameter)
- 1 woven wicker or rattan wall hanging cone pocket
- 10 stems of dried natural lavender and wheat
- 5 stems of preserved bleached palm spears
- 3 brass cylinder vases with dried billy balls
- 1 large chunky pillar candle in a glass hurricane
Step-by-Step Assembly Instructions
- Treat your raw wood tree slice with a clear matte wood sealer to prevent sap transfer or moisture staining on your table linens.
- Mount your woven wicker cone pocket securely to a small invisible wooden stand or lay it angled flat against the center of the tree slice.
- Pack the interior of the cone pocket with dried lavender, wheat stalks, and dramatic bleached palm spears fanning outward like sun rays.
- Place your glass hurricane candle in the open space on the tree slice opposite the floral cone.
- Add three slender brass cylinder vases filled with yellow billy balls to balance the composition on the wood slice.
Tips and Variations
- Tip: Brand or wood-burn your wedding initials and date into the surface of the tree slice for a personalized keepsake you can display in your home after the wedding.
- Variation: Replace palm spears with dried lunaria (honesty plant) coins for a shimmering, translucent mother-of-pearl effect under candlelight.
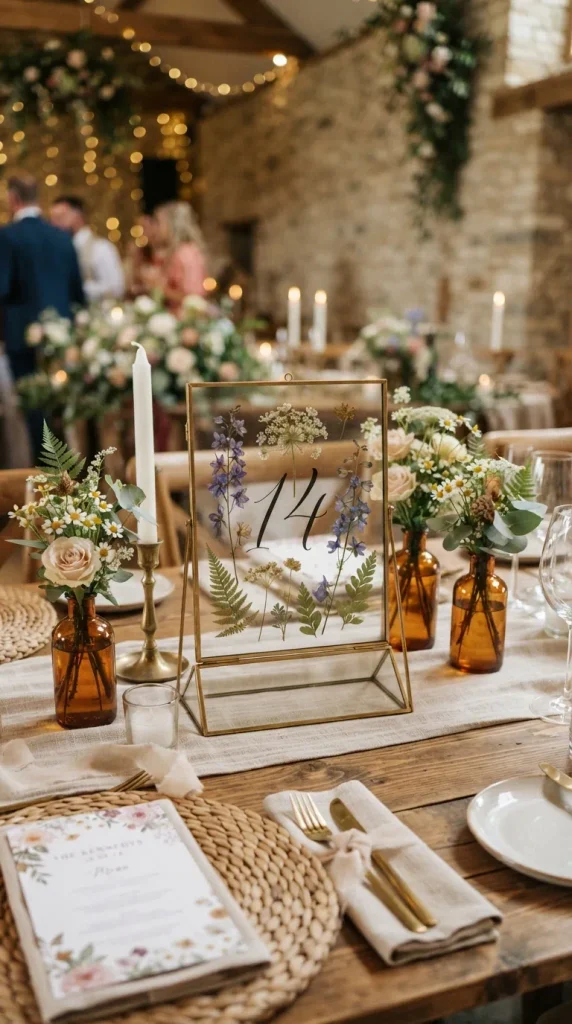
10. The Pressed Botanical Brass Frame Table Number Stand
Merging stationery and botanical art, pressed flower glass frames serve as dual-purpose centerpieces that display table numbers while introducing a delicate, romantic bohemian touch.
Materials Needed
- 2 large double-glass floating brass frames (5×7 or 8×10 inches)
- Assorted pressed wildflowers, ferns, and lace-like cow parsley
- Calligraphed table number printed or written on translucent vellum paper
- Tweezers and archival clear glue dots
- 1 heavy brass geometric prism stand to support the frame securely
- 2 small amber glass bud vases with single stems per table
Step-by-Step Assembly Instructions
- Open your double-glass brass floating frames carefully and lay the glass panels flat on a clean surface.
- Use precision tweezers to arrange your pressed wildflowers and delicate ferns artistically across the glass pane.
- Place your calligraphed vellum table number directly over or nestled within the pressed botanical design.
- Press the second glass pane down gently to sandwich the flowers and vellum in place, then secure the frame latch.
- Insert the completed frame firmly into its heavy brass geometric prism stand.
- Flank the table number stand with two small amber glass bud vases containing single stems of rust-colored scabiosa.
Tips and Variations
- Tip: Collect flowers from your own garden or local area months in advance and press them heavily inside thick books so they carry sentimental value on your wedding day.
- Variation: Use black metal frames instead of brass for a sleek industrial boho contrast.
11. The Tiered Vintage Silver Tray with Succulents and Candles
Mixing vintage heirloom silver with rugged western elements creates a high-low juxtaposition that feels both eclectic and deeply romantic. A tiered silver pastry or tea tray repurposed as a floral stand offers incredible dimension.
Materials Needed
- 1 vintage 3-tier silver-plated afternoon tea tray stand
- 6-8 small potted succulent rosettes in terracotta or white ceramic pots
- 10 assorted tea light candles in silver holders
- Fresh sprigs of rosemary and olive branches
- Small vintage silver creamers and sugar bowls filled with wildflowers
Step-by-Step Assembly Instructions
- Polish your vintage silver tiered stand to a brilliant shine, or leave it with a natural tarnish for an authentic antique patina.
- Place your small potted succulent plants on the widest bottom tier, spacing them out evenly.
- Fill the middle tier with vintage silver creamers and sugar bowls packed with short stems of fresh rosemary and delicate wildflowers.
- Reserve the top tier for a collection of glowing tea light candles in silver votive holders.
- Weave fresh olive branches and aromatic rosemary sprigs around the central stem connecting the tiers so they spill outward onto the plates.
Tips and Variations
- Tip: Line the tiers with lace doilies before placing your pots and candles to enhance the vintage bohemian aesthetic.
- Variation: Use tarnished copper trays instead of silver for a warmer, sunset-inspired metallic palette.
12. The Woven Rattan Basket Burst with Desert Grasses
Woven textures are foundational to bohemian interior design. Utilizing a shallow, wide rattan market basket as a centerpiece container creates a grounded, earthy display bursting with untamed prairie grasses.
Materials Needed
- 1 wide, shallow woven rattan market basket or shallow bowl
- Plastic saucer liner to fit inside the basket
- Wet floral foam blocks
- 12 stems of feather reed grass
- 8 stems of bleached pampas plumes
- 6 stems of dried rust-colored protea flowers
- 4 pillar candles in glass cylinder hurricanes
Step-by-Step Assembly Instructions
- Place your plastic saucer liner securely inside the bottom of the woven rattan basket to catch any water runoff from the floral foam.
- Soak your floral foam blocks and wedge them tightly inside the plastic saucer lining.
- Create the anchor structure by inserting feather reed grass at sharp, outward-pointing angles to mimic the windswept plains of the western frontier.
- Insert your bleached pampas plumes closer to the center to add thick, volumetric softness.
- Push your dramatic rust-colored protea flowers into the heart of the basket arrangement as striking focal points.
- Position your four glass hurricane pillar candles in a square ring surrounding the basket on the table linen.
Tips and Variations
- Tip: Spray the woven rattan basket with a light coat of clear acrylic sealer to protect the natural fibers from damp venue conditions.
- Variation: Use seagrass baskets with black geometric woven patterns for a modern nomadic western look.
13. The Cowboy Boot Floral Vase Pair
A playful yet stylish nod to western tradition, well-worn leather cowboy boots repurposed as floral vases bring instant personality and charm to guest reception tables.
Materials Needed
- 2 well-worn leather cowboy boots (cleaned and conditioned)
- 2 heavy-duty plastic waterproof liners (cut-down water bottles work perfectly)
- Gravel or small stones for weighting the boots
- 10 stems of sunflowers or yellow yarrow
- 8 stems of blue delphinium
- 4 stems of seeded eucalyptus
Step-by-Step Assembly Instructions
- Drop a cup of heavy stones or gravel into the toe and heel cavity of each cowboy boot to ensure they cannot easily be knocked over by guests.
- Slide your cut-down plastic water bottle liners filled with fresh water into the shaft of each boot.
- Build a vibrant, cheerful arrangement inside the boot shafts using sunflowers as your primary focal bloom.
- Add striking blue delphinium stems to provide height and a classic western color contrast of yellow and blue.
- Tuck in sprigs of seeded eucalyptus around the collar of the boot opening to soften the hard leather edge.
- Place the boot pair facing slightly outward from one another in the center of the table.
Tips and Variations
- Tip: Condition the leather of the boots with saddle soap a week before the wedding to give them a healthy, rich luster without a greasy residue.
- Variation: Use white vintage roper boots filled with all-white baby’s breath and pastel roses for an elegant, bohemian bride-inspired twist.
14. The Hanging Macramé Terrarium Orb
Suspending glass terrarium globes filled with tillandsia air plants, moss, and tiny fairy lights creates a floating starry night effect over long banquet tables.
Materials Needed
- 3 glass geometric hanging terrarium orbs in varying sizes
- 3 intricate macramé hanger cords
- Preserved green reindeer moss
- Assorted air plants (Tillandsia ionantha)
- Micro fairy light wire strings operated by battery packs hidden inside the top of the macramé knot
Step-by-Step Assembly Instructions
- Thread your micro fairy light battery packs securely into the top knots of the macramé hangers where they remain hidden from view.
- Weave the delicate fairy light wire down through the macramé cords and coil it gently inside the open glass terrarium orbs.
- Line the bottom of each glass orb with a cushion of preserved green reindeer moss.
- Nestle your air plants snugly into the moss beds so they rest securely inside the glass.
- Hang the completed terrarium orbs from an overhead branch, pergola, or wire tension line centered above the guest table.
Tips and Variations
- Tip: Use warm white fairy lights rather than cool blue LEDs to maintain an inviting, amber glow.
- Variation: Add small crystals like clear quartz or amethyst points inside the terrariums to catch and refract the fairy light illumination.




15. The Terracotta Pot Cluster with Succulents and Cacti
Terracotta is timeless, earthy, and budget-friendly. Grouping unglazed terracotta pots of varying heights and diameters creates an architectural centerpiece that feels right at home in a desert canyon or rustic barn.
Materials Needed
- 7 unglazed terracotta pots in assorted heights and diameters (ranging from 3 to 8 inches)
- Premium cactus and succulent potting mix
- Assorted miniature cacti and trailing string-of-pearls plants
- White chalk marker for optional table numbers written on the pots
- 5 small tea light candles in terracotta saucers
Step-by-Step Assembly Instructions
- Fill each unglazed terracotta pot with your well-draining cactus and succulent potting mix.
- Plant a single variety in each pot—some featuring spiky geometric cacti, others featuring cascading string-of-pearls or plump rosettes.
- Use a white chalk marker to write table numbers gracefully onto the side of the largest terracotta pot in each grouping.
- Arrange the cluster of pots organically on the center of the table, grouping the tallest pots in the center and letting the trailing plants spill down from smaller elevated pots.
- Place small tea light candles in tiny terracotta saucers around the base of the plant cluster.
Tips and Variations
- Tip: Whitewash the upper half of the terracotta pots with diluted white acrylic paint for a distressed, bohemian Mediterranean-meets-western aesthetic.
- Variation: Stamp geometric southwestern patterns onto the clay pots using acrylic craft paint prior to planting.
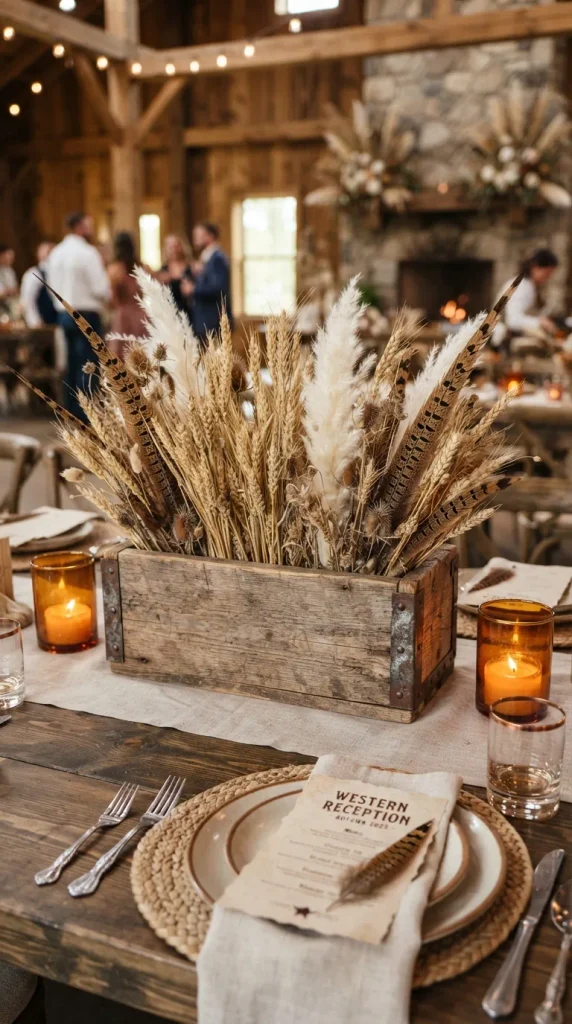
16. Raised Wooden Box with Pampas, Wheat, and Feathers
Low-profile wooden rectangular planter boxes allow guests across the table to converse effortlessly while enjoying a dense, tactile display of natural prairie elements.
Materials Needed
- 1 handmade rectangular weathered wood planter box (approx. 24 inches long)
- Dry floral foam brick inserted inside the box
- 20 stems of natural dried wheat
- 10 stems of fluffy white pampas grass
- 5 genuine ethically sourced natural pheasant or turkey feathers
- 6 glass votive candles with amber glass holders
Step-by-Step Assembly Instructions
- Insert your dry floral foam brick snugly inside the weathered wooden planter box.
- Create a uniform, dense base layer by inserting natural dried wheat stalks vertically across the length of the box.
- Layer in your fluffy white pampas grass plumes, keeping them slightly lower than the wheat to create textural depth.
- Carefully push your genuine pheasant or turkey feathers into the arrangement at dynamic angles, allowing their patterned plumage to catch the eye.
- Set your six amber glass votive candles in a neat line running parallel to the wooden planter box on the table surface.
Tips and Variations
- Tip: Spray the finished dried arrangement lightly with matte floral sealer to protect fragile elements from wind gusts if your reception is outdoors.
- Variation: Incorporate dried seed pods like lotus heads and poppy pods for an even more organic, foraging-inspired look.
17. The Vintage Lantern and Succulent Ring
Black metal or brass vintage lanterns evoke the romantic spirit of early western railway journeys. Surrounding a central lantern with a lush ring of succulents creates a classic centerpiece with immense warmth.
Materials Needed
- 1 large vintage-style black metal candle lantern with glass panes
- 1 large pillar candle inside the lantern
- A pre-made or assembled floral wreath ring made of faux or live succulents and eucalyptus (approx. 14 inches outer diameter)
- 4 small brass taper candle holders with ivory tapers
Step-by-Step Assembly Instructions
- Place your large vintage black metal lantern dead center on the table, securing the pillar candle inside its glass housing.
- Lay your succulent and eucalyptus wreath ring flat on the table, sliding it gently over the base of the lantern so the lantern sits in the eye of the wreath.
- Adjust the succulent rosettes and trailing eucalyptus leaves so they fan outward symmetrically around the metal base.
- Position your four brass taper candle holders evenly around the outer perimeter of the succulent wreath.
- Light all candles just before guests enter the reception space to create an unforgettable welcoming glow.
Tips and Variations
- Tip: Clean the glass panes of the lantern with glass cleaner right before guests arrive so the candle flame shines crystal clear.
- Variation: Use antique copper lanterns paired with vibrant red and orange desert blooms for a sunset color palette.
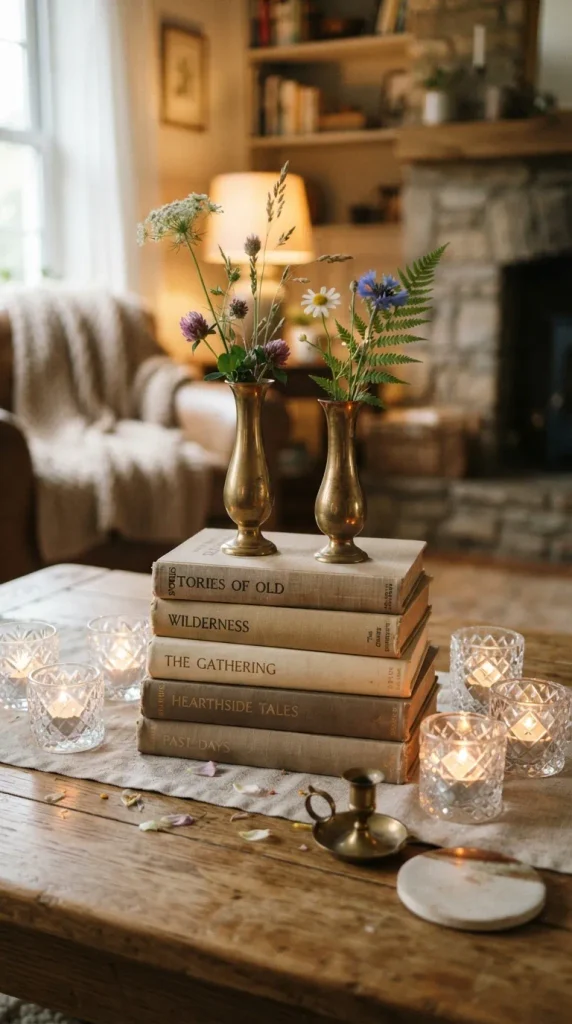
18. The Stacked Vintage Books with Brass Bud Vases
For literature lovers and bohemian romantics, stacking vintage novels with distressed cloth covers provides a unique pedestal for delicate brass bud vases and wild stems.
Materials Needed
- 3-4 vintage hardback books with neutral, earth-toned, or distressed cloth covers
- 3 slender polished brass bud vases of varying heights
- 9 single-stem botanicals (e.g., scabiosa, white ranunculus, and panicum grass)
- 1 small brass bowl filled with dried potpourri or polished stones
- 4 tea light candles in vintage crystal holders
Step-by-Step Assembly Instructions
- Stack your vintage books in a neat pile on the center of the table, placing the largest book on the bottom and the smallest on top.
- Place your three brass bud vases on top of the uppermost book, varying their heights.
- Fill each bud vase with 2-3 single-stem botanicals, keeping the arrangement loose, airy, and asymmetrical.
- Set the small brass bowl filled with polished stones or potpourri beside the book stack.
- Surround the entire book and vase display with sparkling crystal tea light holders.
Tips and Variations
- Tip: Source vintage books from local thrift shops with covers in shades of beige, forest green, terracotta, and dusty blue to match your wedding palette.
- Variation: Tie the book stack together with a length of frayed raw-edge silk ribbon for a soft, romantic bohemian touch.
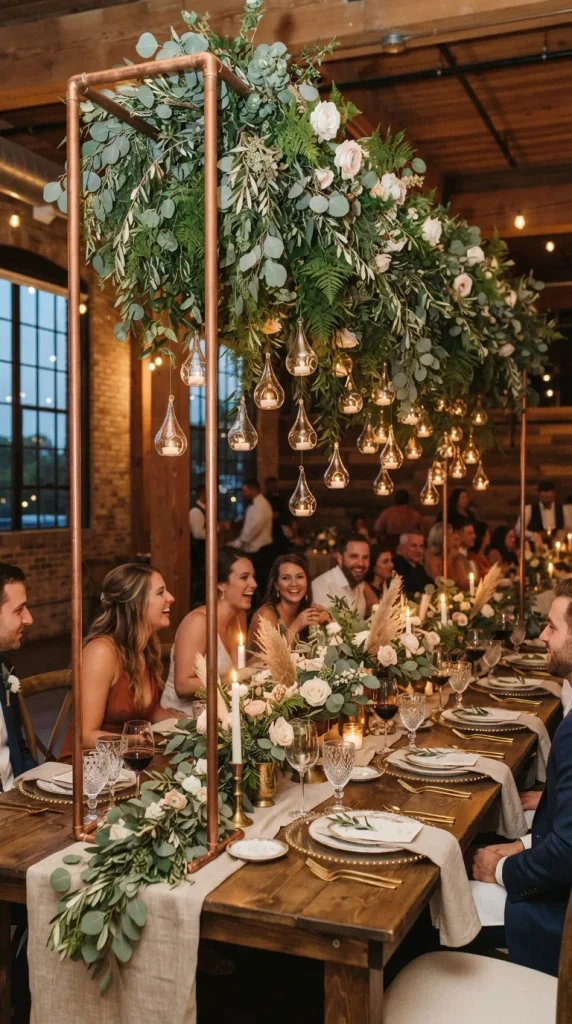
19. The Hanging Copper Pipe and Greenery Trailing Bar
Industrial copper plumbing pipes combined with lush botanical trailing greenery offer a sleek, modern bohemian statement piece for long king’s tables or head tables.
Materials Needed
- 1 custom-assembled copper pipe overhead framing structure (designed to clamp or rest on table ends)
- 30 feet of fresh seeded eucalyptus and leatherleaf fern garlands
- Fine copper wire for securing greenery to the pipe
- 4 glass terrarium teardrop candle holders suspended from the copper pipe with fishing line
- Tea light candles inside the hanging teardrops
Step-by-Step Assembly Instructions
- Assemble your custom copper pipe framing structure so it spans the entire length of the table and arches securely overhead.
- Wrap your fresh seeded eucalyptus and fern garlands tightly around the copper pipe framework, securing every few feet with fine copper wire.
- Hang your four glass teardrop candle holders from the copper pipe at staggered heights using invisible fishing line.
- Place lit tea light candles inside each glass teardrop holder.
- Check that the copper structure is completely stable and that all trailing greenery is safely clear of any open flames.
Tips and Variations
- Tip: Polish the copper pipes with lemon juice and salt the morning of the wedding to ensure a brilliant, warm metallic shine.
- Variation: Weave fairy light strings through the eucalyptus garland before wrapping it around the copper pipe for a magical evening glow.
20. The Antler and Crystal Geode Cluster Centerpiece
The ultimate statement in bohemian luxury, combining natural shed antlers with raw, sparkling crystal geodes creates an arrangement that feels magical, mystical, and deeply connected to nature.
Materials Needed
- 2 medium naturally shed deer antlers
- 3 raw crystal quartz or amethyst geode clusters (approx. 4-6 inches each)
- 1 long, narrow wooden table runner board
- 10 stems of dried bunny tails and scabiosa pods
- 5 glass pillar candle cylinders with white candles
- Scattered polished glass gems and fairy lights
Step-by-Step Assembly Instructions
- Lay your long wooden table runner board down the center of the reception table as a secure base.
- Position your two shed antlers end-to-end along the wooden board so their tines interlock naturally in the center.
- Nestle your sparkling raw crystal geode clusters between the antlers, allowing the crystalline points to catch the light.
- Tuck dried bunny tails and scabiosa pods into the crevices of the antlers for soft, organic texture.
- Place your five glass pillar candle cylinders along the wooden board between the antlers and crystals.
- Weave a delicate battery-operated copper fairy light string throughout the antlers and geodes to make the entire display sparkle.
Tips and Variations
- Tip: Glue small felt pads to the bottom of your heavy geode clusters to protect the wooden table surface from scratches.
- Variation: Use raw citrine clusters instead of quartz for a warm, golden-yellow energy that complements rustic desert color palettes.